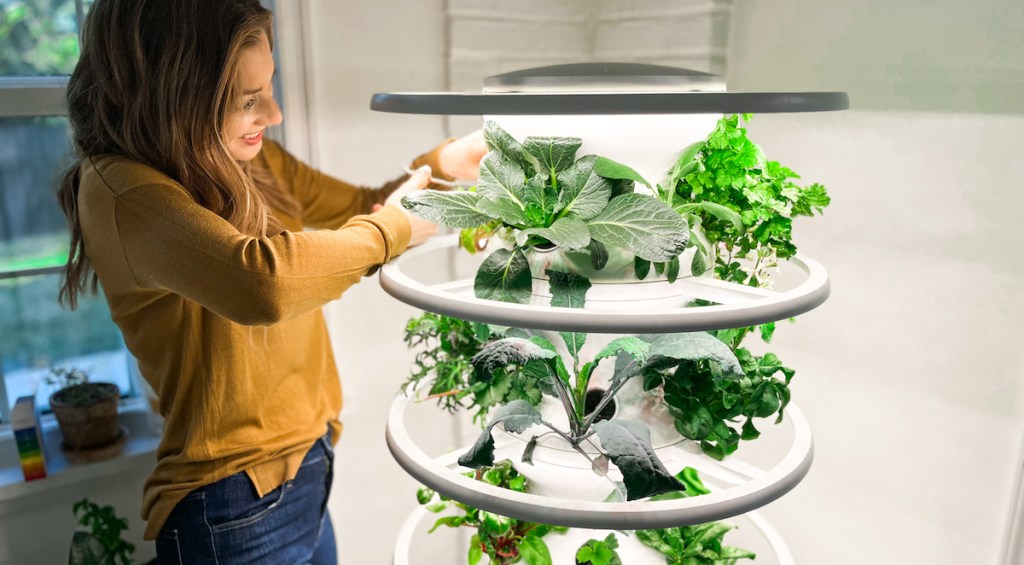
Find out more about the indoor/outdoor Lettuce Grow hydroponic garden.
Let’s grow together. 🌱
Our review will help you decide if the Lettuce Grow Farmstand hydroponic garden is right for you. Plus, we share insider tips for successful grows and tricks to save.
Even better, as a thank you for stopping by, you can score $50 OFF your Lettuce Grow Farmstand with our exclusive code! 🤩 Plus, it ships for FREE. 👏🏻
Get $50 OFF Lettuce Grow Farmstands – ALL sizes!
Discount will automatically apply when using our exclusive links, or enter promo code HIP2SAVE at checkout.

Lettuce Grow Farmstand starting at $399
Use promo code HIP2SAVE at checkout ($50 off)
Score FREE shipping on all orders
Final cost $349 shipped!
I’ve had my eye on a hydroponic garden for quite some time so I was thrilled to test the Lettuce Grow Farmstand! I’ll be honest, I was intimidated by this system as I’m a gardening novice.
However, I’m into my second month of successfully growing and can confidently say you don’t need to be an expert to be successful with this revolutionary product…and the results will blow your mind! 🤩
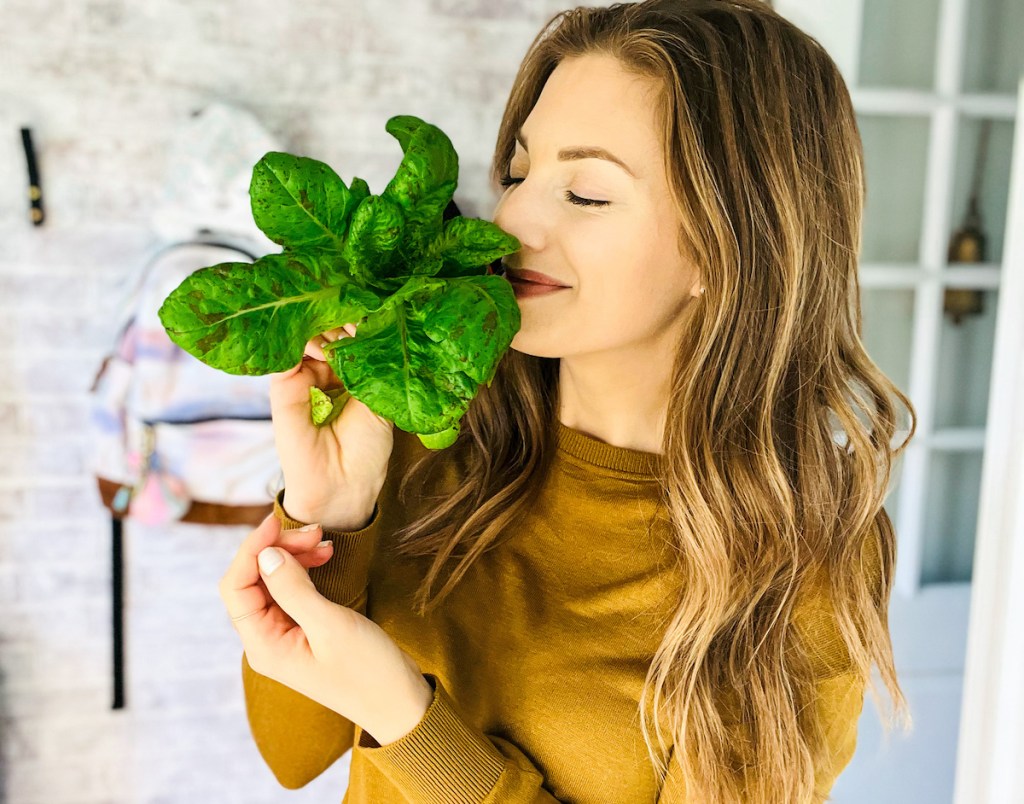
That said, you really do need to love plants and appreciate growing your own organic foods at home to appreciate this system. But chances are you do, and that’s why you’re here so welcome to the plant party! 🌱
On another note, I fully realize what an investment this hydroponic garden is which is likely another reason you’re looking to further educate yourself on this system. I have learned SO much since starting my journey with Lettuce Grow so I’m excited to share everything I know including insider tips and tricks to save and successfully grow for many years to come. Plus, I want you to score $50 off if you’re ready for this lifestyle! 🤩
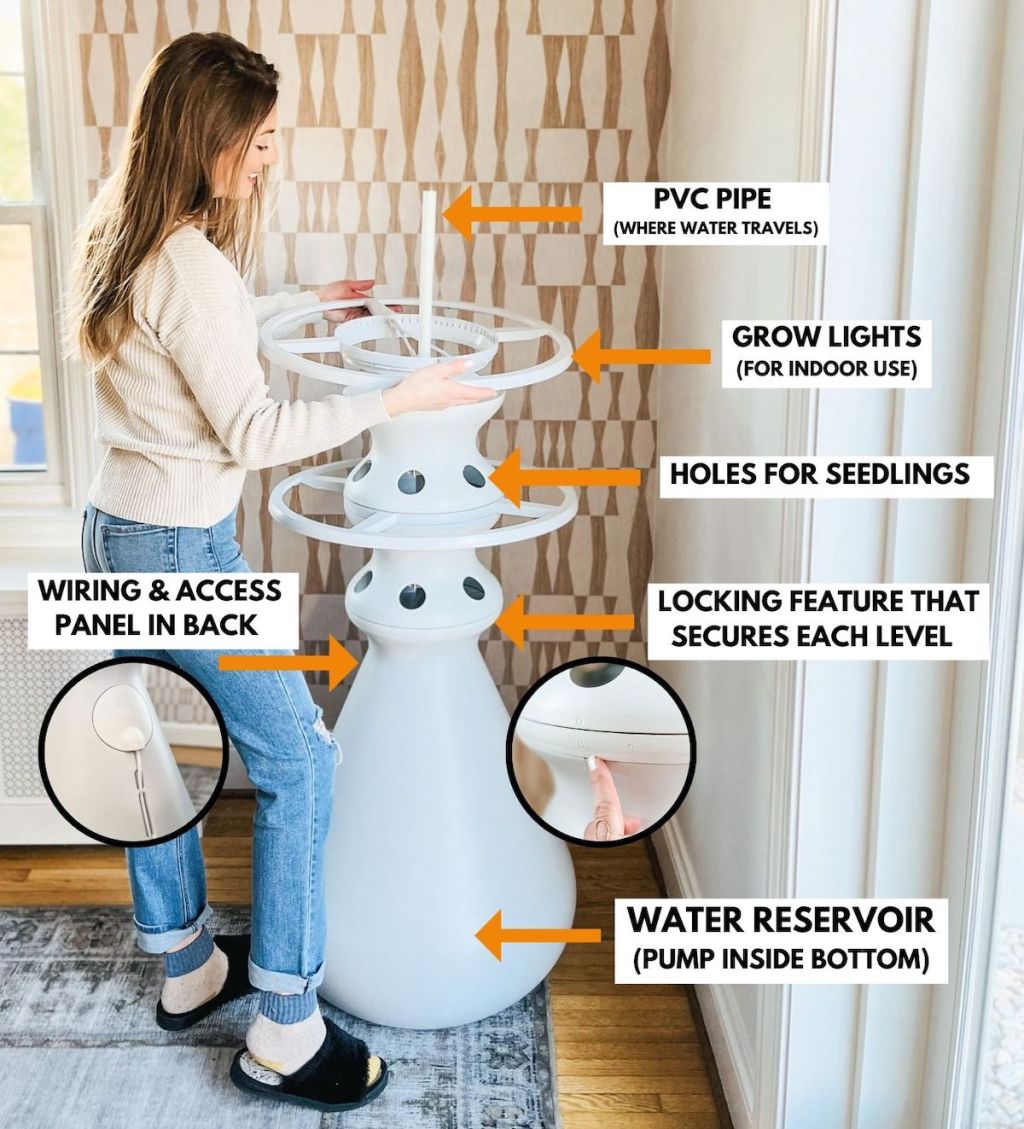
Let’s start with the setup of your Lettuce Grow Farmstand, which requires no tools and is incredibly easy with their step-by-step directions.
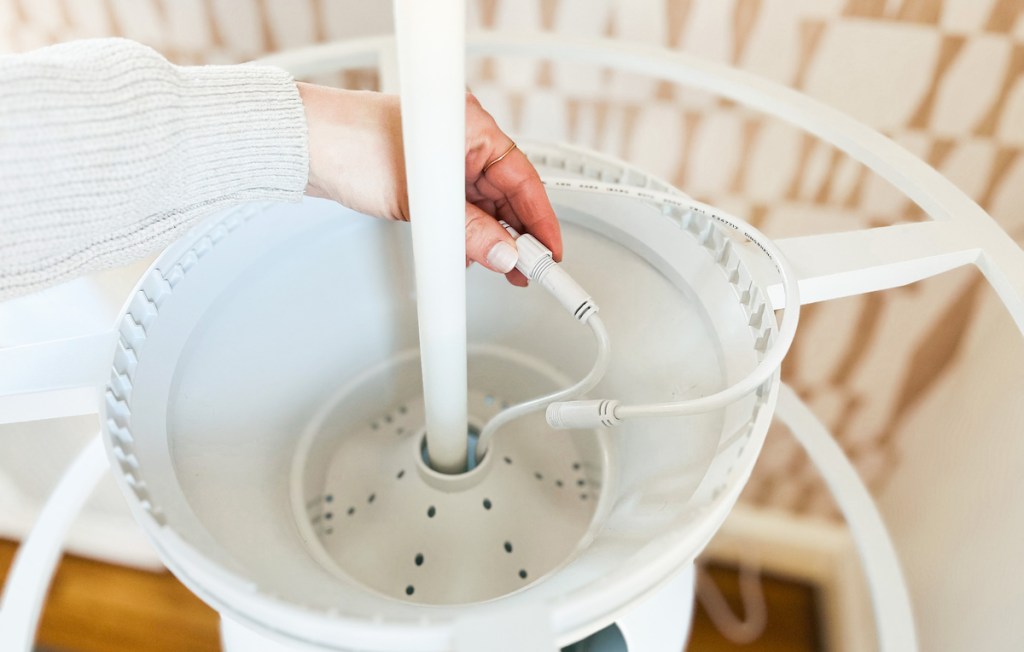
I don’t consider myself handy, so thankfully the directions for this system are so digestible and easy to follow. Truly, anyone can build this themselves and your order will come with everything you need to start growing!
The beauty of this system is that it can be used indoors with their Grow Rings or outdoors with no lights at all. 🙌🏼
As with the Farmstand, the Glow Rings are simple to set up and connect to your system. (Don’t worry, they’re secure and safe to be around water!) If you have the proper growing conditions and want to grow outdoors, your system will be even easier to set up and less expensive since you won’t need to purchase the light.
However, I love the fact we can grow inside during winter when growing outdoors would be impossible.
How does this hydroponic garden work?
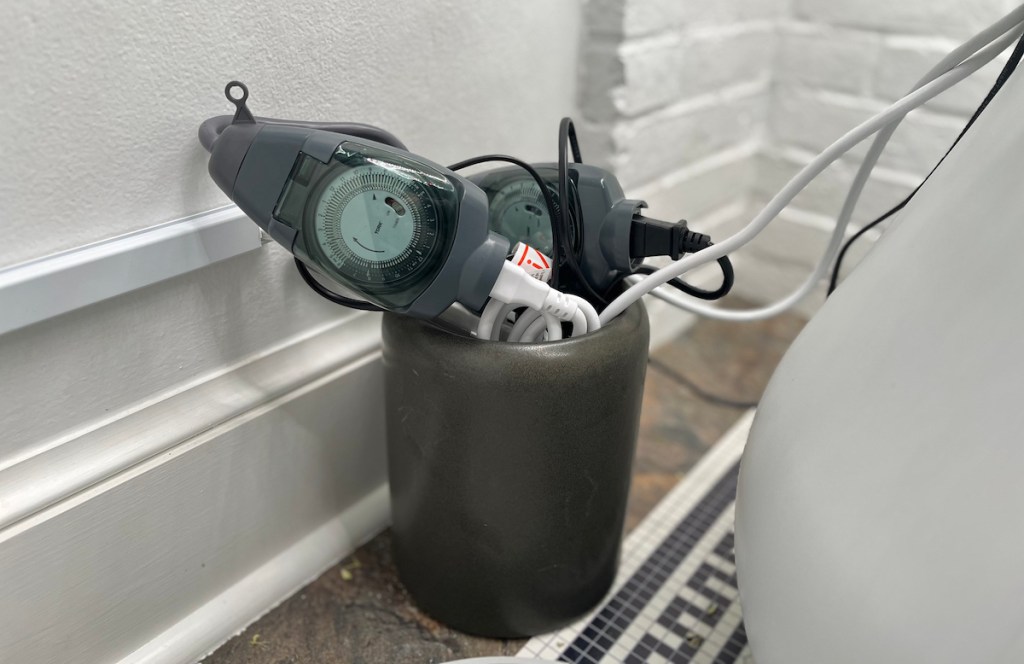
The bottom of your system will have a small pump suctioned to the inside of your reservoir that attaches to a PVC pipe and goes all the way up your system. Once your tank is filled with water, the pump will pump water up the pipe and out via a little diffuser at the top which allows water to trickle down and feed your plants from inside the system. Your pump (and lights) will be connected to their own timers so you never have to remember to water your plants and day-to-day care for your plants is essentially effortless and mess-free.
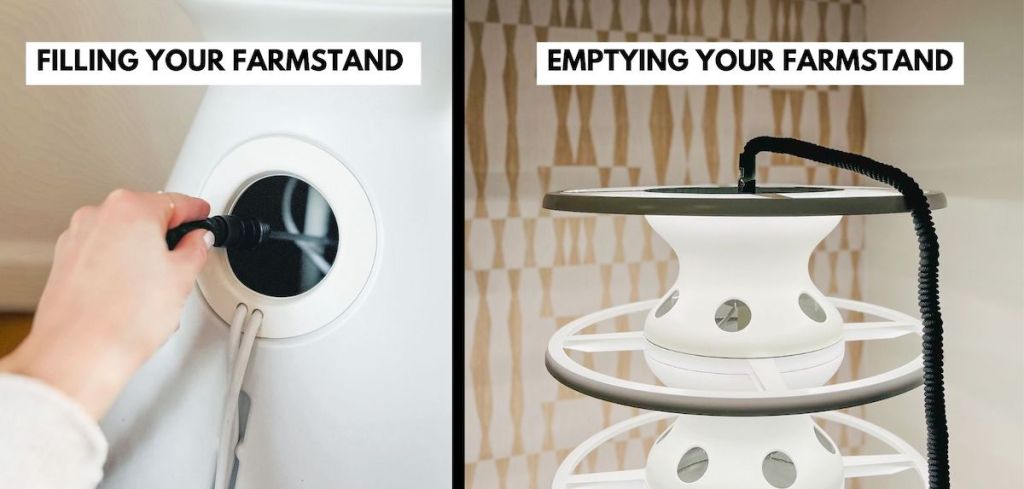
Important notes:
Your Farmstand will need about 20.5 gallons of water when you initially fill it so having access to a hose will make filling your farmstand much quicker and easier (although you can also use a pitcher, water bottle, or glasses of water to do it if you do not have hose access). We have a Silver Bullet Hose which is incredibly lightweight, easy to carry around, and stores easily when not in use.
Pick an appropriate place for your indoor Farmstand because it’s going to be bright. While times vary depending on the size Farmstand you get, ours requires 14 hours of light every day.
Initially, we set ours up in our dining room which is open to our entire downstairs. Between working from home and considering the weekends, we weren’t able to time our lights to where they didn’t feel intrusive in our dining room. The kitchen can also be a great option. Thankfully our mudroom (right off our kitchen) is large enough and keeps the Farmstand out of the way but still easily accessible.
Emptying the Farmstand is as simple as connecting your hose to the top of the PVC pipe and letting the pump do all of the work. So all the more reason to invest in a hose if you don’t already have a suitable one! I can assure you this is such a simple process since we’ve already moved our Farmstand after the initial setup. However, you’ll really only ever need to empty it if you’re moving it indoors to outdoors (or vice versa) or if it’s time for a cleaning.
For more location flexibility, consider checking out their dollies that support your Farmstand (yes, even when it’s full of water!) and make it easy to rotate and roll when desired.
Now we’re ready to get growing…literally! Here’s everything you need to know about your Lettuce Grow seedlings.
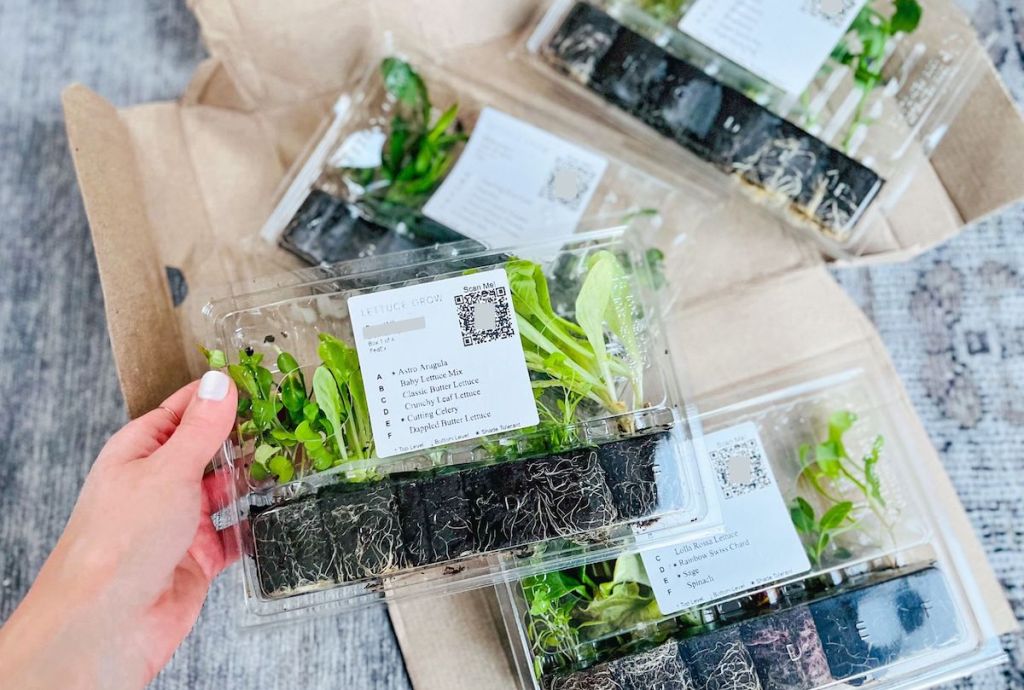
After selecting your stand size, you’ll move on to selecting your seedlings. Lettuce Grow will guide you to know which plants are suitable for your indoor (or outdoor) growing and you can pick a bundle based on your preferences. If the bundles don’t catch your eye, you can opt to pick an assortment of your own preferred seedings. The seedlings are $3.99 each, and you have the option to ditch ordering seedlings altogether if you plan to grow from scratch yourself – but, the seedlings make growing a lot easier and faster.
You’ll need to plant your seedlings immediately upon arrival.
Lettuce Grow sends your seedlings after you’ve received your Lettuce Grow Farmstand, so you’ll have sufficient time to assemble your system before planting.
Every seedling will come in a case that is clearly labeled so you can easily identify each one. It will also tell you where to place them on your farmstand. Some can go anywhere you’d like, whereas others (like cascading or climbing plants) will need to go to the bottom.
Lettuce Grow only uses the highest-quality, non-GMO, and organic seeds. 🙌🏼
They also grow all of their seedlings in accordance with organic guidelines (a non-negotiable for me!). In the chance a seed is not organic due to its occasional supply constraints, it will be noted on the Lettuce Grow listing. Again, you can pick and choose the seedlings you want so no worries if a non-organic seed is not your preference.
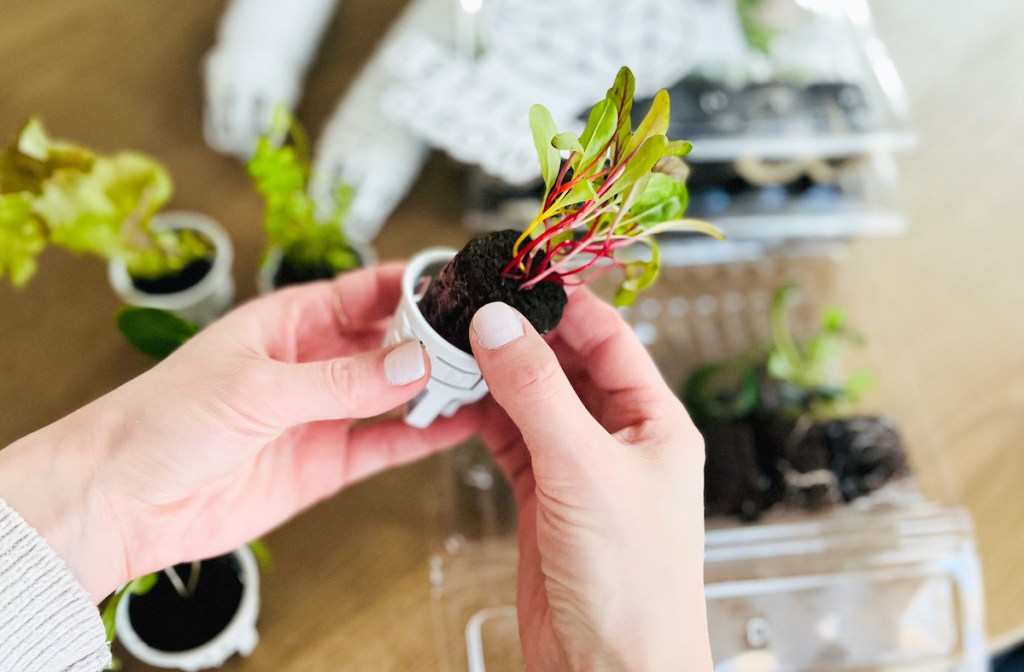
The plugs each seedling comes in are a mix of coco coir (a.k.a. coconut fiber) and sustainably sourced peat moss. Plugs retain moisture well and provide roots with an ideal ratio of water and air for optimal growing. Your Lettuce Grow does not use soil, which is why it’s considered a hydroponic garden.
Hydroponic growing means plants are grown without soil, by using water-based mineral nutrient solutions in aqueous solvents.
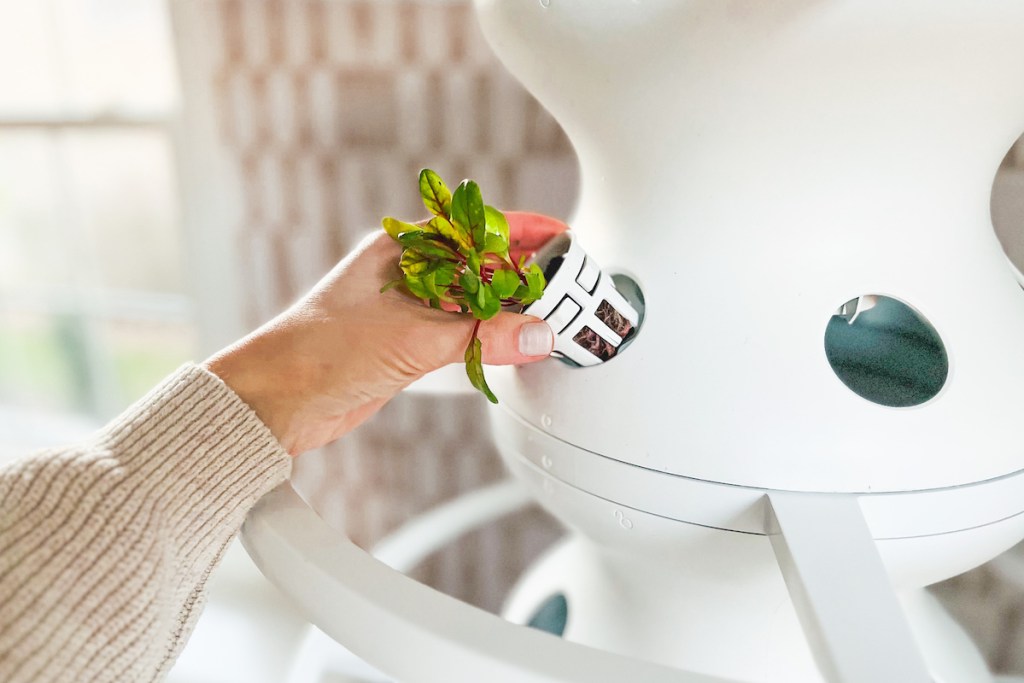
Your Farmstand will come with a durable plastic holder for each opening which perfectly fits each of your seedlings. When planting new seedlings down the road, you’ll want to hold onto these holders as they’re reusable and you won’t receive extras with each order (although you can order more from Lettuce Grow if you would like).
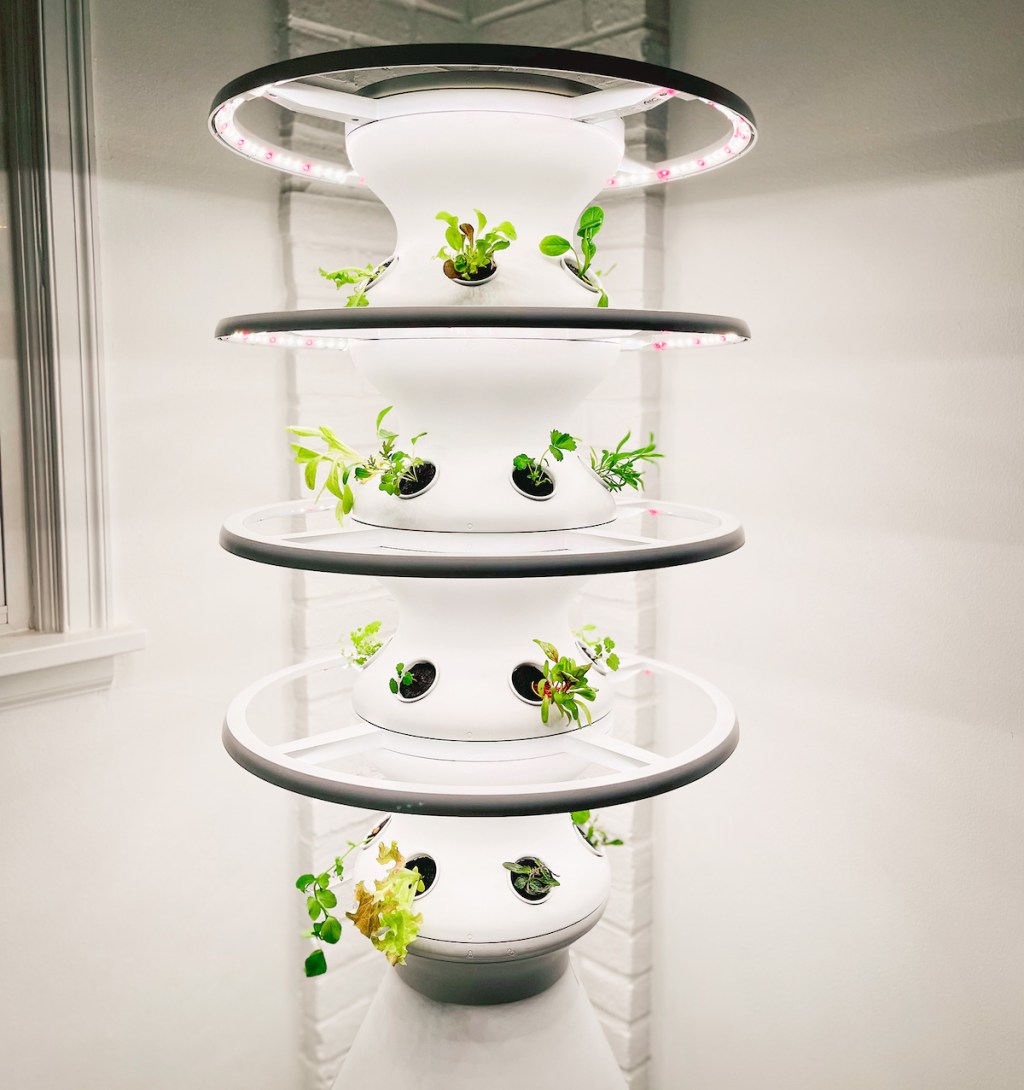
Here’s what my Lettuce Grow Farmstand looked like on Day 1!
I was really impressed that my seedlings arrived healthy and with moist plugs as if I just picked them up from a nursery myself! After a few hours under the lights, they really perked up and started thriving! 🙌🏼
Caring for your seedlings weekly is really simple. Below is everything you need to know to properly maintain your Lettuce Grow Farmstand and seedlings.
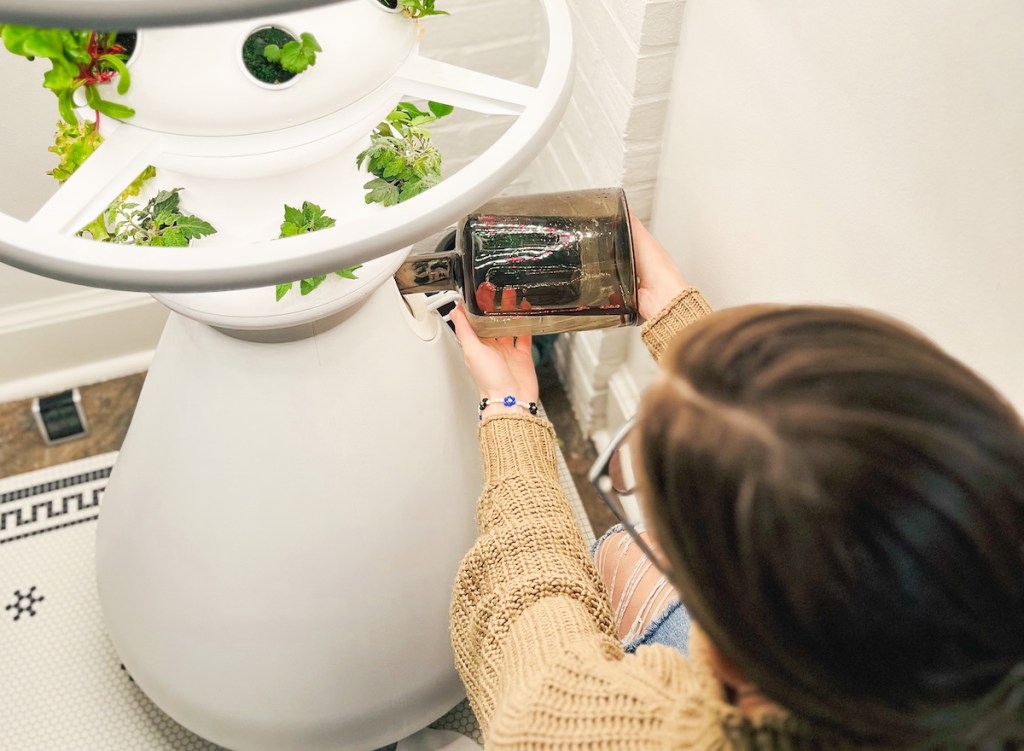
For weekly maintenance, you’ll need to do the following three things:
- Top it off with water – you won’t need as much as your initial fill so I use a glass vase I already had laying around rather than my hose. The larger your plants grow, the more water they’ll use.
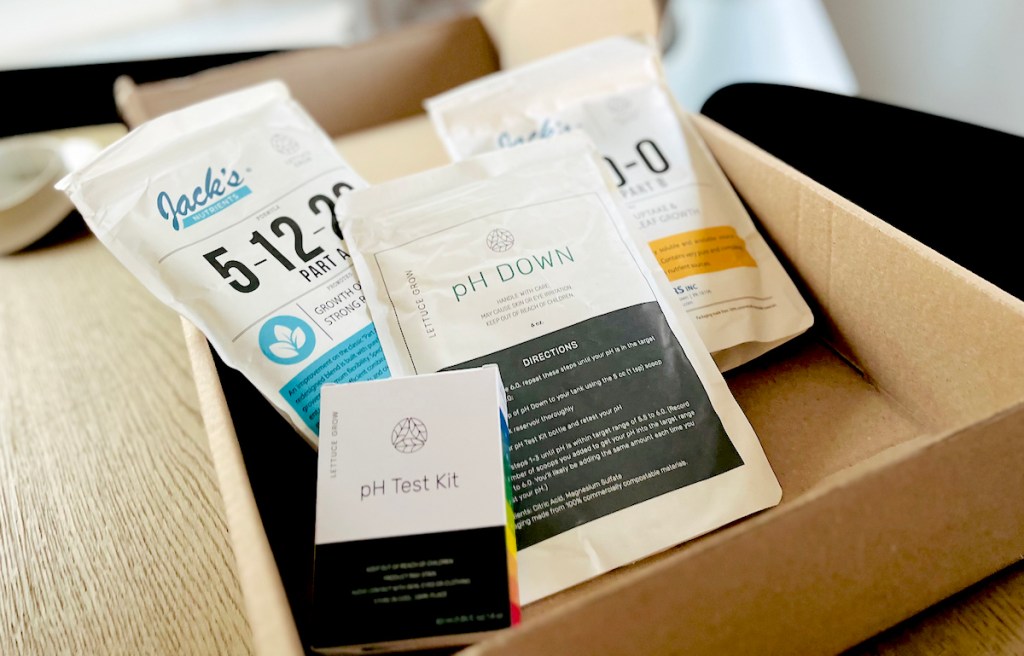
- Add nutrients – the number of scoops you need will vary depending on the number of plants you’re growing. I used 4 scoops of each nutrient for the initial setup and just half a scoop of each nutrient during each weekly maintenance. Your farmstand will come with nutrients and scoops to get you started.
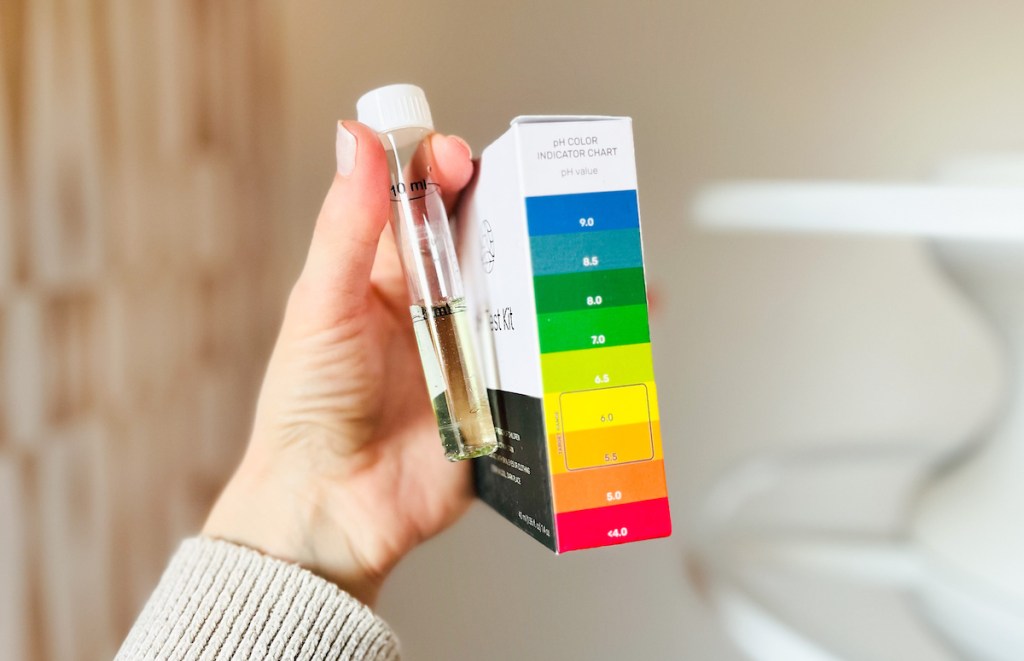
- Check/balance the pH levels – your Farmstand will come with a pH testing kit to easily test your water and takes just a minute to do. If your pH is too high, they provide you with a pack of pH Down which will help get your water to the ideal levels. It’s as simple as dropping a scoop into your water.
Let’s discuss nutrients:
The nutrients that will come with your Farmstand are of the highest quality just like their seeds and growing practices. They’re made of the purest raw materials that meet the strictest standards so you can assure you’ll be maintaining your plant babies with only the best nutrients. 🙌🏼
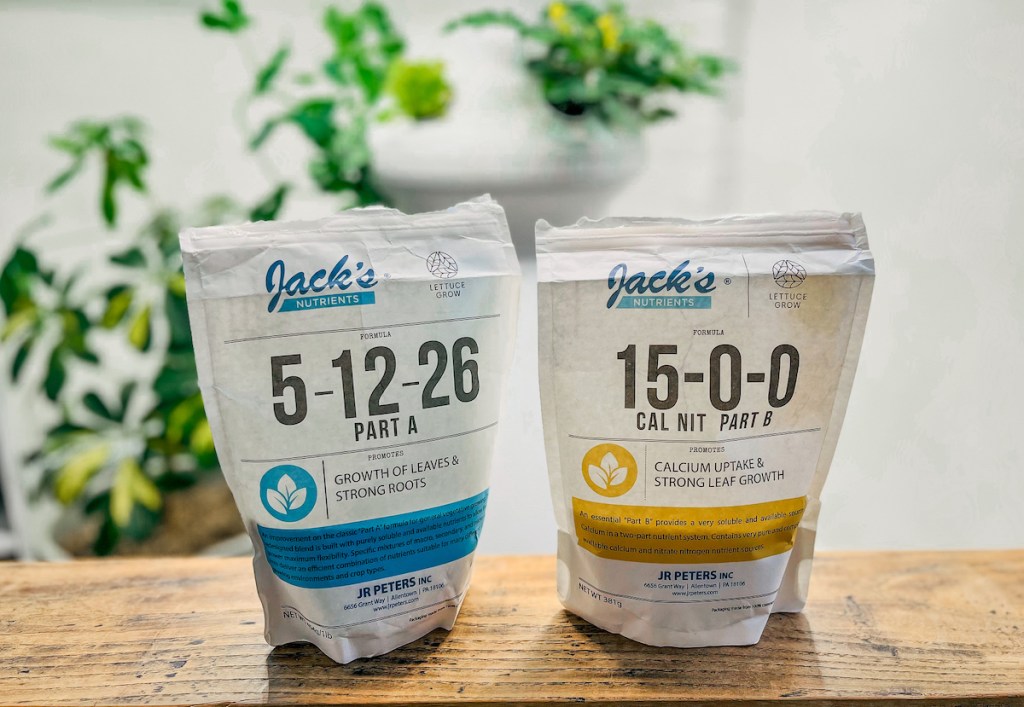
Jack’s Nutrients, which come with your Farmstand, are made in the USA (just like the Farmstand itself!), free of heavy metals, efficient, and very effective. Adding them to your system is as simple as dropping a scoop into the water reservoir and giving it a stir.
Here are the nutrients you’ll receive:
- Part A – for general vegetative growing. This redesigned blend is built with purely soluble and available nutrients to allow the grower maximum flexibility. A specific balance of macro, secondary, and micronutrients delivers an efficient combination of nutrients suitable for many different growing environments and crop types.
- Part B – provides a very soluble and available source of calcium in a two-part nutrient system. Contains very pure and completely available calcium and nitrate nitrogen nutrient sources.
Let’s discuss pH testing:
Plants require the right pH levels in order to be able to efficiently uptake the nutrients they need and thrive over time. Being a gardening novice I can assure you this sounds way more intimidating than it really is!
Your Lettuce Grow will come with a pack of pH Down and a scoop to adjust your levels if needed. This formula is a simple blend of citric acid and magnesium sulfate so it’s totally safe for your plants. Your pH levels will vary depending on your local water. For me, I’ve only had to adjust my levels once so my pack will last for quite a while!
Testing your pH levels is very simple!
Fill your test tube to 5 ml, add 5 drops of the pH testing drops, and shake! The color of the water will indicate whether you need to add pH Down or if you’re in the correct range. If pH Down is required, you’ll continue testing until the proper levels are achieved.
Now that I’ve walked you through the entire setup of the Lettuce Grow hydroponic garden, check out my results in under a month! 🤩
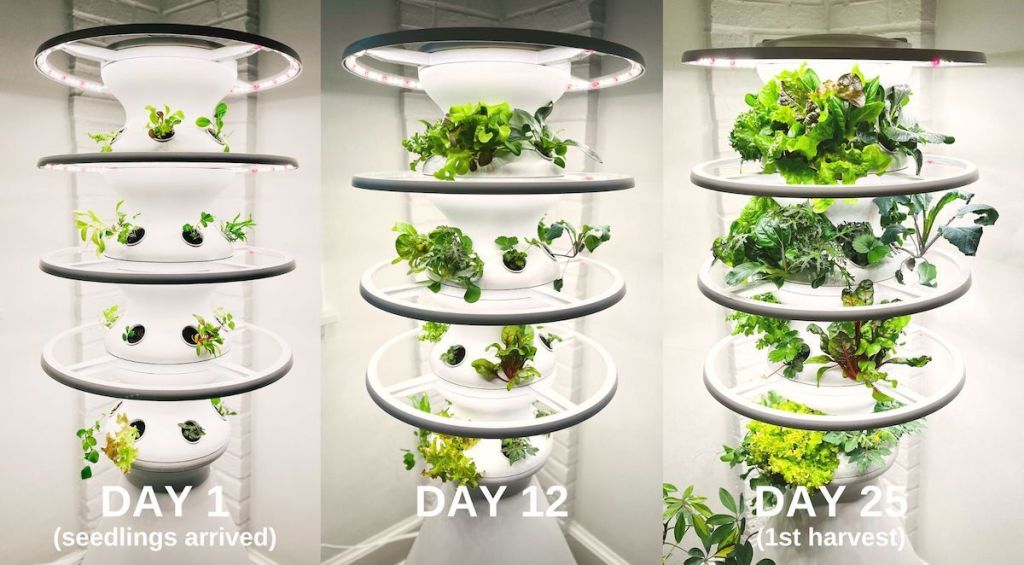
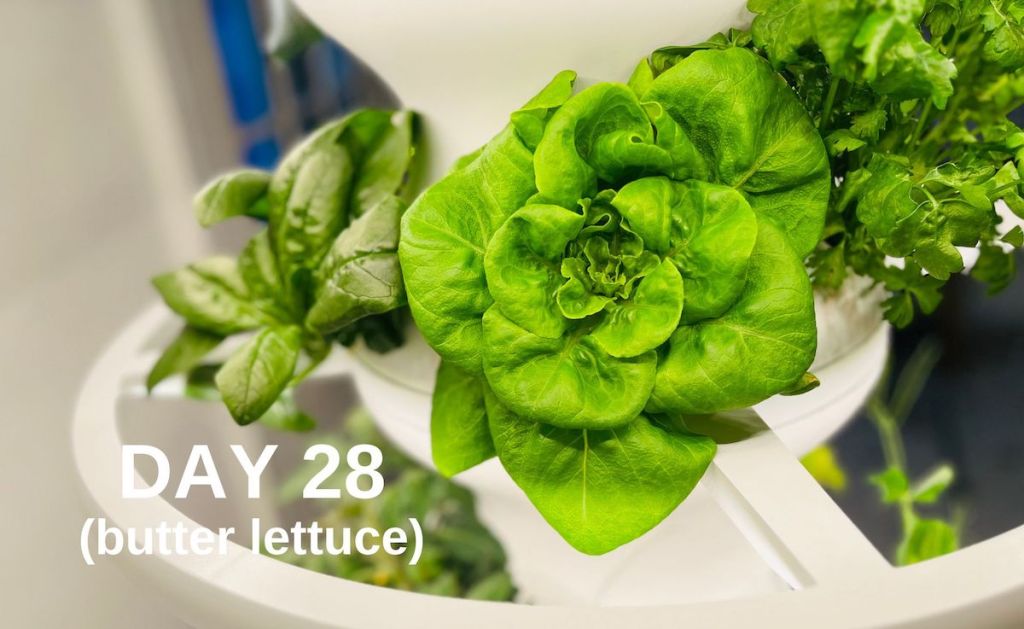
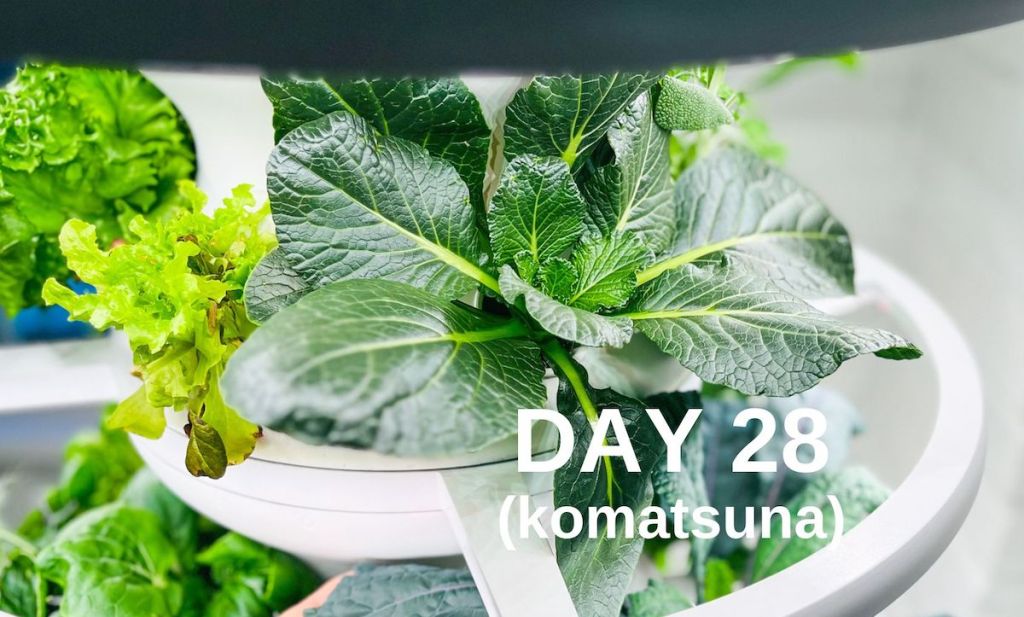
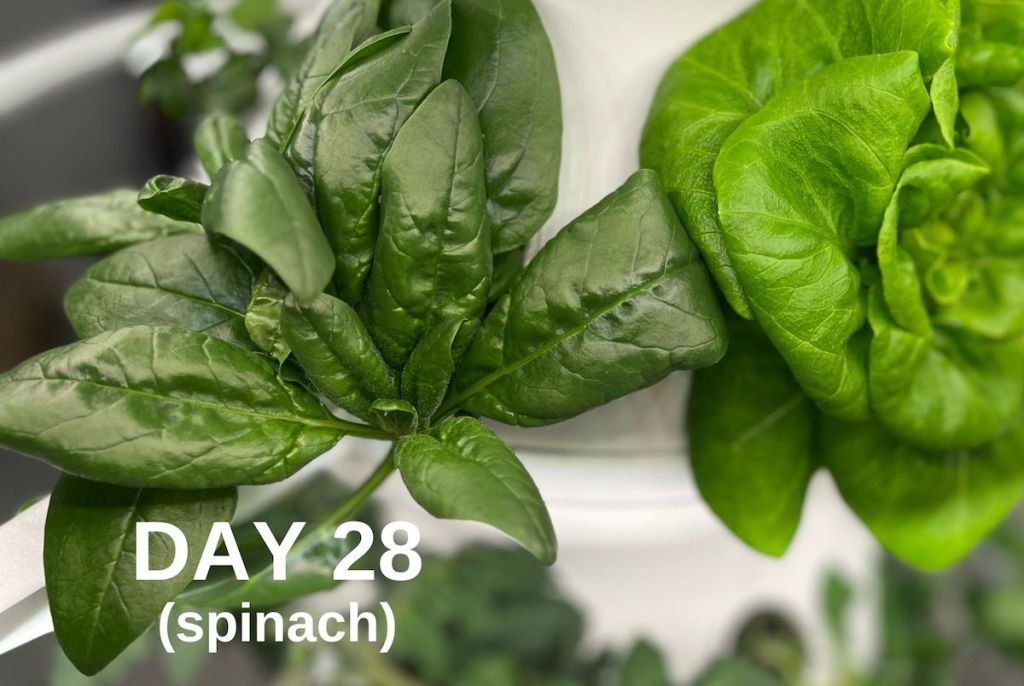
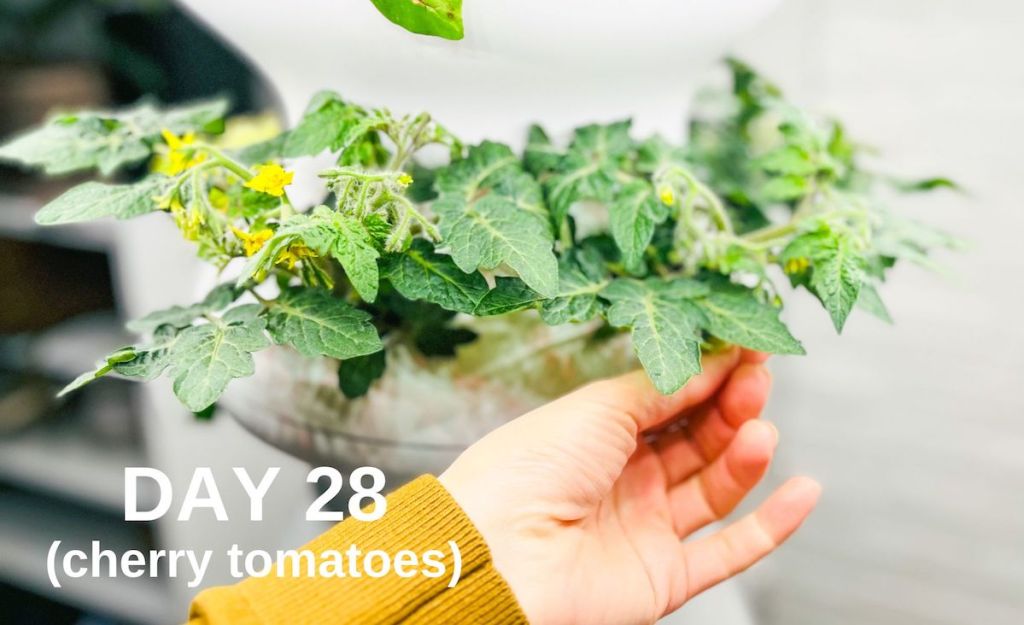
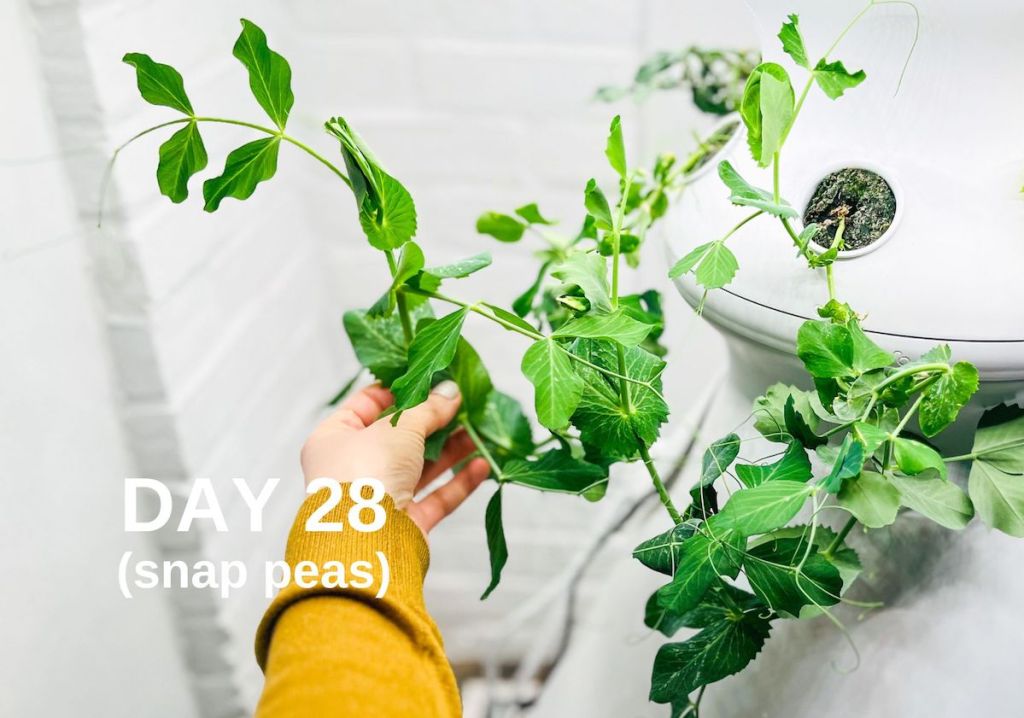
I’ll let the photos do the talking for a minute. 🤩😍
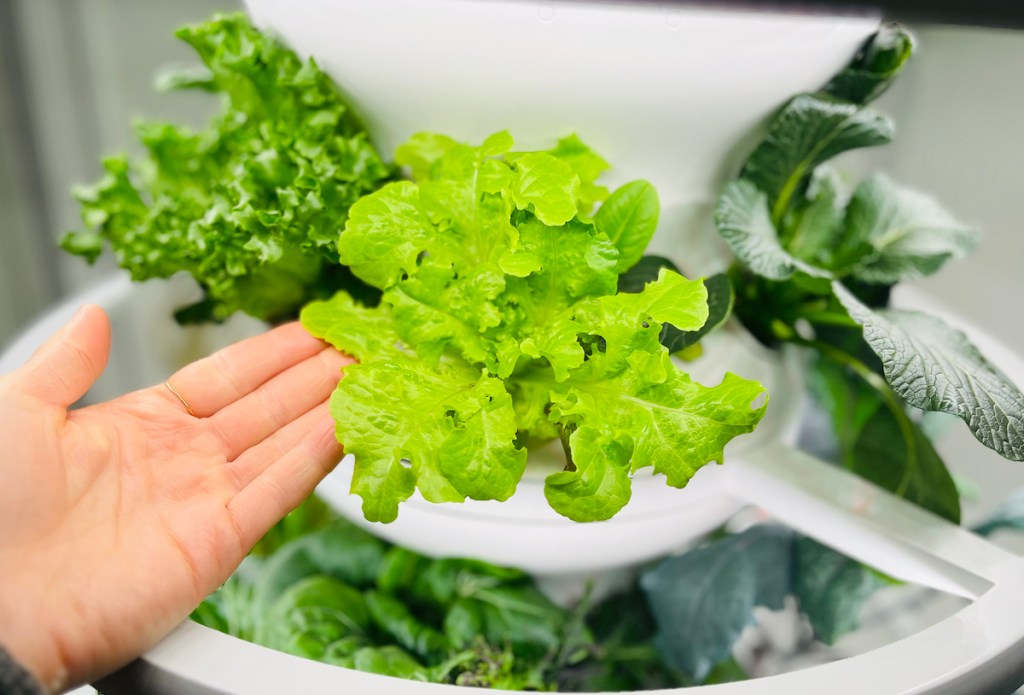
Needless to say, I simply cannot get over the fast and easy results you can achieve with this hydroponic garden! 🤩 Within 3 weeks some of our greens were already ready to be harvested and on day 25 we officially made our first harvest and made 4 big salads with plenty more to spare.
One of my concerns from the beginning was how much food this hydroponic garden will produce and if it would feel like an impact or not…
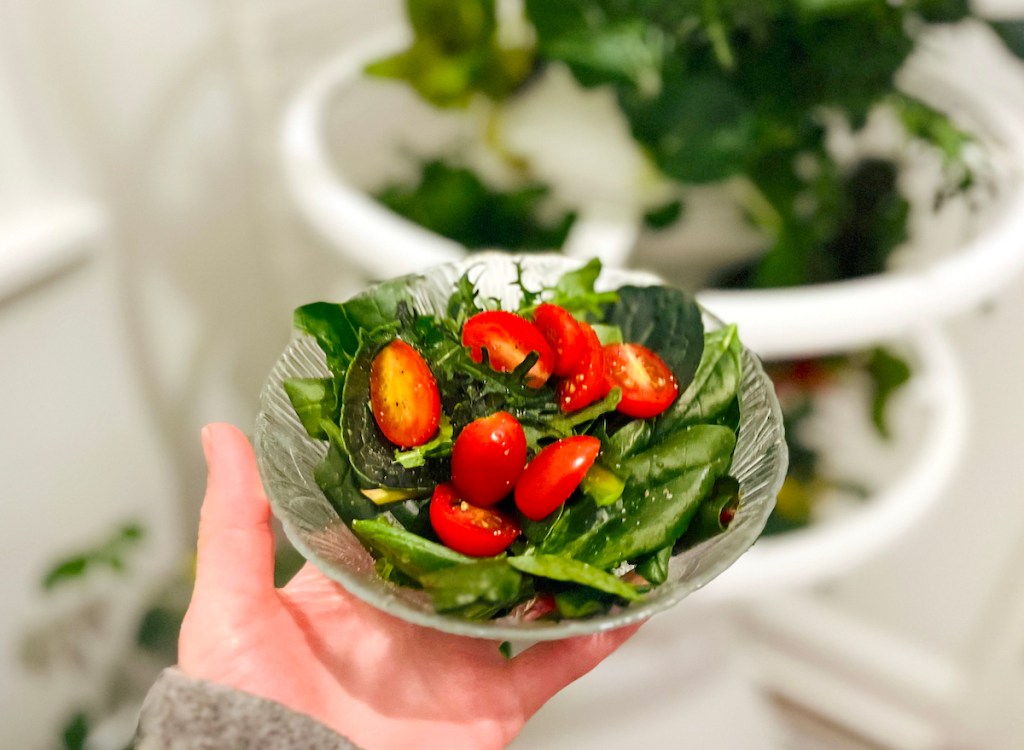
Thankfully, our Lettuce Grow Farmstand has more than exceeded my expectations! 👏🏻 Plus, the more our plants mature, the more I see them really impacting our organic grocery expenses.
It has been so nice going to the grocery store this winter and skipping right past all the pricey organic greens! 🤩
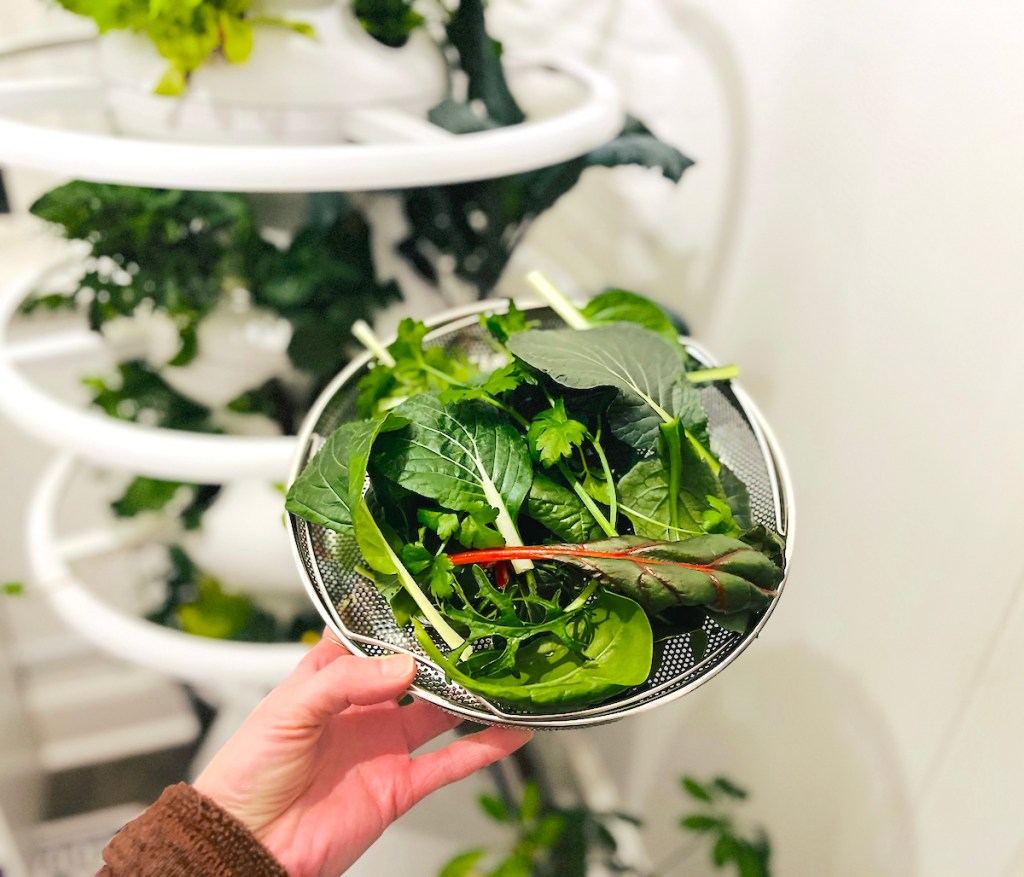
It’s important to keep in mind that fruit or veggie-bearing plants will take longer to mature, so greens and herbs will be the best plants to grow if you’re looking for the quickest turnaround. My goal for future growth is to have different greens maturing at different times so we always have something to eat. 😍
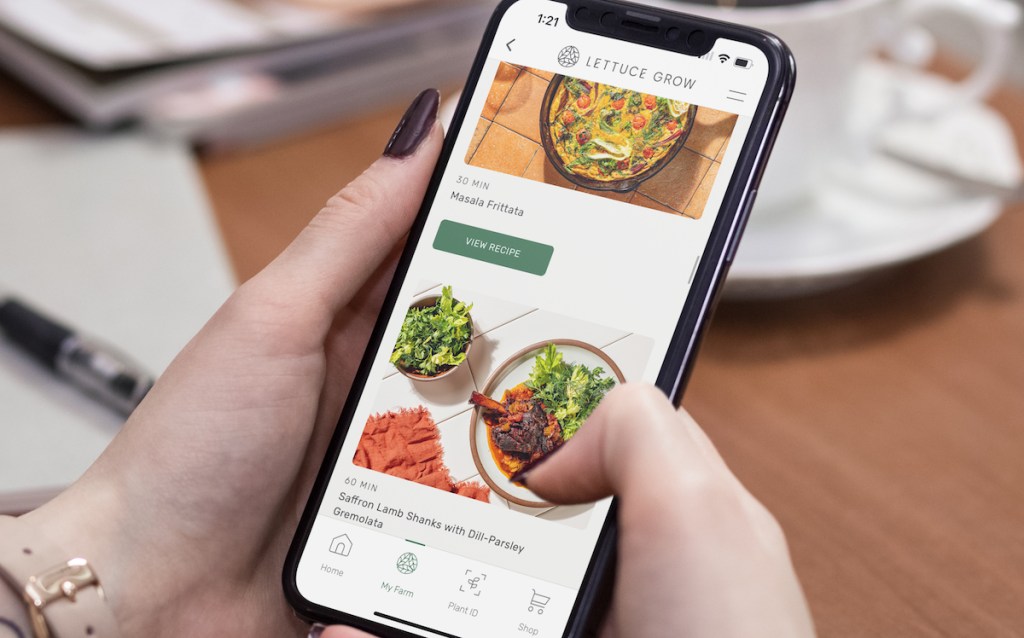
So far, we’ve made multiple salads and used greens on other dishes like tacos, lettuce wraps, burgers, and more! I also love that their free Lettuce Grow app gives you delicious recipe suggestions for your ready-to-eat plants and herbs. It’s helped me think of meals to make and really utilize everything we’re growing! 🙌🏼
Here are some helpful tips I’ve learned along the way:
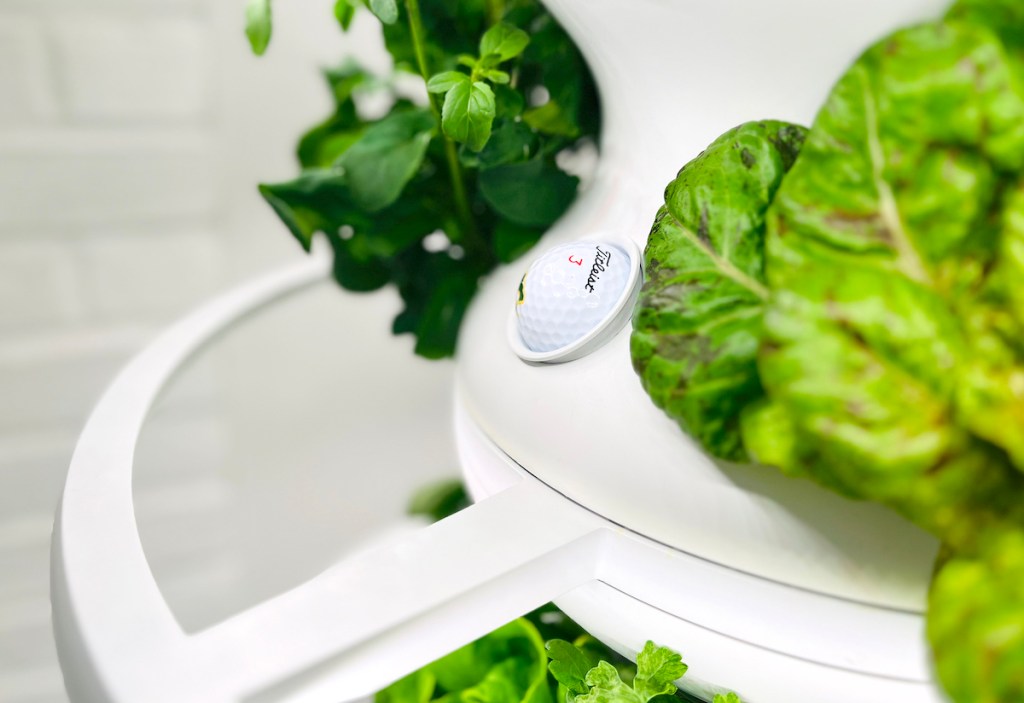
Use a golf ball to “plug” unused holes.
Golf balls fit perfectly inside the empty Lettuce Grow cups! Doing this helps block light from getting into your farmstand and will keep unwanted bugs and algae from growing when a hole is not being used. Algae is bad for your plants’ roots because they steal nutrients that your plants need to thrive.
Use sticker labels to identify your plants.
Unless you’re a gardening master, you’ll really appreciate this hack! A Cricut works perfectly for sticking your own labels or you can buy labels online, use post-it notes, or whatever else suits your fancy. I still need to get around to labeling mine, but this is one hack I wish I thought of when setting up my Farmstand. As another tip, I’ve seen other owners place their sticker labels on the outside of the Grow Rings. This placement allows you to easily see the label once your plants are really mature.
Try not to harvest all at once.
Lettuce Grow says “cut and come again” for a reason! If you’re careful about your harvest, you can cut some and come back for plenty more! Above is a photo of my crunchy leaf lettuce that grew back in about a week after I harvested about 3/4 of the plant. Some plants may grow back if harvested all at once, but not all will, so for optimal rejuvenation plan to cut and come again.
Make sure you also have an appropriate pair of gardening scissors to cut your plants. I hung mine on the wall behind my Lettuce Grow so they’re always easily accessible.
Use a trellis for climbing plants.
Larger, climbing plants, like snap peas, love to have a place to climb so a garden trellis is great for supporting these larger plants. You can stick them right into the plug to support your plant. I’ve also seen other owners use Command ceiling hooks, garden twine, or pieces of cable cord hiders that can stick to the base of their Lettuce Grow to support much more mature and heavy climbers like bell pepper and cucumber plants.
Use a vase or container to keep your wiring and timers tidy.
Your Lettuce Grow Farmstand will have up to two bulky timers – one for Glow Rings and one for watering (connected to your pump). Plus, wiring to plug it all in so a storage container to keep everything tidy and off your floor will keep your space more organized. I grabbed a cheap ceramic vase and placed a plant in front of mine for the time being, but you can certainly use something you already own. This cable management box with a wood lid also came highly recommended.
Use a water heater if necessary.
A water heater will give you peace of mind and may be necessary when growing in cold temps outside or in non-insulated rooms with colder temperatures. This could potentially prolong your outdoor growing season too! I started my indoor growing at the beginning of winter and although I’m growing indoors my mudroom tends to be drafty and cold. Since our mudroom isn’t heated, to ensure my plants are staying nice and warm during winter I added a 300W water heater to the inside of the tank. Adding a heater will require you to keep an eye on water levels to be sure it always stays fully submerged.
Save by growing outdoors.
This may go without saying, but it’s worth noting you can save significantly on your Lettuce Grow hydroponic garden by growing outdoors. You can ditch the cost of Grow Rings which start at $250 if you have the right conditions to grow outdoors. Plus, you can grow even heartier plants like cucumbers, zucchini, and cauliflower just to name a few.
Grow your own seedlings.
The time will come when plants will need to be replaced in your Farmstand. While the Lettuce Grow seedlings are certainly convenient, they’re pretty pricey and can add up fast. Growing your own seedlings is fun and another great way to save money. It’s also a great way to introduce other plant varieties to your Farmstand that LG currently doesn’t offer.
To do this, you’ll need some seeds and Root Riot Plugs are the perfect organic replacement cubes for your hydroponic garden. Baker Creek Heirloom seeds are just one of many reputable places you can find pure, high-quality seeds. I already have some of their Orange Hat Tomato seeds which I heard are perfect for growing in the Lettuce Grow Farmstand. 🤩
Some growers plant the newly seeded grow medium directly in their Farmstand. However, some seeds will require darkness and/or lots of humidity to germinate so you may also need an enclosed seed starter tray. While there will be some upfront costs to growing your own seedlings, it will pay for itself in no time!
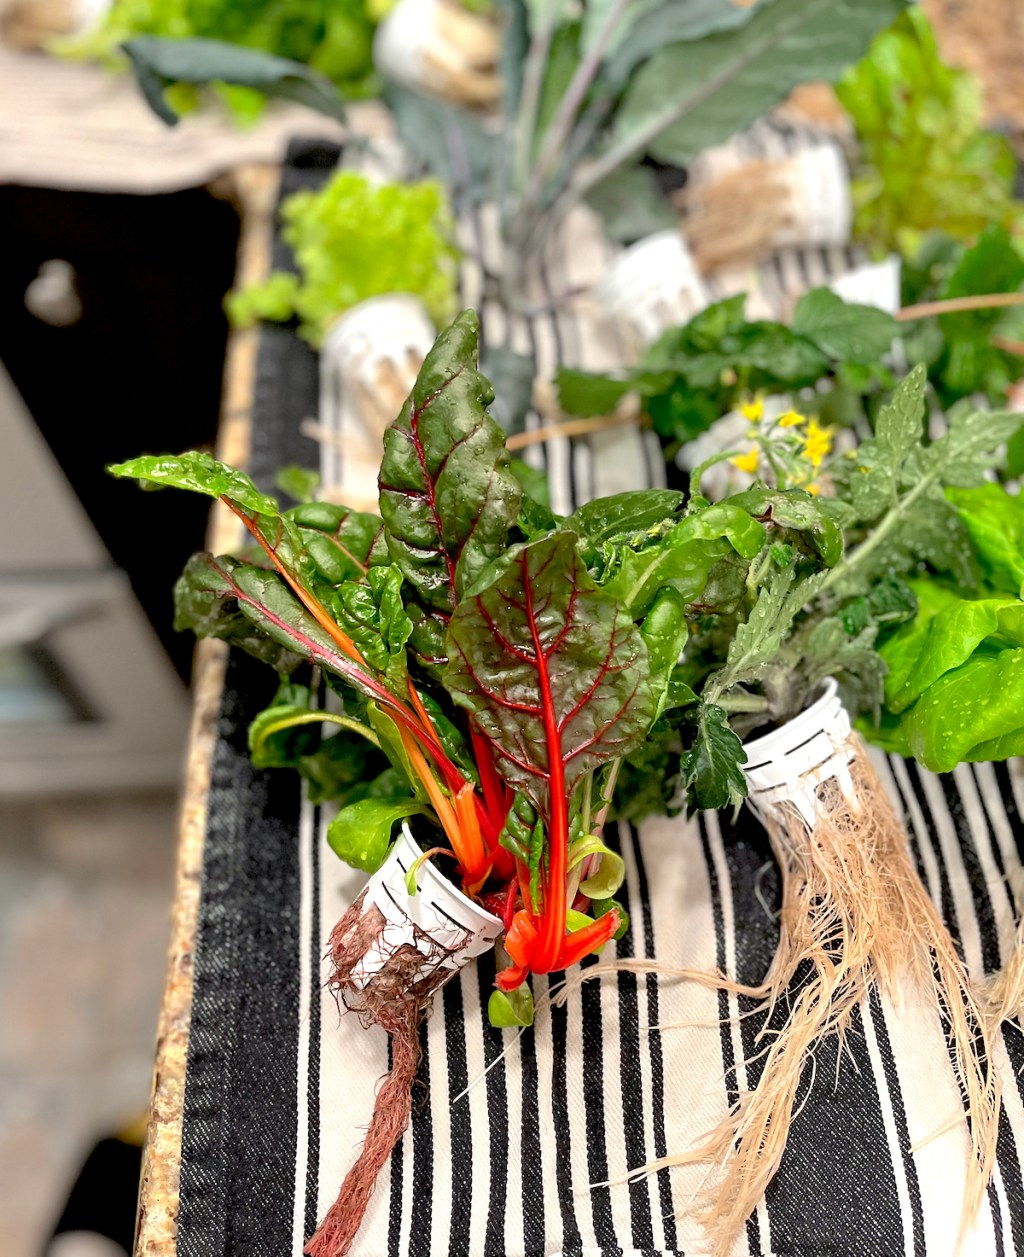
Trim your roots.
You’ll need to occasionally trim your plants’ roots once they’re mature to avoid them growing too big. This will also keep them from getting caught in the pump and ruining your system. Again, you’ll want some appropriate scissors and it’s important to make sure they’re clean so you don’t contaminate your plants. So far, I have only had to do this once and it was way simpler than I was anticipating!
You’ll start by gently pulling the plant cup out of the hole being careful not to rip your roots. Then trim about 10-15% of the root mass over a trash can. Gently feed the roots back into the hole and click them into place. Voila!
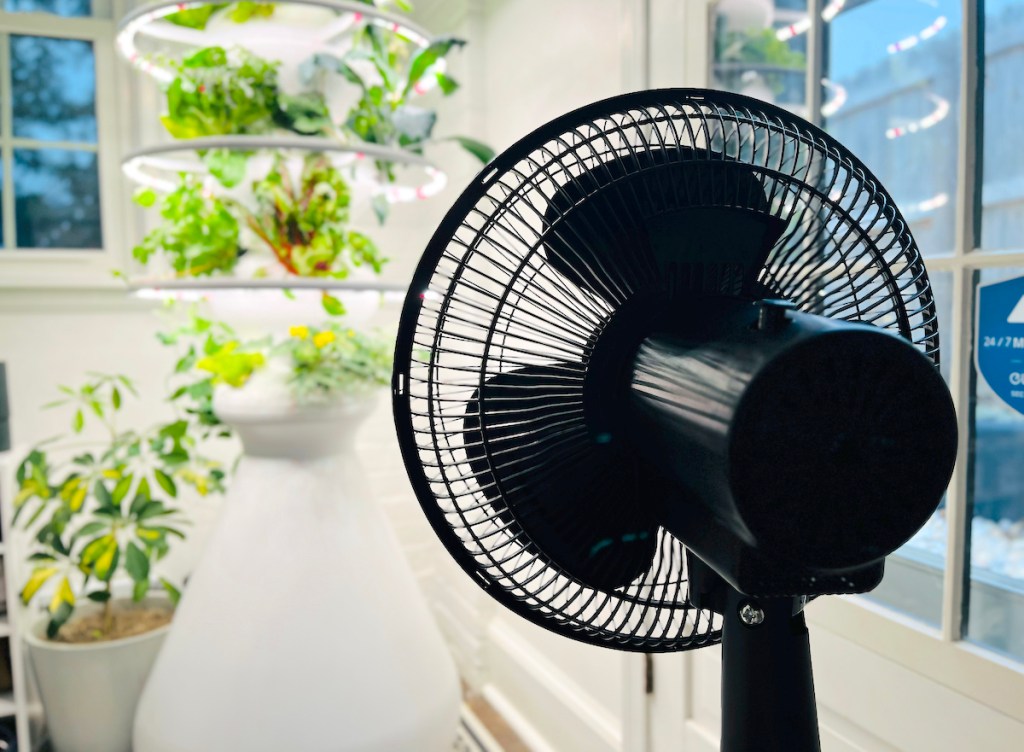
Manually pollinate your indoor plants.
Some plants like tomatoes and strawberries will require pollination in order to produce. When growing outdoors, bees, butterflies, and birds take care of this organically. However, indoors these beneficial creatures don’t exist. So when your indoor plants begin to flower, you’ll need to self-pollinate.
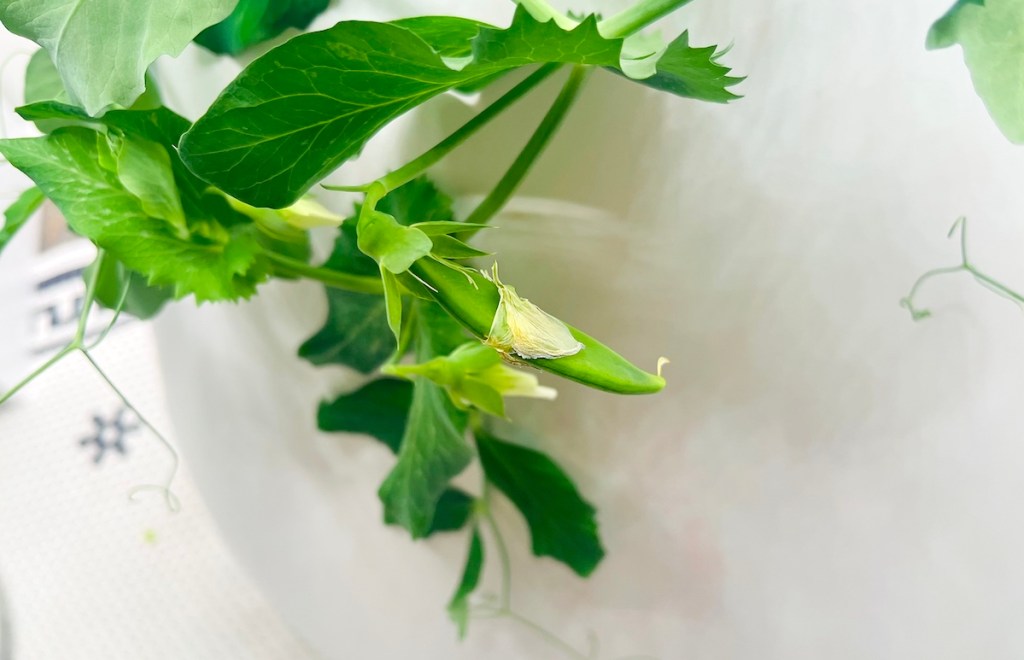
The easiest solution to this is to place a self-oscillating fan nearby – this may also help ward off pests. We’ve already seen some snap peas popping up since incorporating this into our daily regime! 🤩 Sadly, this didn’t occur to me until after my tomatoes began to flower so I’ll have to report back with an update! What’s really reassuring is that I’ve seen many other Lettuce Grow owners successfully harvest tons of goodies when growing indoors! It may just take a few more months to mature compared to growing outdoors.
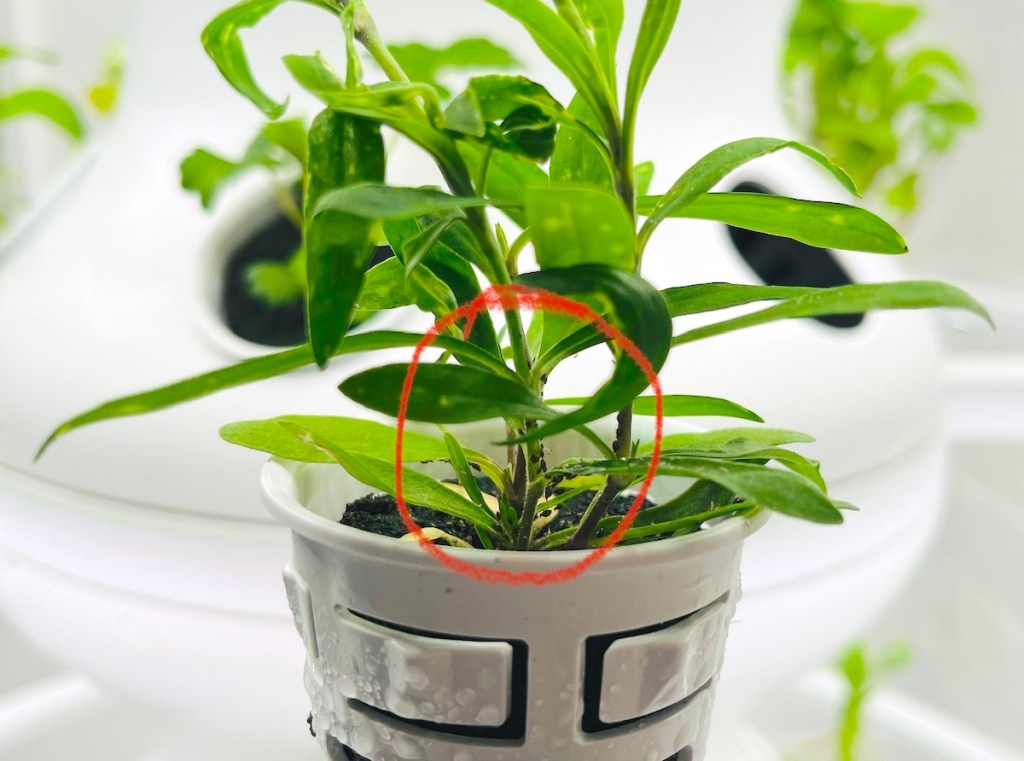
Always check in on your plants.
On day 4 of my hydroponic garden journey, I noticed aphids had quickly taken over one of my seedlings and another clutter during week 4. 😔 Aphids are common garden pests and feed on plant sap. They can attach themselves to clothing, pets, or shoes so this is one problem that could easily occur for anyone. I didn’t know how to properly deal with this situation at first so I trashed my first seedling altogether.
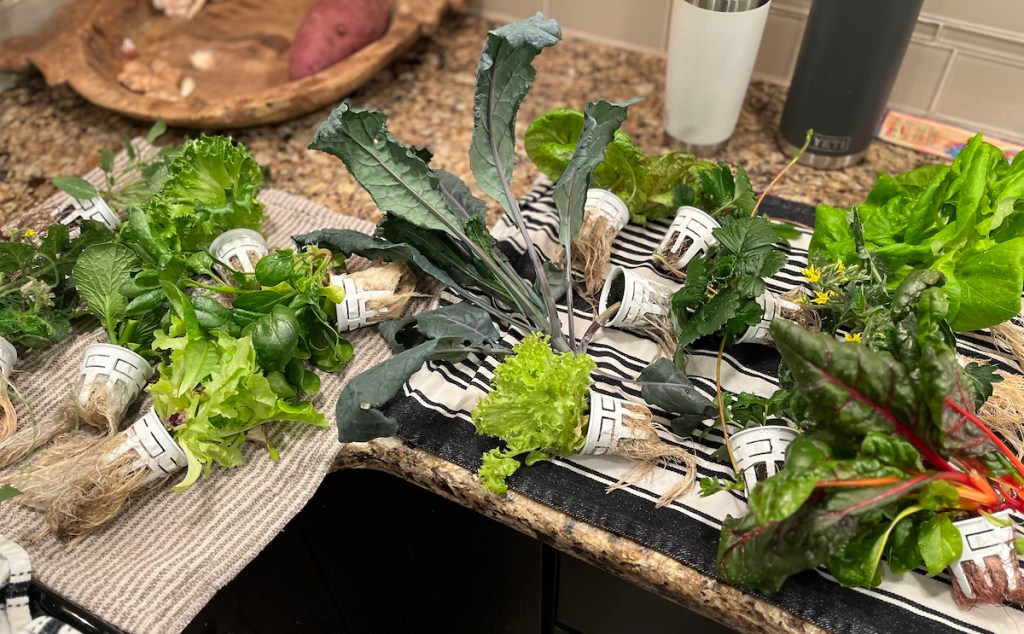
Later, I learned aphids can easily be taken care of by using an organic pest spray that’s OMRI approved or by simply rinsing them off. I rinsed my entire stand off the second time to take extra precautions. (Hosing them off outside with a combination of water and peppermint Dr. Bronners or spraying them with Neem Oil for more aggressive treatment also came highly recommended.).
What I’ve learned is that gardening can be a very finicky science. If anything, these obstacles were a great reminder to always be checking our plants! Regardless, if you’re committed to your plants, it’s nothing you can’t hurdle over! I’m also thankful Lettuce Grow has a very helpful blog post to deal with these potential issues. Moving forward, we’ll be keeping a much closer eye.
Join the Lettuce Grow Facebook community.
The Lettuce Grow Community Group on Facebook has been extremely helpful during my hydroponic garden journey too. In fact, it’s where I learned the majority of these tips! In the group, you’ll have access to a plethora of information from genius hacks to plant tips from other Lettuce Grow owners so it’s definitely a source I recommend joining.
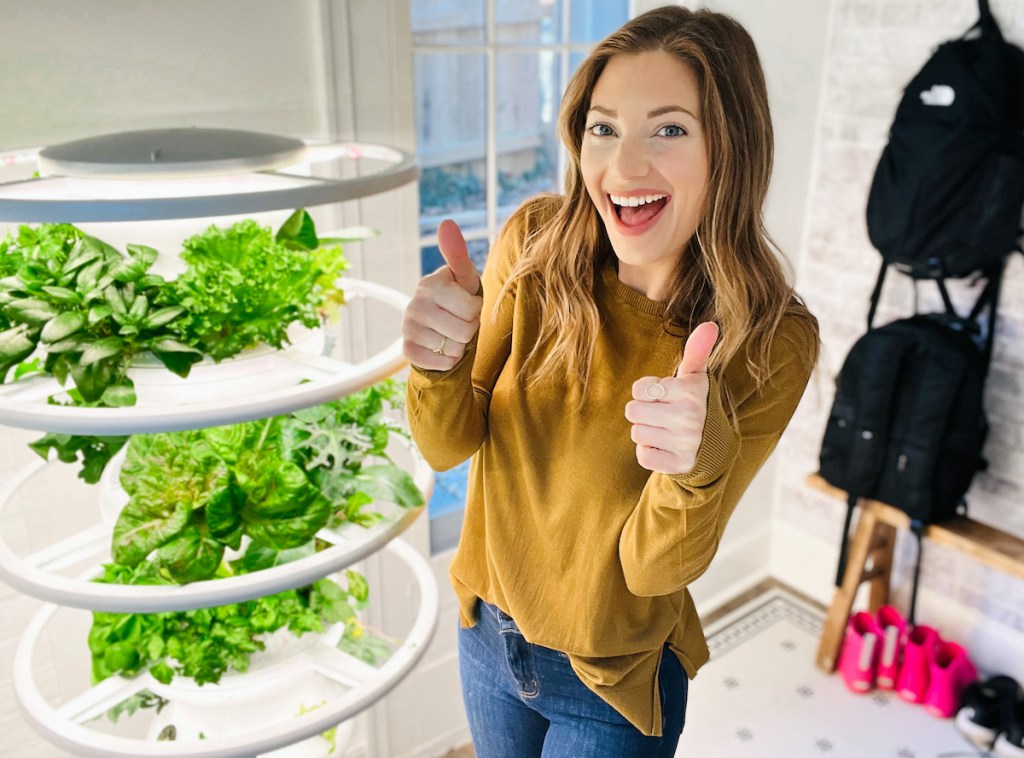
Overall, I am SO in love with my Lettuce Grow Farmstand! 🤩
The entire process has been a learning curve for me. However, it has felt so empowering to be able to grow my own organic crops at home. And in the dead of winter at that! 👏🏻 After more than a month, I already feel like a pro and have learned so much about plants.
I’m so excited about what this journey has in store and I will certainly be back with any more updates I have along the way!
Ready to start your hydroponic garden journey?! 😍
The Lettuce Grow is made in the USA and comes with a 3-year warranty. Best of all, the Farmstand and Glow Rings have a 90-day risk-free guarantee so there’s no reason not to give them a try! 🎉
!doctype>

