

As usual I'm LATE AGAIN! ⏰😩
Sheesh! where has the time gone?
I honestly meant to have Part 2 published early last month but wouldn't you know, I've been totally engrossed in the Johnny Depp and Amber Heard defamation trial on youtube, and between that and actually working on the bedroom of this DOLLHOUSE, I've missed my blog deadline by a mile- 🤥 yup- MY BAD!
Anyway, I'll try and make it up to you in this post, because I'm going to show you what I've finished inside the Dower House living room AND I'm going to show you what and how I'd made ( then remade) the leaded glass windows in the living room using an unconventional method, which happened to work for me.
There's A LOT to cover so grab yourself a hot cup of coffee or tea because this will be a long, Long,LONG post and times a-wastin' -
beginning with -
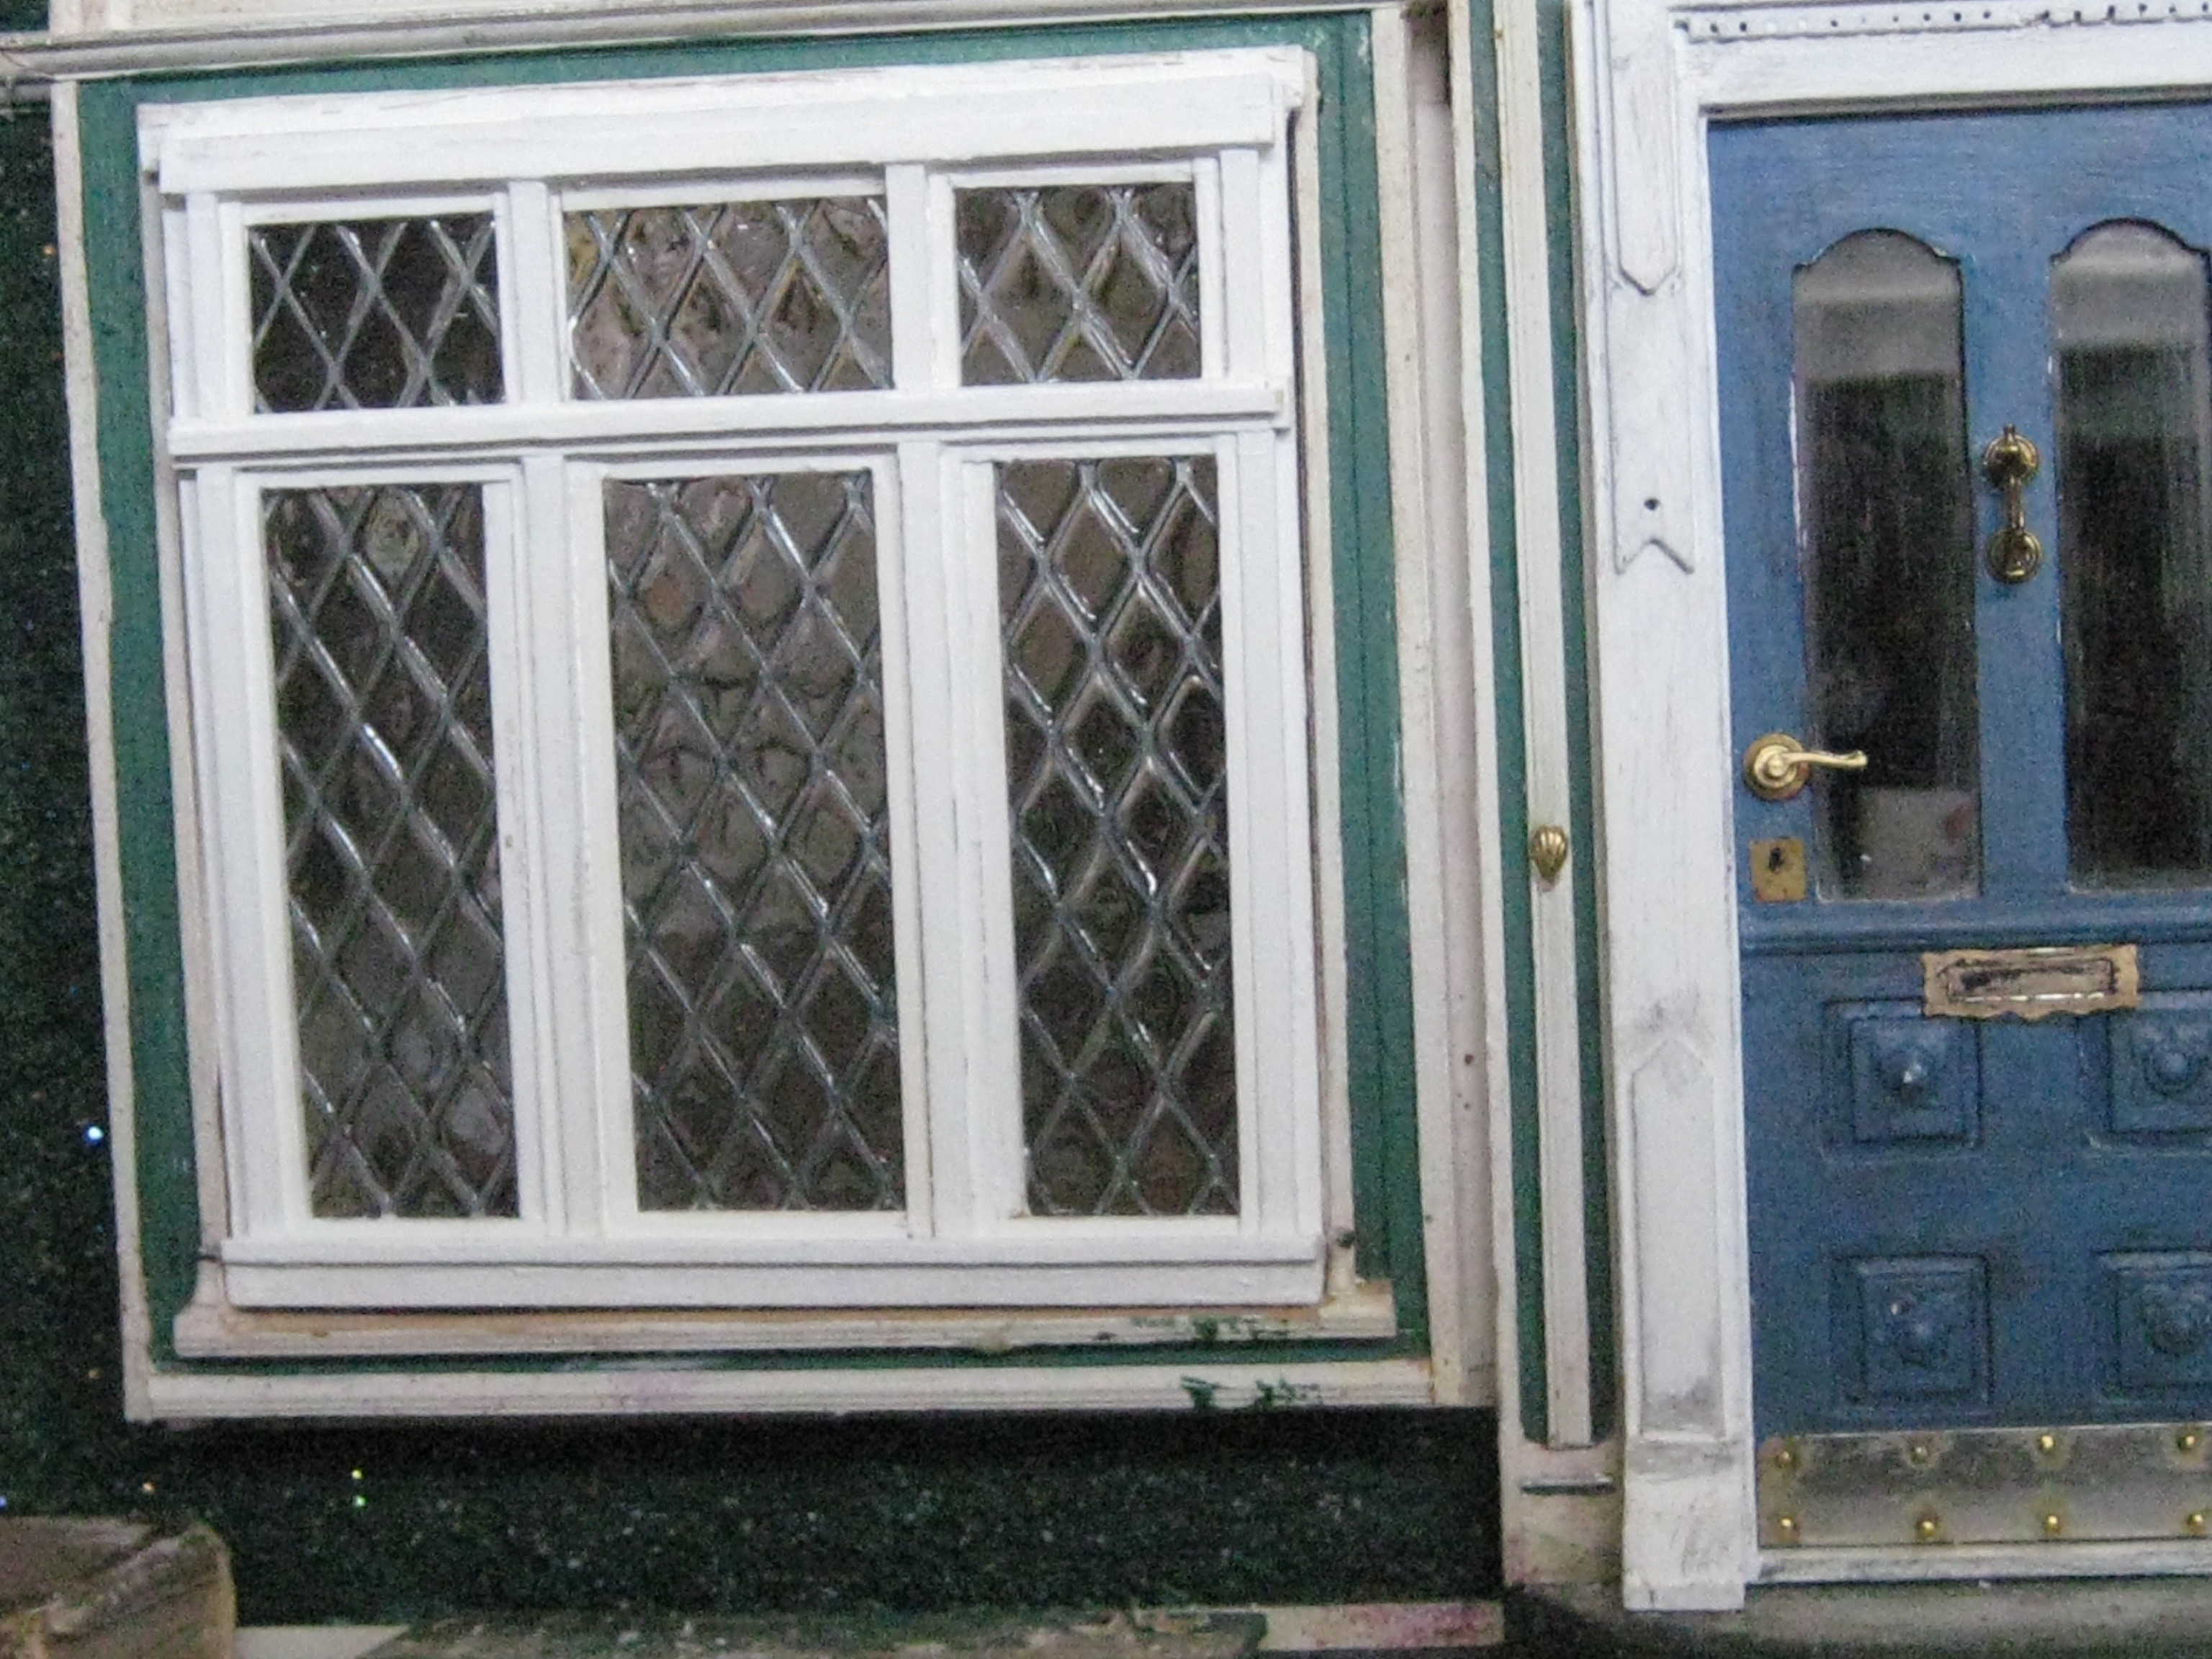
THE New FRONT DOOR
.jpg) | |
|
The door is a "vintage" Miniature House Victorian front door kit. I already had in my stash and believe it came from my dear friend BETTIE SMITH'S miniature collection. I didn't realize how old the door was until I tried to find the image of it via Google and wasn't able to, but here's an image of the companion window which will illustrate the carved details above the door: a detail which I was forced to remove. .jpg) I had to take off the cap due to the sloped of the Glencroft roof which angles around the door: there just wasn't enough room  The new door is rectangular however I still wanted to keep the look of the old gothic archway which is original to the kit. To do this I used the old kit door finishing trim and extended the "legs" of it on both sides to match the taller height of the new door. The door itself is flush with the exterior front wall of the dollhouse which is pressed up against the existing wood trims. Making it work from the inside created a 1/2 inch recess around the front door . In other words, installing the new front door was the equivalent of trying to fit a square peg into a round hole. I had to modify the installation to enable the door to swing open without any impediment caused by the interior door surround resulting in a deep space between the door and the wall. Clear as mud - right? 🧐 .jpg) In short this is what it looks like and I've left it removable for the time being. Who knew that changing out a door could turn into something as complicated as this proved to be? Even so, I'm happy with it because the little recess is unusual and quirky and has a very 'English-y' feel to it! ❤😌 I've painted the door both front and back, several times trying to get it to look fresh without appearing too pristine. In the end I lightly aged it with a graphite pencil then called it a day. Just in case you're wondering why I wouldn't want this door to look 'BANDBOX NEW' is because I want my tiny dwellings to appear as though they've been occupied for a long time and time and the elements have a way of removing the surface sheen from just about everything and people have a way of causing certain amounts of distress on the things we regularly use. Which is why, I didn't want the look of a freshly painted front door. I Did however, want a letter slot in the front door but I didn't want to have to cut one out of the door so I purchased a set of 2 brass mail slots and glued them to both sides of the door. I ordered a package of mini mail from the U.K complete with U.K stamps and postmarks. If you're in the market for British mini mail, I've included the link below-
I left one letter on the floor under the mail slot: the rest are housed in the Secretary. I felt that The Dowager needed a bit more personal security therefore, a iron slide bolt at the bottom of the door became a requirement. Years ago, I had made one out of card-stock for the front door of Villa Leone, which turned out quite well, however I didn't feel like making another so I bought mine on line. The one you see below is by TOWN SQUARE MINIATURES I really like the look of the black iron bolt against the white painted wood. It stands out (but not too much!) and thus the Dowager is able to rest securely! |
.jpg)
.jpg)
.jpg) |
| NOW LET'S TALK ABOUT THE LEADED GLASS WINDOW ( a semi tutorial) Last Year, when I'd removed the old kit windows from this dollhouse, I made sure to save them so that I could use them as a guide but wouldn't you know it when I needed them- I couldn't find them SO I had to make a window from scratch. 😣 NOT MY FAVOURITE THING TO DO! 😫 I made a window then after I'd made it I didn't like it😱 |
I had enough wood trims for the replacement panels,
but historically
me and wood have a very shaky relationship.
I usually waste more wood than I actually use.
With me it's -
measure OFTEN then cut it WRONG anyway.
I painted lots of trims knowing that I would mess it up and of course I did.
As for the acetate,
I had just enough of it
to make the second set of
"glass"panes-whew!
.jpg)
.jpg)
.jpg)
.jpg)

.jpg)


.jpg)
.jpg) I actually enjoyed making this plant and will probably make another for the Dower House bedroom.
I actually enjoyed making this plant and will probably make another for the Dower House bedroom.
.jpg)
.jpg)
.jpg)
It is difficult to see in the photo below but I cut 3 separate panels of clear heavy plastic and built the frames around them
into one single unit.
.jpg) |
| Once I had the frame(s) secured it was time to move on to the leading. With the first set of windows I used the metal mesh from an air filter it was good but the mesh had depth and so I needed a lot of UV resin to fill it. Hence it made the glass too thick. |
.jpg) | |
|
For the leading in this window I used the metal cross-hatched mesh from 2 MOSQUITO ZAPPERS!
The Zappers look like plastic tennis rackets with 3 layers of grills (2 big over1 small) which are sandwiched over each other and connected to wires; which are connected to batteries; which are housed inside the handle. I've seen them in action on t.v. although I've never used one myself. I found these at the thrift store. I've included a link to Walmart's so you can read up about it if you're interested. https://www.walmart.ca/en/ip/bite-shield-racket-zapper-electronic-insect-killer-yellow-and-black/6000203257890? |
.jpg)
.jpg)
.jpg)
 |
| The front and back of both rackets have a VERY FLAT crosshatched metal which I thought would work the best. I first tried it up against the window opening to see if the scale of the leading looked right but it was too hard to tell |
 |
| I proceeded to pry apart the plastic frame from the bigger of the 2 zappers because I wasn't able to unscrew it. The smaller racket was easier to disassemble as the screws were more accessible. |
.jpg) |
| This method worked but I had to be careful not to accidentally bend the mesh. This is what it looked like once the grill was removed from the frame. |
 |
| The photo below shows how thin the profile of the mesh is |
.jpg) |
| Below the "leading" in millimetres |
.jpg) |
| and in inches |
.jpg)
.jpg)
NO SOLDERING REQUIRED-
I laid the window frame over the mesh to test it out
.jpg)
.jpg)
Once I was satisfied that it would work,
I cut out 3 separate sections of leading for each panel using tin snips and laid them between the wood strips.
To hold them in place
I used a tiny bit of Fabri-Tac around the edges of the metal to prevent them from shifting as I continued to build up the wood trims around them.

.jpg) |
| and ANOTHER TEST I continued to build up the wood panels AROUND and OVER the leading from the inside of the window, then I repeated the entire process again with a second layer of metal and trims for the outside of the window. I know... Sounds like a weird way to do it but I'm not a great builder, so I do what works for ME. |
.jpg)
.jpg) |
| Once the window panels on the inside were completed, I BRUSHED over the leading and the clear plastic with a very THIN coat of UV RESIN |
 |
| I USED A BRUSH having learned the hard way with the first set of windows that pouring on the resin makes the glass way too thick and uneven. unless of course, that that's the look you want |
 |
| I tested the window once again once the interior glazing was done. |
.jpg) |
| For the exterior side of the window I had to make sure that the grills lined up with the interior leading on all 3 panels then I began building up the wood trims over them too. When the exterior trims were completed I again brushed over the metal with UV Resin- curing each panel one at a time under the UV lamp. I'm still debating on whether I should randomly tint some of the diamond panes with a colour to imitate stained glass 🤔 Knowing me, I'd wreck it and then be mad at myself forever and/or have to make ANOTHER set.... Moving on... |
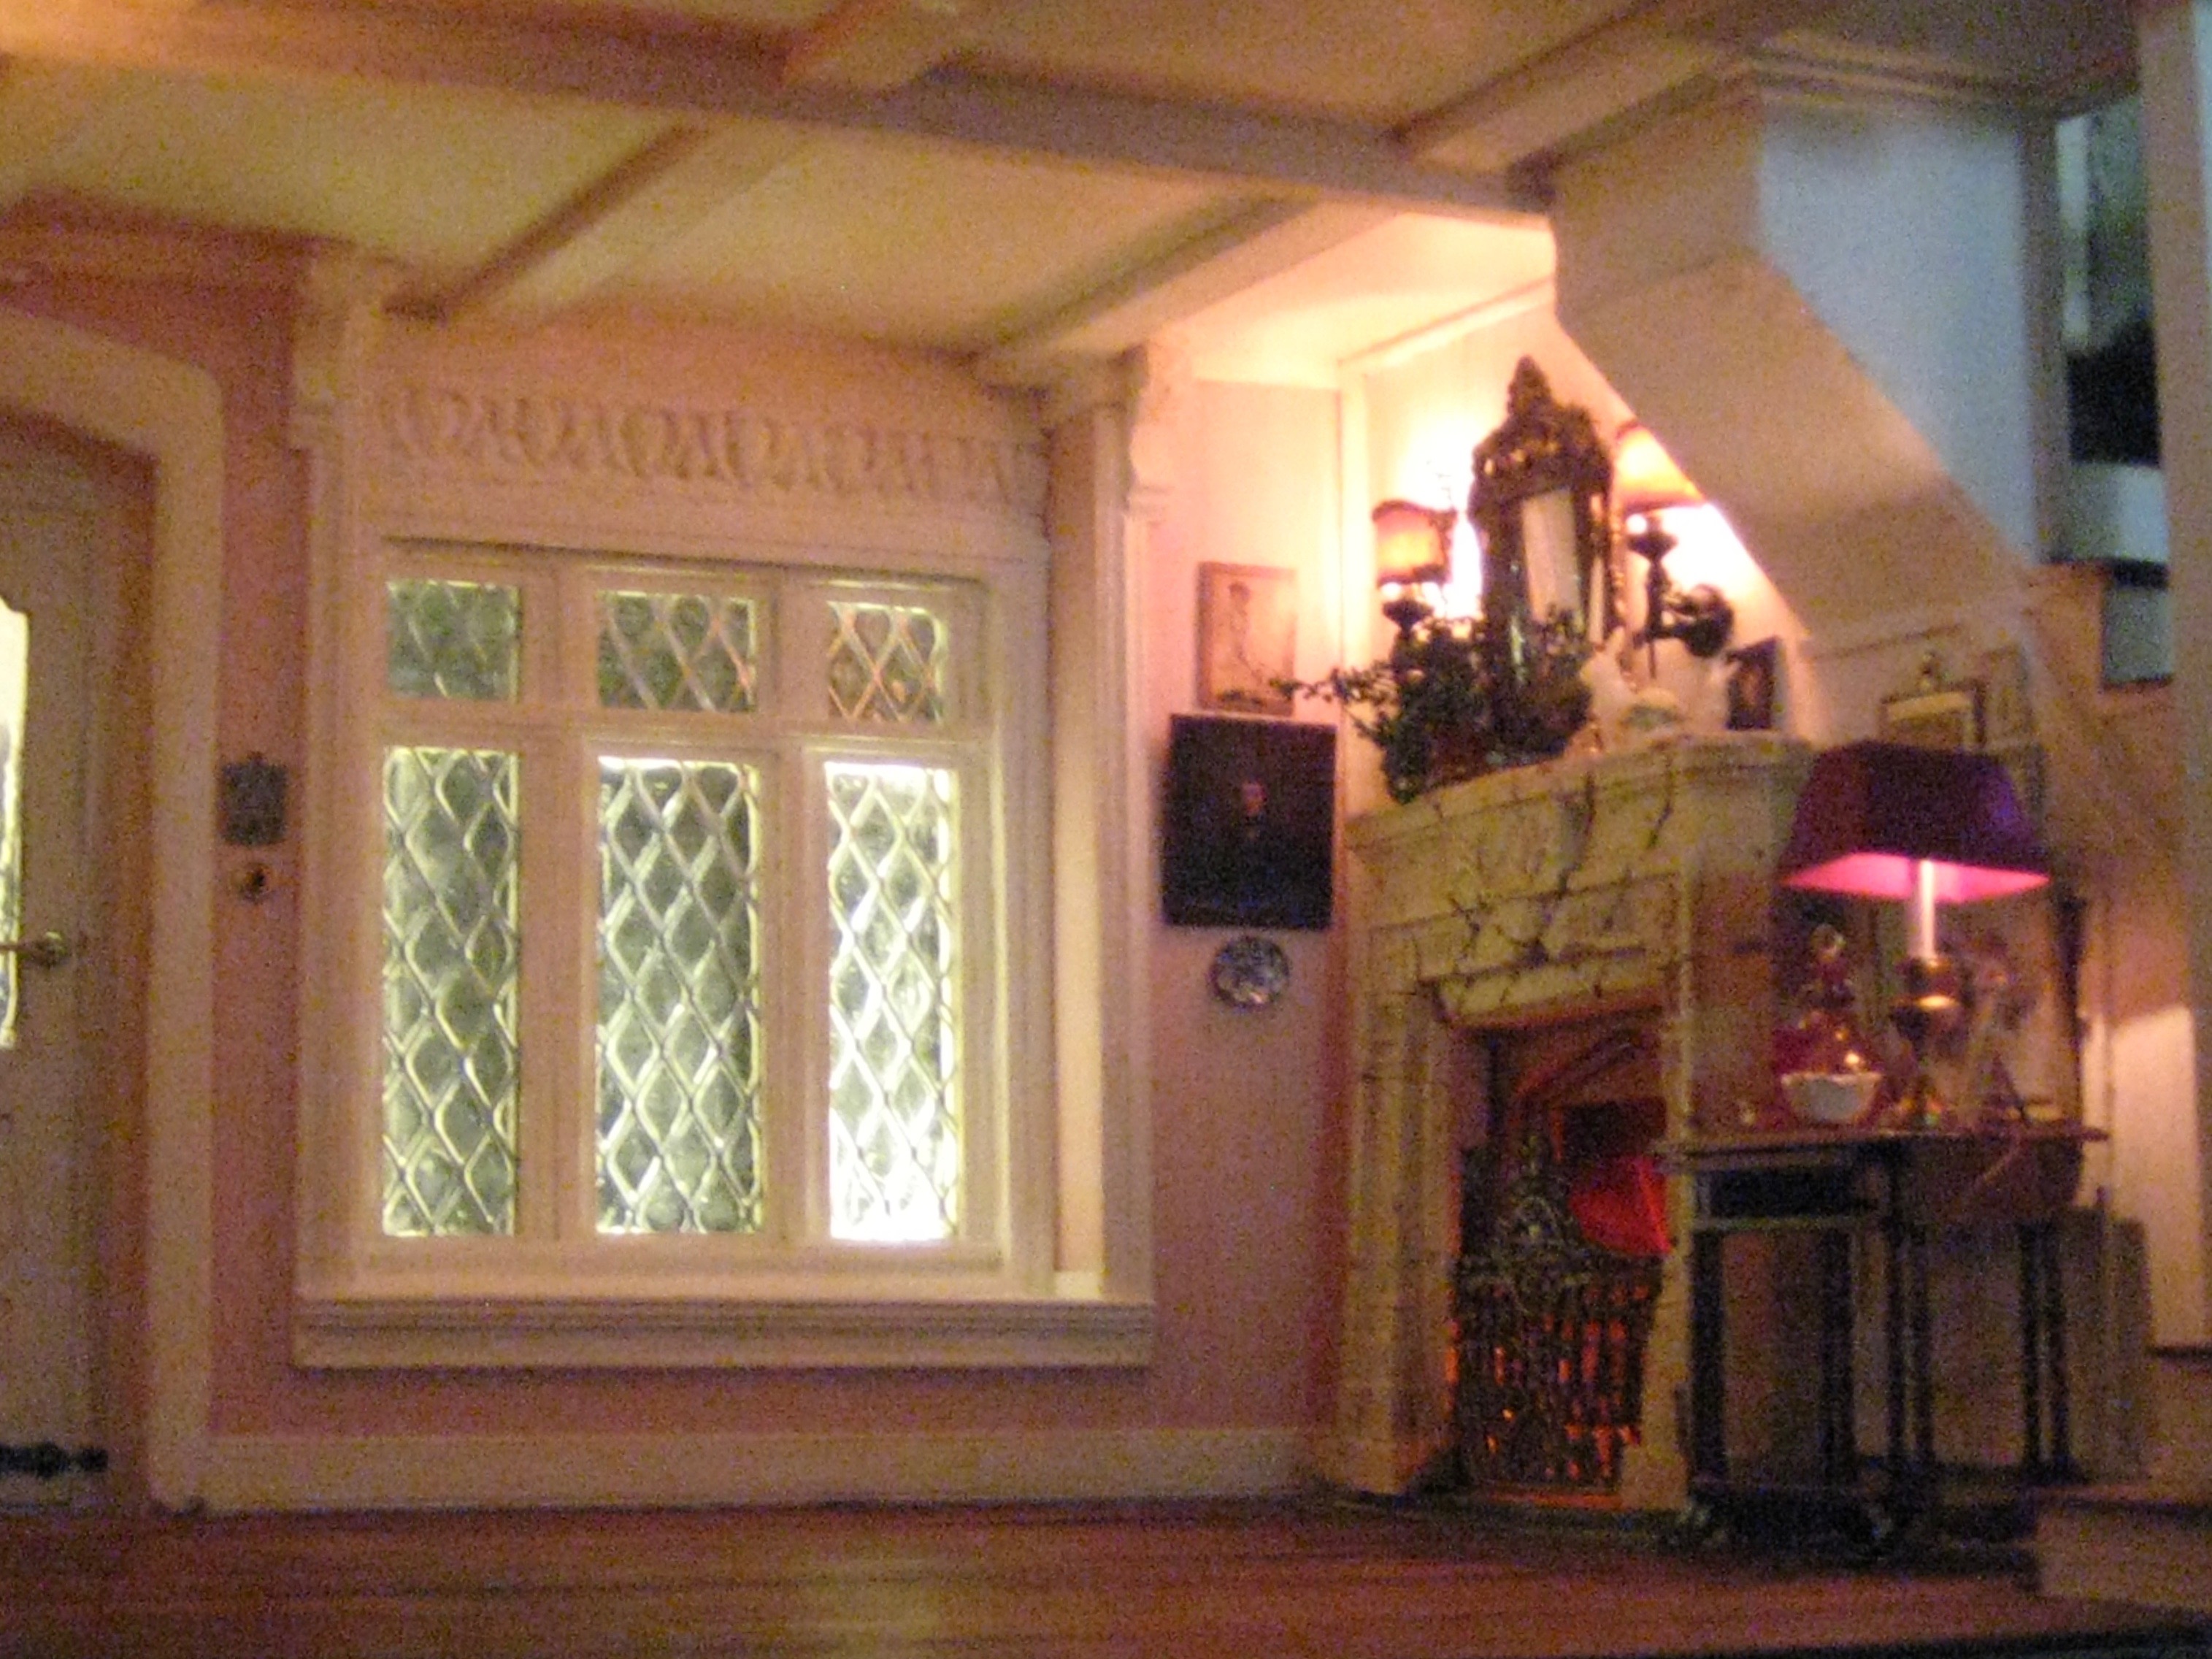
I installed the new window.
As you can see,
this dollhouse is in desperate need of a repainting
which I shall do LATER.
For me I start with the interior and develop the character of the owner.
Later, (much later) I'll work on the exterior after I've established the history of the house
and its current occupant-
kinda backwards to the norm but that's how I like to do it.
.jpg) |
|
The window in situ fyi I made these drapes for Villa Leone but I swapped them out with some fabulous fabric which Jodi MY MINIATURE MADNESS had gifted me with instead. Initially they were place holders but then I decided to make them permanent. They're held in place with Museum wax and the stiffness of the fabric. The next thing on my TO DO LIST was unexpected. |
.jpg) |
| Above the window bump-out was a connecting strip of the pink wallpaper I used in the rest of the room. But now with the larger leading the window looked proportionally small. My solution was to beef up the window surround and make it look more imposing! |
.jpg) |
|
I used an air dry clay casting from this silicone mold which I'd purchased on Amazon for some of the detailed stone carvings on VILLA LEONE  I cut a section of the Egg and Dart trim to fit above the window and glued it in place. I LIKED IT! I felt it gave the window more PRESENCE and the needed visual weight so I went with it. I removed the narrow strip of pink wallpaper and filled the void with more wood trims above the egg and dart moulding, and then painted everything white. |
.jpg) |
| THINGS ARE LOOKING UP! 😎 |
.jpg) |
| More wood trims were added around the parameters of the window until I was satisfied that the window could visually hold its own. I may add some black hardware to 2 of the side panels to suggest that the window are operational, but for now I'm calling them done! |
THE FIREPLACE
.jpg) |
| As I think I mentioned in Part One, this fireplace was formerly a tea-light holder which I found at the thrift store for a few dollars: I LOVE the Size of it! It had a thick, heavy duty resin hearth which I sawed off with a hacksaw- easier said than done Let me tell you guys sawing resin by hand is labour intensive! 💪 The metal grate is original to the fireplace. |
.jpg) |
| Before I forget to tell you- the little blue and white dish on the wall |
is by artisan Sue Sherrill
an Ebay purchase
but the pictures on the wall
are magazine cutouts
which I pasted onto heavy card and hung with a wire and/or BlueTac
The majority of artwork in the living room,
as well as in the bedroom are mounted onto card-stock which I've edged
with complimentary wood stain furniture markers.
or a matching felt pen.
THE MANTLE
Once I'd decided that I wanted a green plant on the mantle, I quickly made one using some dried green plant materials from my stash.
But then, as usual,
I changed my mind and decided to replace it with something different.
Since I specifically wanted an overgrown ivy, I decided to make one myself
and have it crawl and drape the way I wanted it to.
.jpg)
I made the ivy plant on the mantle using multi-twists of fine copper wire which I shaped then painted.
Once the stems were dry,
I glued on
tiny ivy leaf paper punch outs
gluing them onto the stems with
white glue and super glue.
When all was set,
I brushed over the stems and the leaves with a thin mix of wood glue and water.
The stems were planted into a square plastic
spray nozzle which I'd painted and glazed with UV resin.
I filled the vase with brown plasticine
to hold the ivy in place.
.jpg)
.jpg)
fyi
Below is a photo of the previous dried plant material
for comparison
.jpg) | |||
The wall sconces were fortuitous purchased from SP MINIATURES originally intended for Villa Leone however, they didn't work for the Villa so on a whim, I tried them out here and THEY WERE PERFECT!
The over-mantle mirror is one I've had for AGES (1970's)!
It's a heavy metal casting which use to have a print of a Old Masters painting. I repainted and aged the metal frame and replaced the print with an old compact mirror. |
.jpg)
.jpg)
.jpg)
Also on the mantle, are a brass candlestick; a playing card stud earring used as free-standing picture frame; another magazine cutout; a tiny Capodimonte china ornament; and 2 white rabbits from the ebay store of
which I painted with clear UV resin.
The third rabbit from this set, sits on top of the Secretary.
.jpg)
.jpg) |
| On the left side of the fireplace wall is a fimo cornucopia sculpture which FATIMA of BEAUXMINIS gave me more than a decade ago! It looks like Murano Glass and I've filled it with long fireplace matches: wood slivers shaved from a full-sized matchstick. To the right of the match holder is a nesting table, with a display of a glass pink drinks set by GLASSCRAFT. The wine bottle contains red printer ink. .jpg) There's also a small wooden camel which I glazed with UV resin and a delicate china bowl by Teresa Welch and a photograph in a brass frame; all of which is illuminated by a brass lamp sporting a burgundy shade purchased from an online miniature show. .jpg) 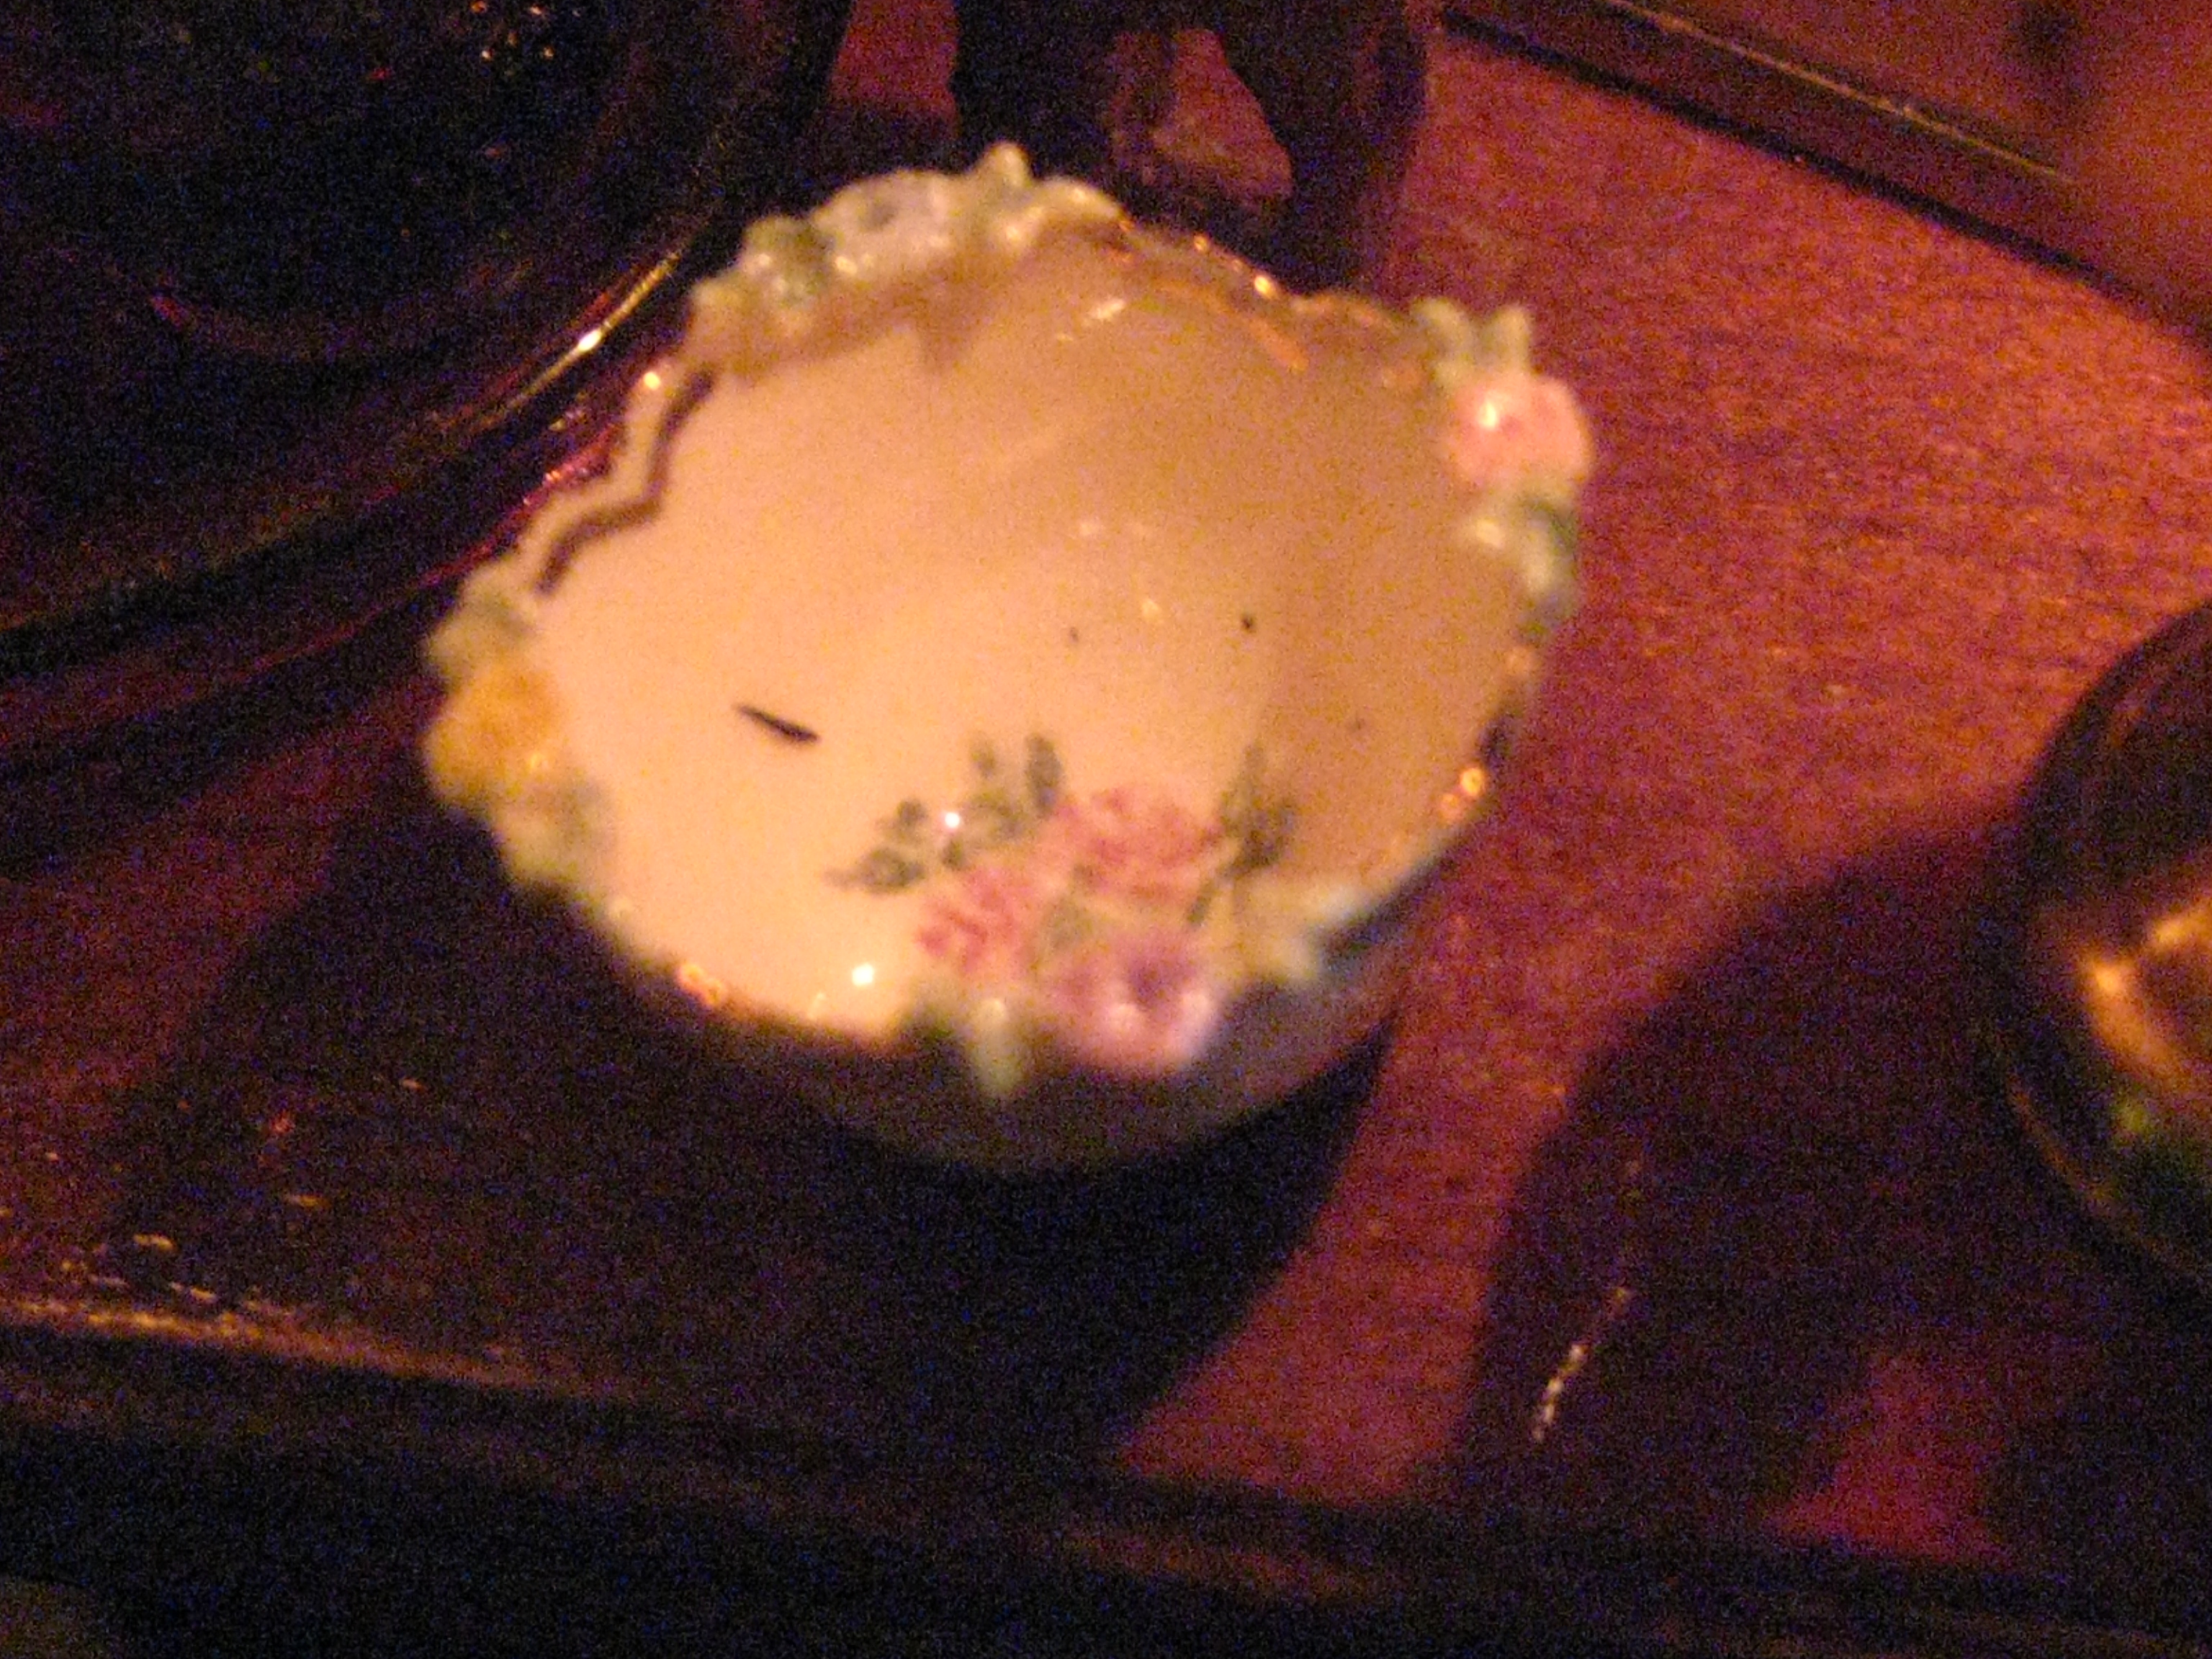 |
.jpg) | |||
|
The pink glass display and the pink roses in the painting appear to have been made for each other! .jpg) The TREASURED painting
was a gift to me from Cathrine Buron ( Ninette & co.) which she painted specifically for #43 GREEN DOLPHIN STREET however, I think I've found a better home for it here in The Dower House! Thank You again Catherine! 💖
|
.jpg)
.jpg)
.jpg)


.jpg) |
|
The oriental carpet was just one of at least 6 identical mini carpets woven into a LONG LENGTH of GORGEOUS Thai silk which I was LOATHE 😣 to cut up although eventually I did. I glued on a backing using FABRI-TAC to keep the rug from fraying. .jpg) The carpet repeats the rich golden yellow of the window curtains. On the floor under the arm chair is "Churchill" the Dowager's new bulldog pup. He's all tuckered out from playing with the Union Jack rubber ball (a bead) lying next to him. Unfortunately his maker who is a VERY TALENTED Russian artisan is currently off line right now, otherwise I'd be able to share her Etsy link but I'm hoping that she'll soon be up and running again because as you can tell, she makes Truly Wonderful miniature animals with lots of expression in their poses. .jpg) |
.jpg)
.jpg) |
In the photo below you'll see the VERY NARROW flight of stairs leading up to THE BEDROOM which I'd just begun working on during the time I was writing this post. I've since finished the hall walls and most of the stairs themselves- the 2 Windows in the stairwell are yet to be installed.  I've eliminated the previous wooden handrail but I at one point I was seriously considering installing a ROPE-GRIP However, now that I've finished the stairwell I'll probably NOT do it since getting my big hand in that narrow space would make the job awkward and difficult. |
.jpg)
Initially my plan was to use ALL of the available wall-space in the Living Room
to showcase a number of the Dowager's prized pieces of
miniature blue and white china.
But
as the room began to fill up with other things,
the only wall left for a china display was the left one.
However
the large secretary in the middle of the wall
reduced the space even further to
the area above the desk
and the sliver of space on either side of it.
I needed to make the most of it!
.jpg) |
the BLUE AND WHITE CHINA |
.jpg) |
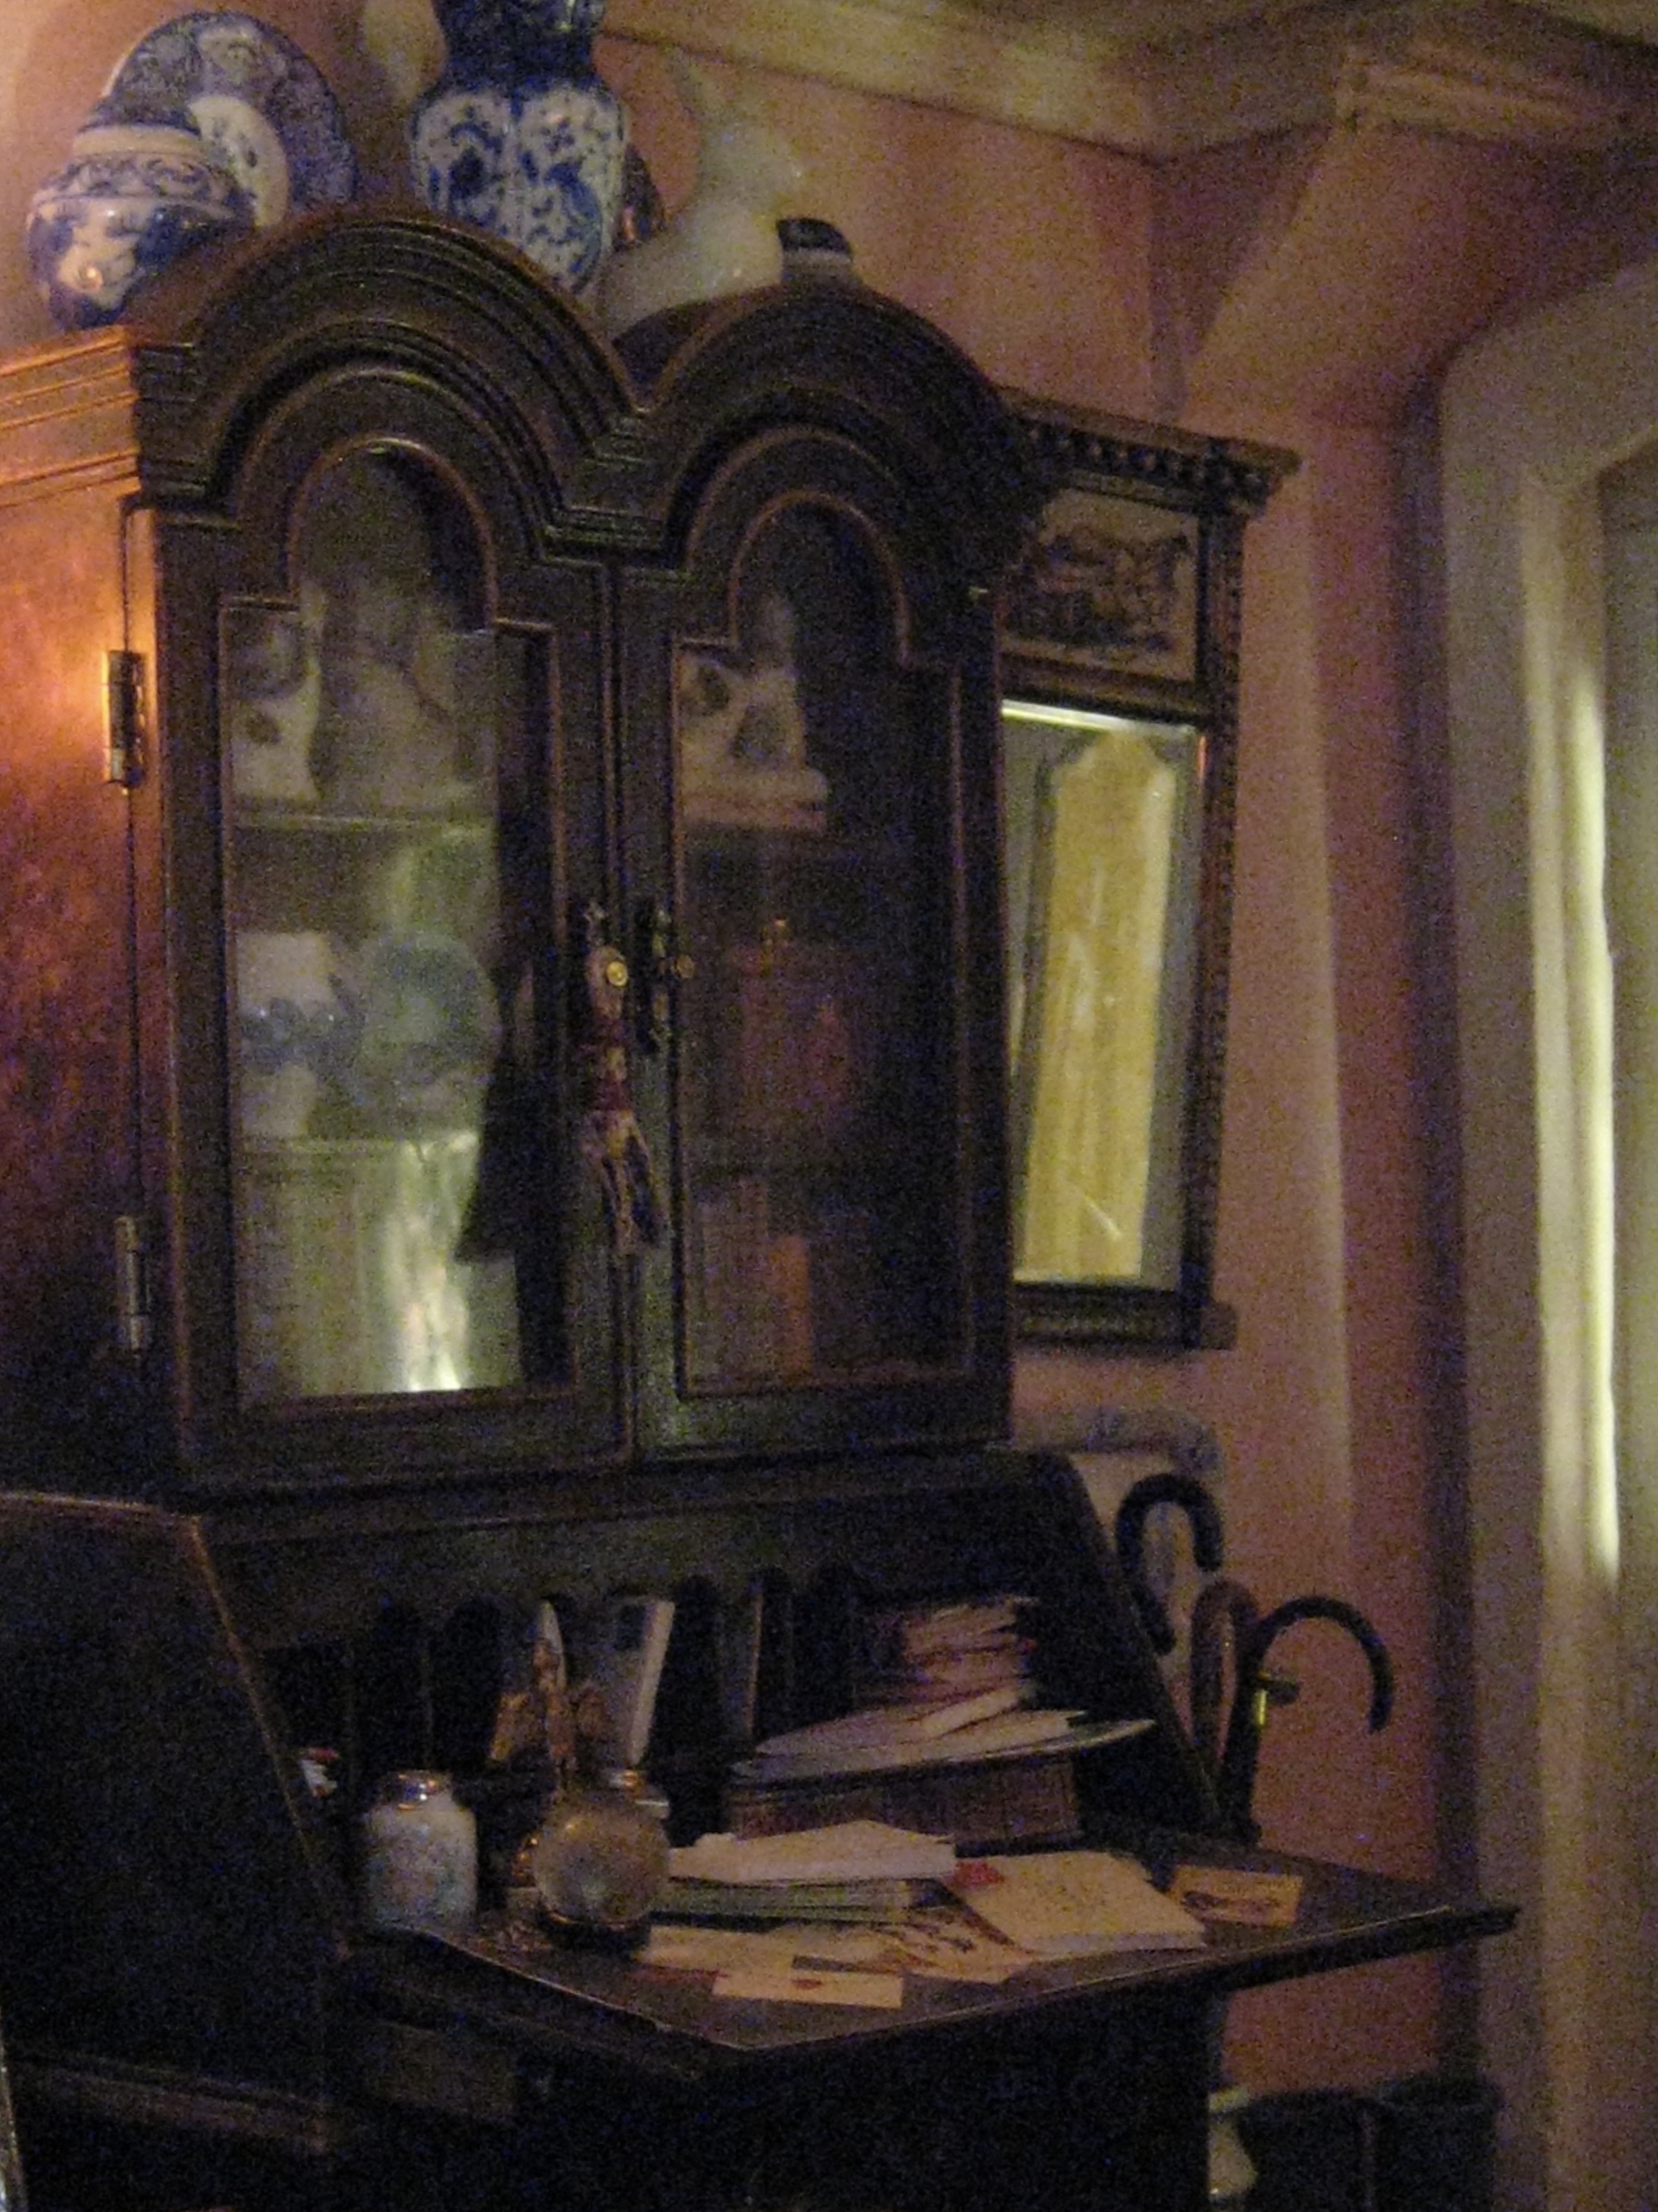
| The top of the desk proved to be the ideal place to feature the taller pieces in my collection |
 | |||||||||||
.jpg) THE AMAZINGLY TALENTED JONQUIL NORRIE of Latchkey and Jonquil had sent me a parcel for Christmas which contained (among other small wonders) a tall blue and white vase which she'd hand painted, herself! 💖 I LOVE IT!!! I placed it Centre Stage on top of the secretary flanked by a couple of plates from TWELVE TIMES MORE TEENY alongside a couple of ginger jars I'd found on Etsy and a large white rabbit from Giulias Miniatures The Secretary itself, is a vintage resin plastic piece from The Gobel Butterfly Collection which I'd painted a long, long time ago using a faux bois technique to get it to resemble a dark burl.
is "Vintage" JEAN DAY. Back in the day ( no pun intended) Jean used to make Wonderful little porcelain dolls and dollhouse dolls and I'm proud to say that I have quite a few of them some of which you can see in my blog back-post of TOYS TOYS TOYS
 .jpg) The original seat cushion lifts out of the frame, so I recovered it using a section of a man's Italian silk tie depicting a circus elephant- it's not what's typically "English" but it fits! Back to the desk...
|


.jpg)
 |
| British mail purchased on Ebay |

 |
| The small scalloped dish above the light fixture was made by U.K. Artisan Nikki Naki Nu and the English mirror to the right of the desk was purchased from SP Miniatures another favourite resource of mine |
 |
| A growing collection of canes and umbrellas are placed next to the desk alongside a pair of muddy Hunter Wellies |
.jpg) |
| The canes and the brollies |
.jpg) |
| Mary Poppins parrot umbrella from Miniature Crush on Etsy |
.jpg) | |||
|
This lovely umbrella was made by Fatima of Beauxminis Sadly, I had to steal it out of #43 Green Dolphins Street whilst I wait for Fatima to make more of them. The Muddy Wellies
INTO THE HOME STRETCH Yes! I'm almost done😄 |
.jpg)
.jpg)

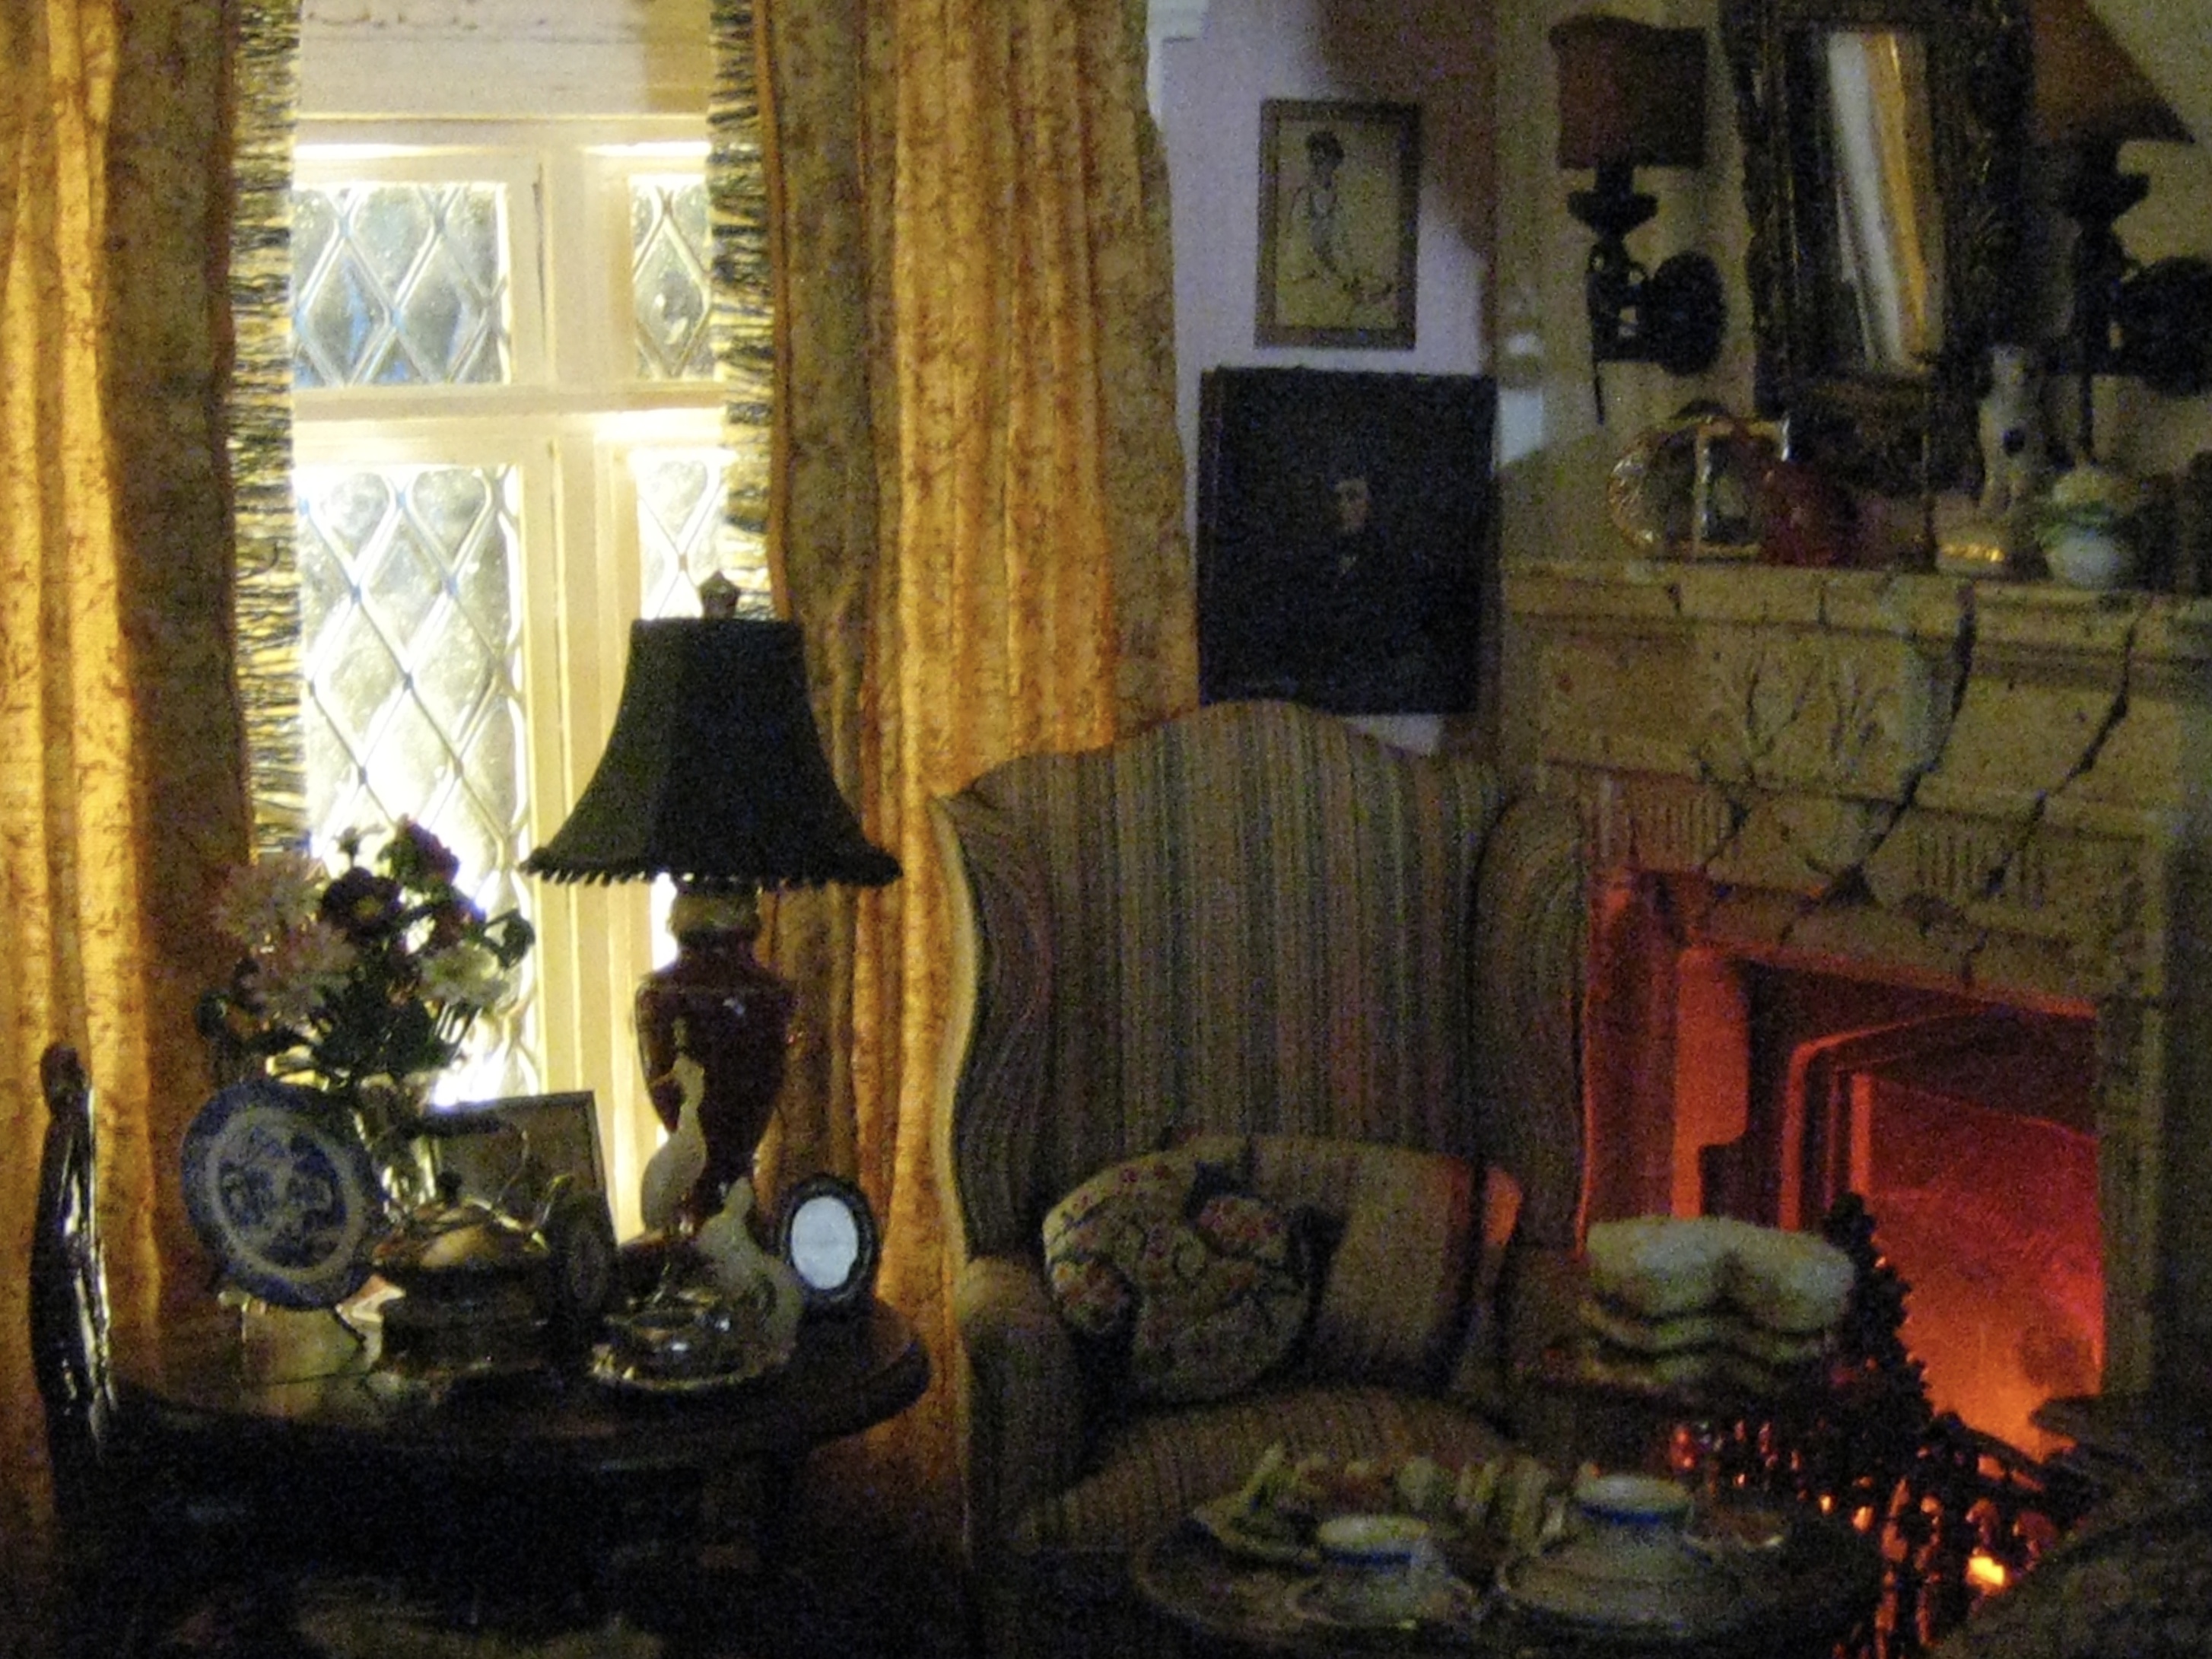
So having come full circle
we are back again at the front window.
In front of the window I have installed a wide arm chair
from a miniature furniture lot purchase-
It was already upholstered in a multi-stripe of light & dark stripes of pink, gold, beige,
and gradient blues
.jpg) |
|
I like the way it picks up the pink in the wallpaper but I also enjoy the contrast of it against the golden yellow drapes and the area rug. On the chair are two cushions One made for me a LONG time ago by my friend Pam Grant and the other cushion I made using the same fabric as those on the sofa.  |
.jpg) |
|
The table lamp is "non-working" ever since I accidentally broke off the wires. Even so- I already have enough illumination in this room and only required the presence of a lamp to dress this table, so"non-working" works fine! 😆 To make it work for this room, I painted it, glazed it with U V resin then I appliquéd it with gold nail decals. The shade is painted inside and out with silver nail polish and black chalk paint, after which, the bottom of the shade was edged with a fine black picot trim. |
The silhouette is another magazine cut out
mounted onto card-stock.
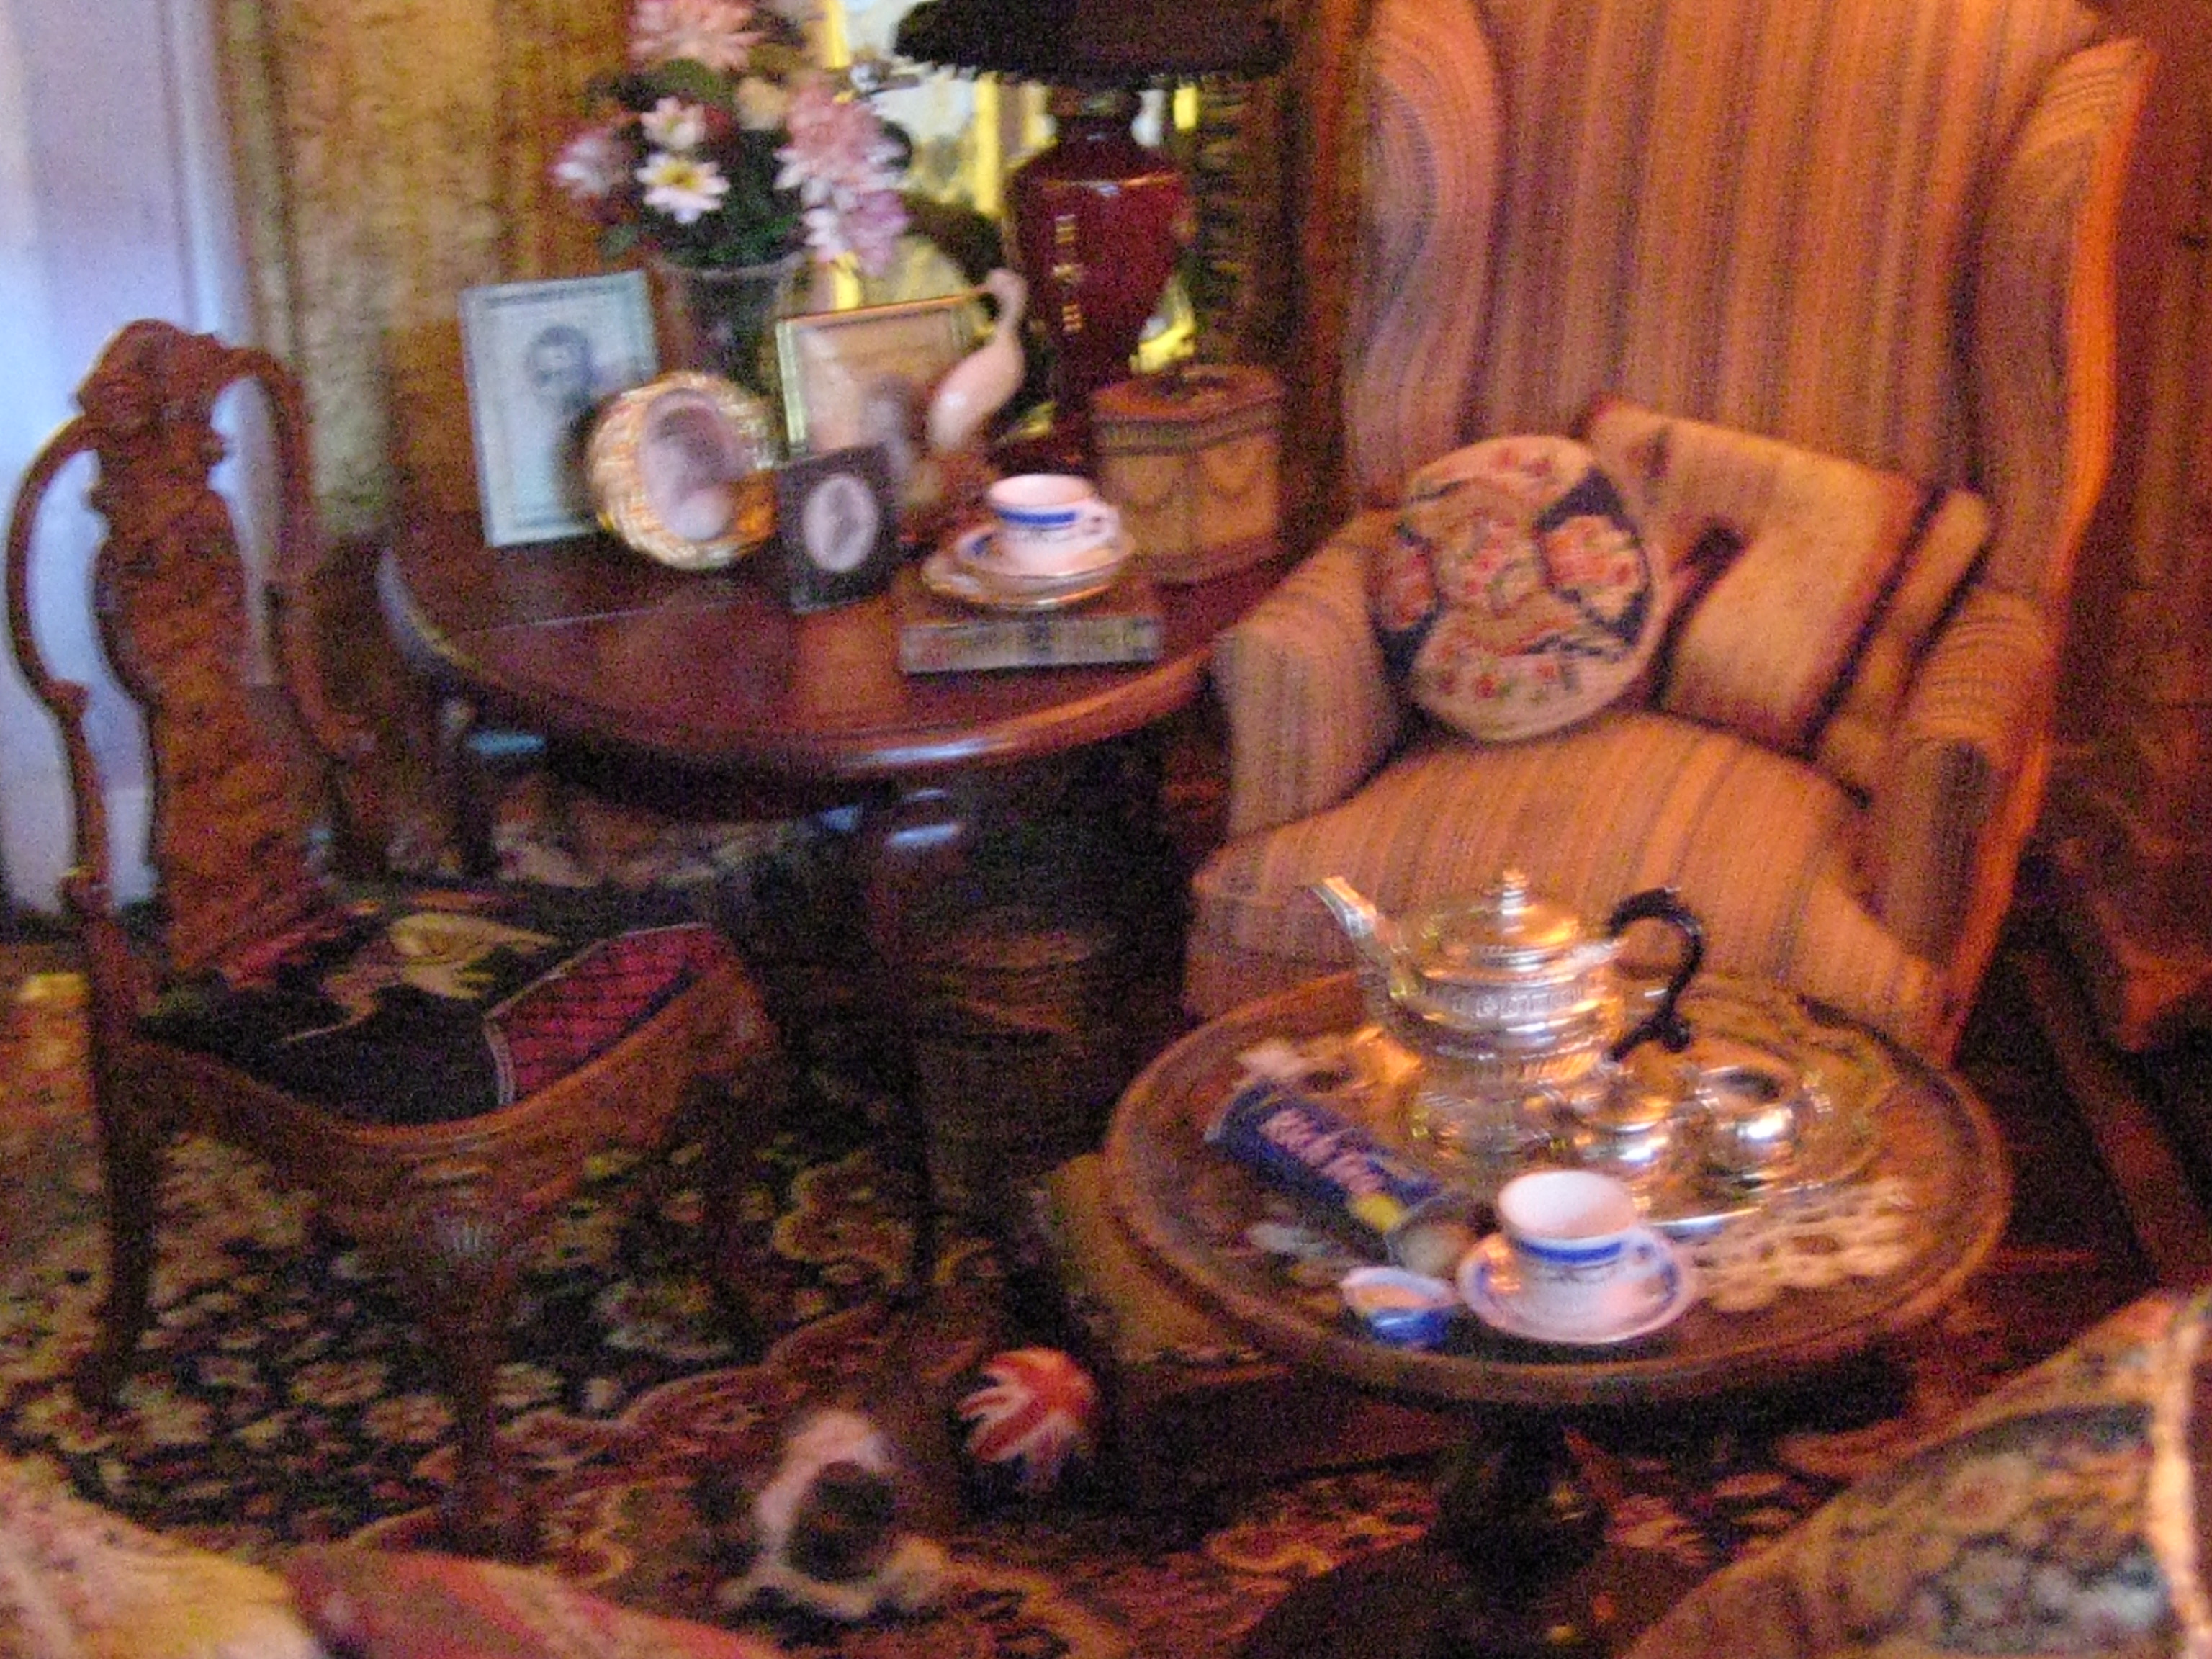
The sterling silver cream and sugar on the silver tray
were all made by Don Henry.
The tray came from
and the silver sugar and cream I acquired from
.jpg) |
|
The Staffordshire china dog is the mate to one displayed in the secretary. The painted metal hunting dog was a lucky find inside a bag of thrift store junk. A blue and white Stokesay ware plate sits in front of a bouquet of white daisies, pink dahlias and burgundy peonies. Daisies made by me Peonies I made from a kit by The Miniature Garden Dahlias -Ebay |
.jpg)
.jpg)
The silver teapot is one of my
FAVOURITE THINGS
I can't remember where or when I bought it,
but what I liked about it
was its unique shape.
When it finally arrived in the post,
I was SMITTEN even more! 😍
It's hand-signed but the signature is so faint,
that it can only be deciphered via a jeweller's loop.
The knob on the lid and the carved handle are both made of (ebony?)wood.
There's also what looks like a teeny tiny hallmark
stamped in the metal
which is impossible to make out even with a loop.
Regardless of whether it is sterling silver or not,
the entire teapot with its curved spout and squat body is
Altogether LOVELY
.jpg)
SO there it is-
YOU'VE SEEN ALL THERE IS TO SEE!
SUCH A LONG POST😂
but I hope you've enjoyed the tour
and found it worth the wait!

.jpg)
 |
| the DOWER HOUSE LIVING ROOM is DONE! well actually there are still a few more tweaks which I need to complete so let's say it's 99.9% DONE!  Thank you everybody for you patience
AND
for sticking it out to-
|

THE END
before you go-
here's a teaser of the Dower House bedroom which I'm currently working on....
and I can hardly wait to show it to you-
IT WILL BE READY"...
very soon!😜

elizabeth