

These Easy Gluten-Free Rolls are made with simple ingredients for the softest, most delicious gluten-free dinner rolls you’ll ever taste! Easy to make, they’re perfect for serving with soups, stews, and more! Dairy-Free Option.
The Best Gluten-Free Rolls
There’s nothing that brings the family around the table faster than the aroma of freshly baked rolls, and this gluten-free recipe is the best you’ll ever taste! We may be a bit biased but we’ve run this recipe through multiple rounds of testing, and each time they’ve been loved by friends and family alike…even those who don’t eat gluten-free!
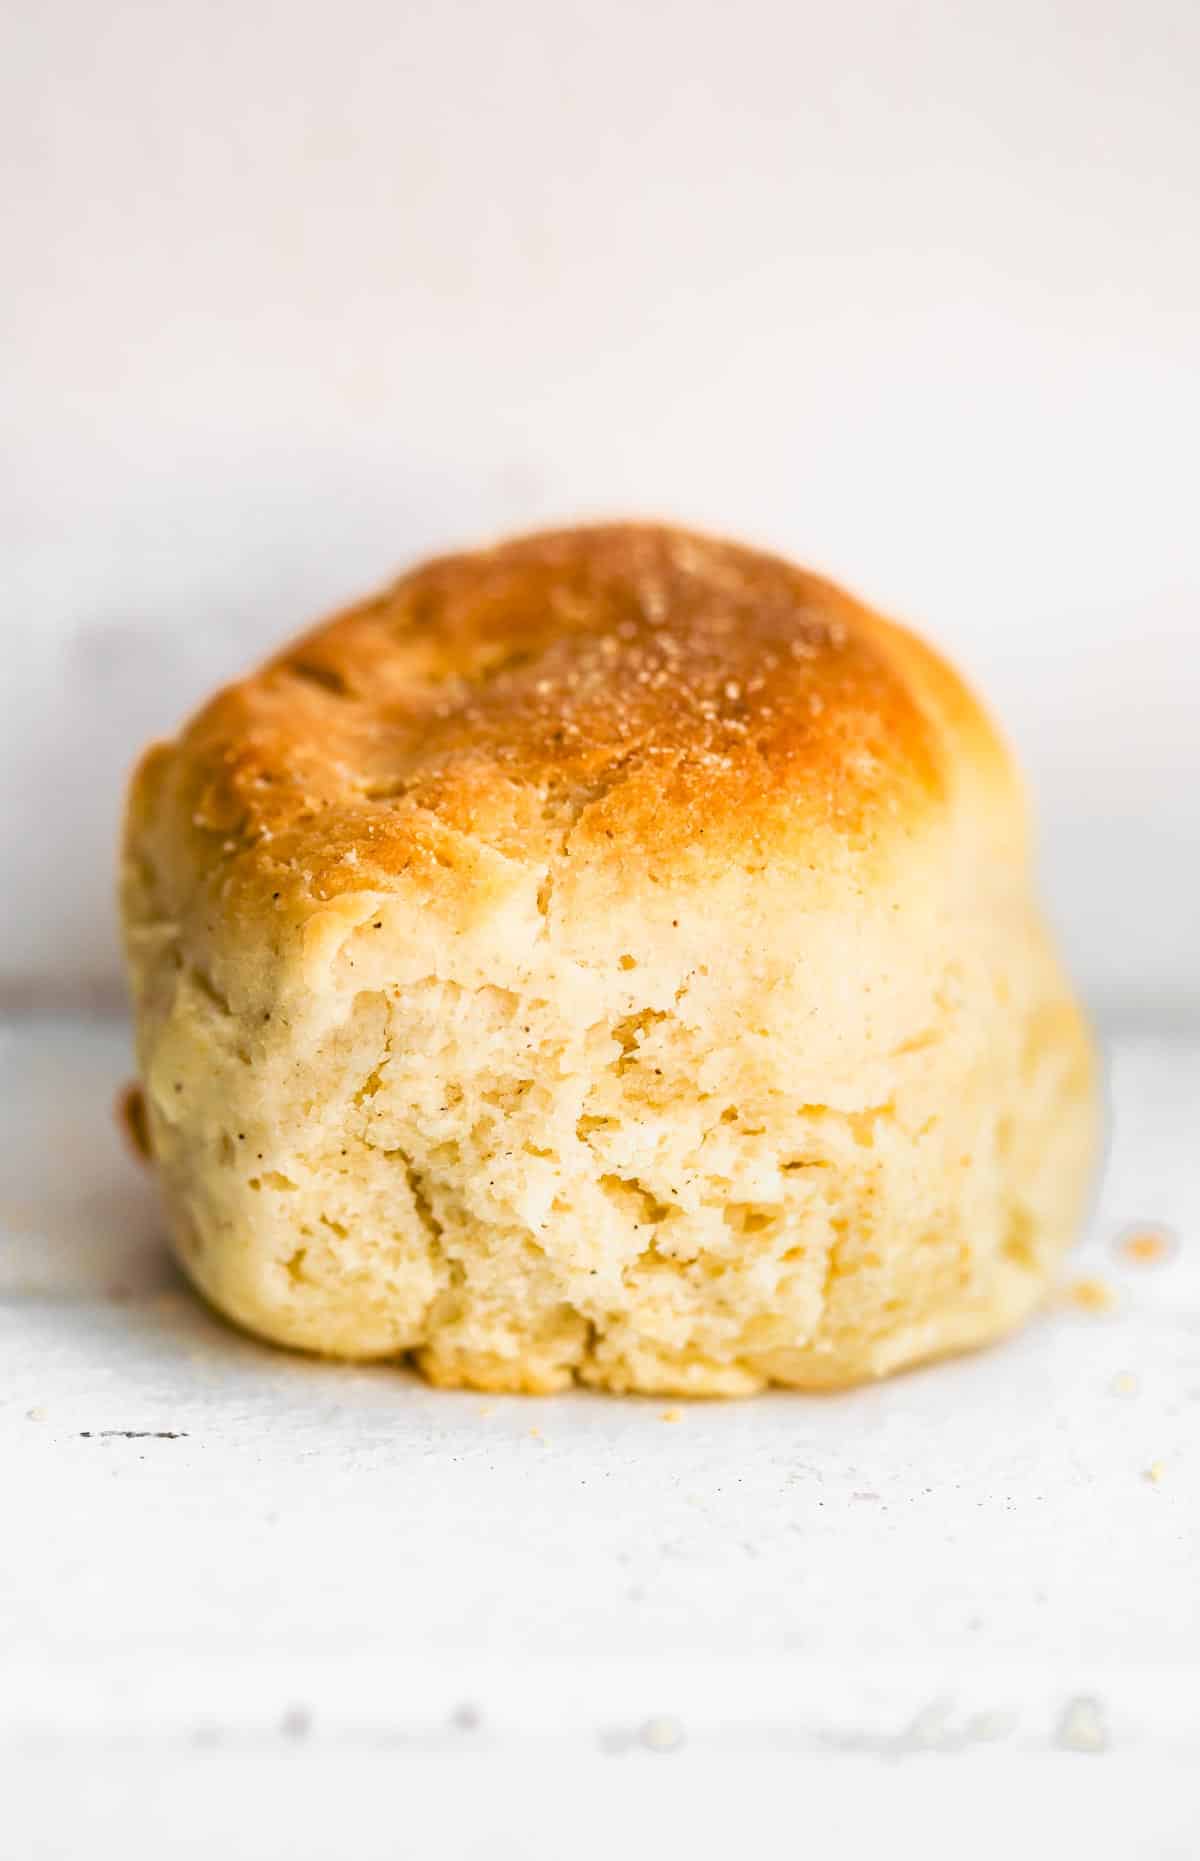
For good reason, too. These gluten-free dinner rolls are made with just a handful of ingredients that come together to yield soft, tender rolls. Baked to golden perfection, they’re sweet, irresistible, and the perfect addition to any meal like vegan broccoli cheese soup and tuna noodle casserole! In fact, you’re probably going to want to whip up a double batch, because they’re guaranteed to disappear fast.
Gluten-Free Ingredients You’ll Need
You won’t find any preservatives or strange ingredients in this gluten-free rolls recipe! We used simple, natural items to create the best texture and a slightly sweet taste. Here’s everything you’ll need:
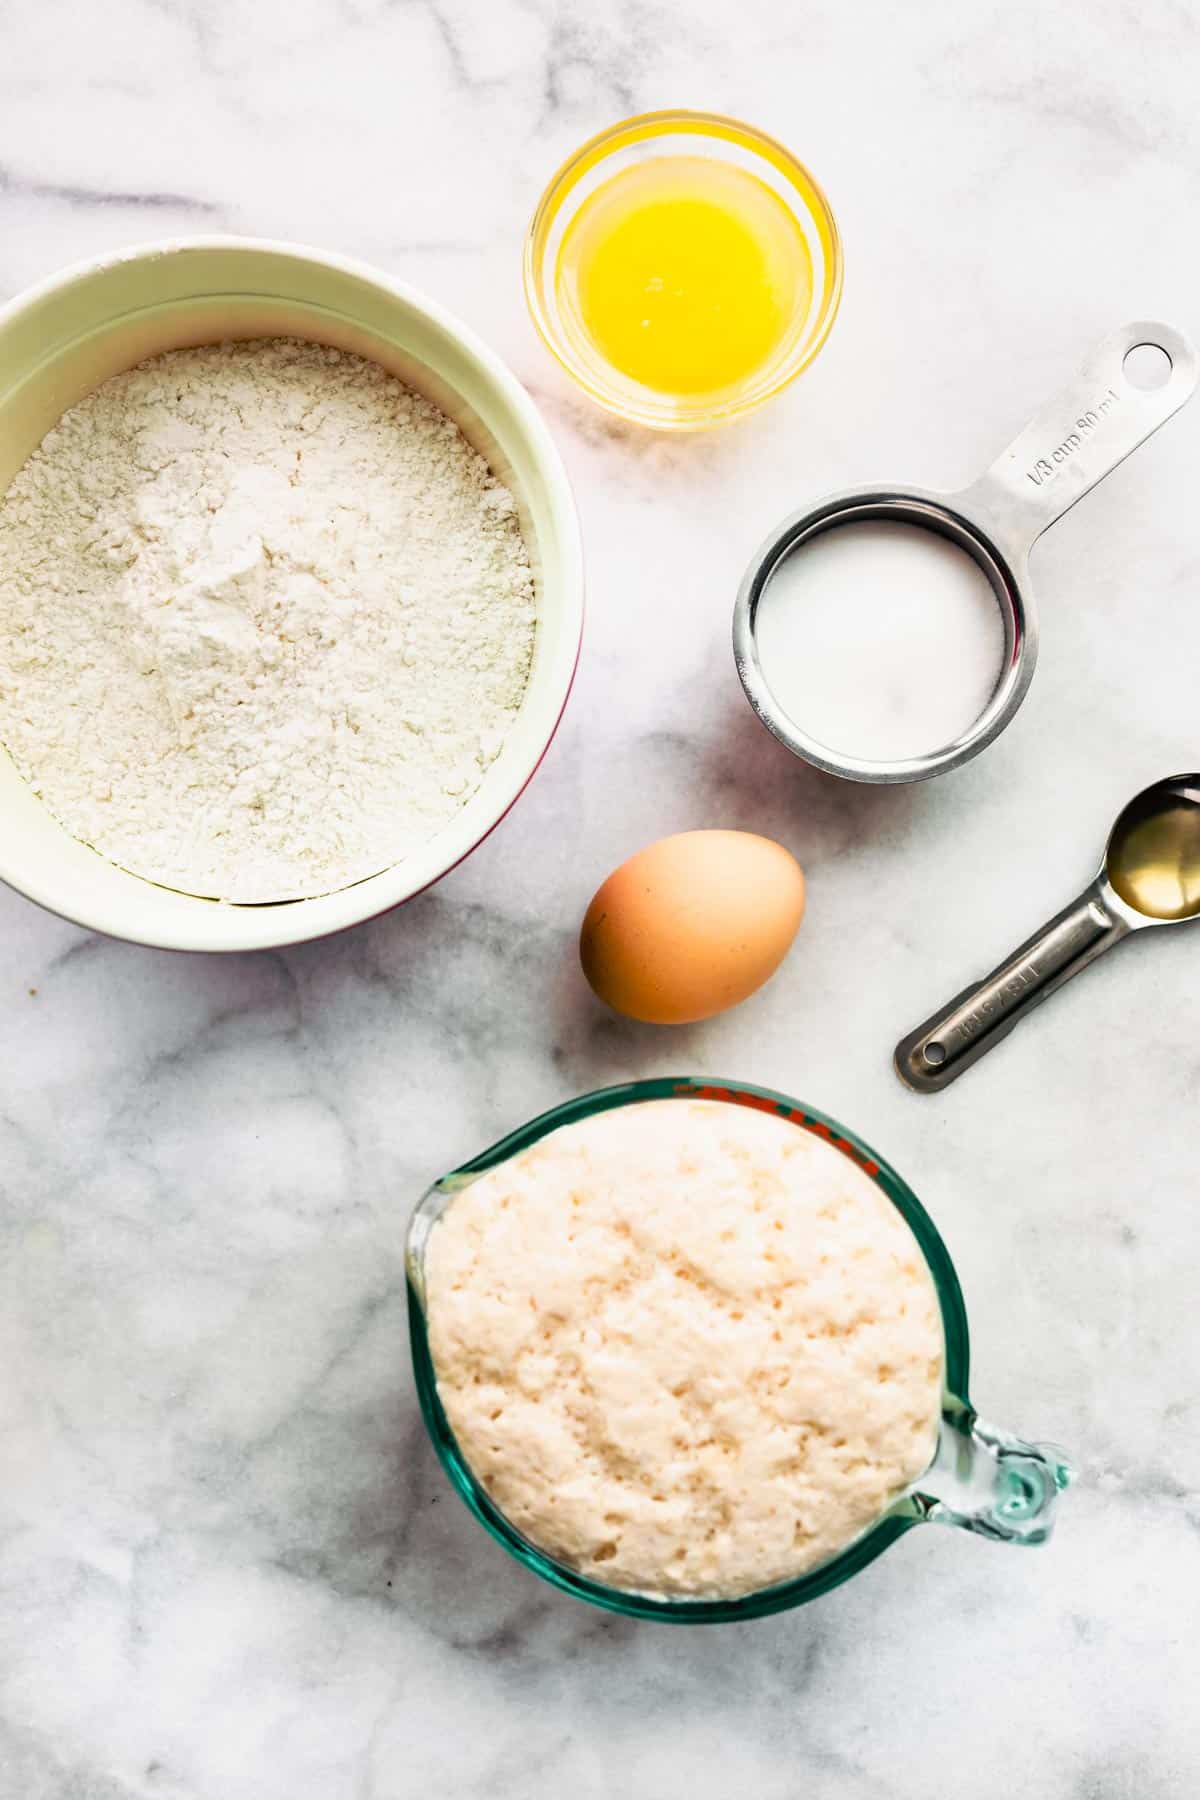
- Non-Dairy Milk – Any kind you like best will work. Just make sure it’s unflavored.
- Quick Rise (also known as Instant) Yeast – You can find this in packets in the baking section of most grocery stores.
- Sugar – In addition to providing a sweet flavor, sugar is included in many bread recipes to feed the yeast, resulting in faster rising, fluffy gluten-free rolls.
- Gluten-Free All-Purpose Flour Blend – For the best results, we recommend using a homemade blend of white rice flour, tapioca starch, potato starch, and sorghum flour. (See the recipe card below for measurements.) However, if preferred, a pre-made gluten-free all-purpose flour blend can be used instead. Just make sure it doesn’t contain xanthan gum! You’ll want to add that yourself.
- Xanthan Gum – Used to add structure and lock in moisture.
- Unsalted Butter or Coconut Oil – This creates a flakey texture and rich flavor.
- Egg – Provides structure to the rolls.
A Note About Flour
When it comes to making gluten-free rolls, the success you have is largely dependent on the flour you use. Don’t worry, though! We’re breaking down our top recommendations below.
Homemade Gluten-Free Flour Blend
For the best overall texture, we recommend preparing our homemade blend with a variety of gluten-free flours. Not only does it work incredibly well with this recipe, but it also enables you to have complete control of the amount of baking agents like baking powder and xanthan gum used. As a result, you can more easily manipulate the texture of your baked goods. We love a good pre-made mix, but nothing beats our homemade blend!
Gluten-Free All-Purpose Flour (withOUT Xanthan Gum)
The second best gluten-free flour mix is to use a pre-made gluten-free flour blend that does not include xanthan gum or other baking agents. That said, each pre-made mix will bake a little differently each time. We used Bob’s Redmill gluten-free all-purpose flour blend then added xanthan gum, and it turned out great! IMPORTANT – Pre-made mixes yield a different volume than our homemade flour blend using anywhere from 2 to 2 ½ cups instead of 3 cups when measuring 330-335 grams. They also bake a little quicker. So, be sure to keep an eye on your rolls as they bake, and see the recipe card below for details!
1:1 Gluten-Free All-Purpose Flour Blend (with Xanthan Gum or Other Baking Agents)
Due to not having control of the baking agents used, this option can be a little hit or miss meaning you might find a blend that works well and substitutes for the homemade blend easily. Or, it could be a miss and result in gluten-free rolls that are dense and not quite as fluffy. That said, you can definitely give it a go! Just be sure to omit the baking powder, and only add ¼ teaspoon or less of the xanthan gum if you do. Also, keep an eye on your oven as the baking times will vary based on the flour blend you use.
How to Make Gluten-Free Dinner Rolls…Easy As 1,2,3!
If you’ve previously been too intimidated to make your own gluten-free rolls, don’t be! We admit that it requires a bit of patience and several steps, but it’s easy to do.
- Proof the Yeast. Warm the milk in the microwave or on the stovetop until it reaches a temperature of 110° Fahrenheit. Add the yeast and sugar. Mix the ingredients together, and set them aside until the yeast becomes bubbly.
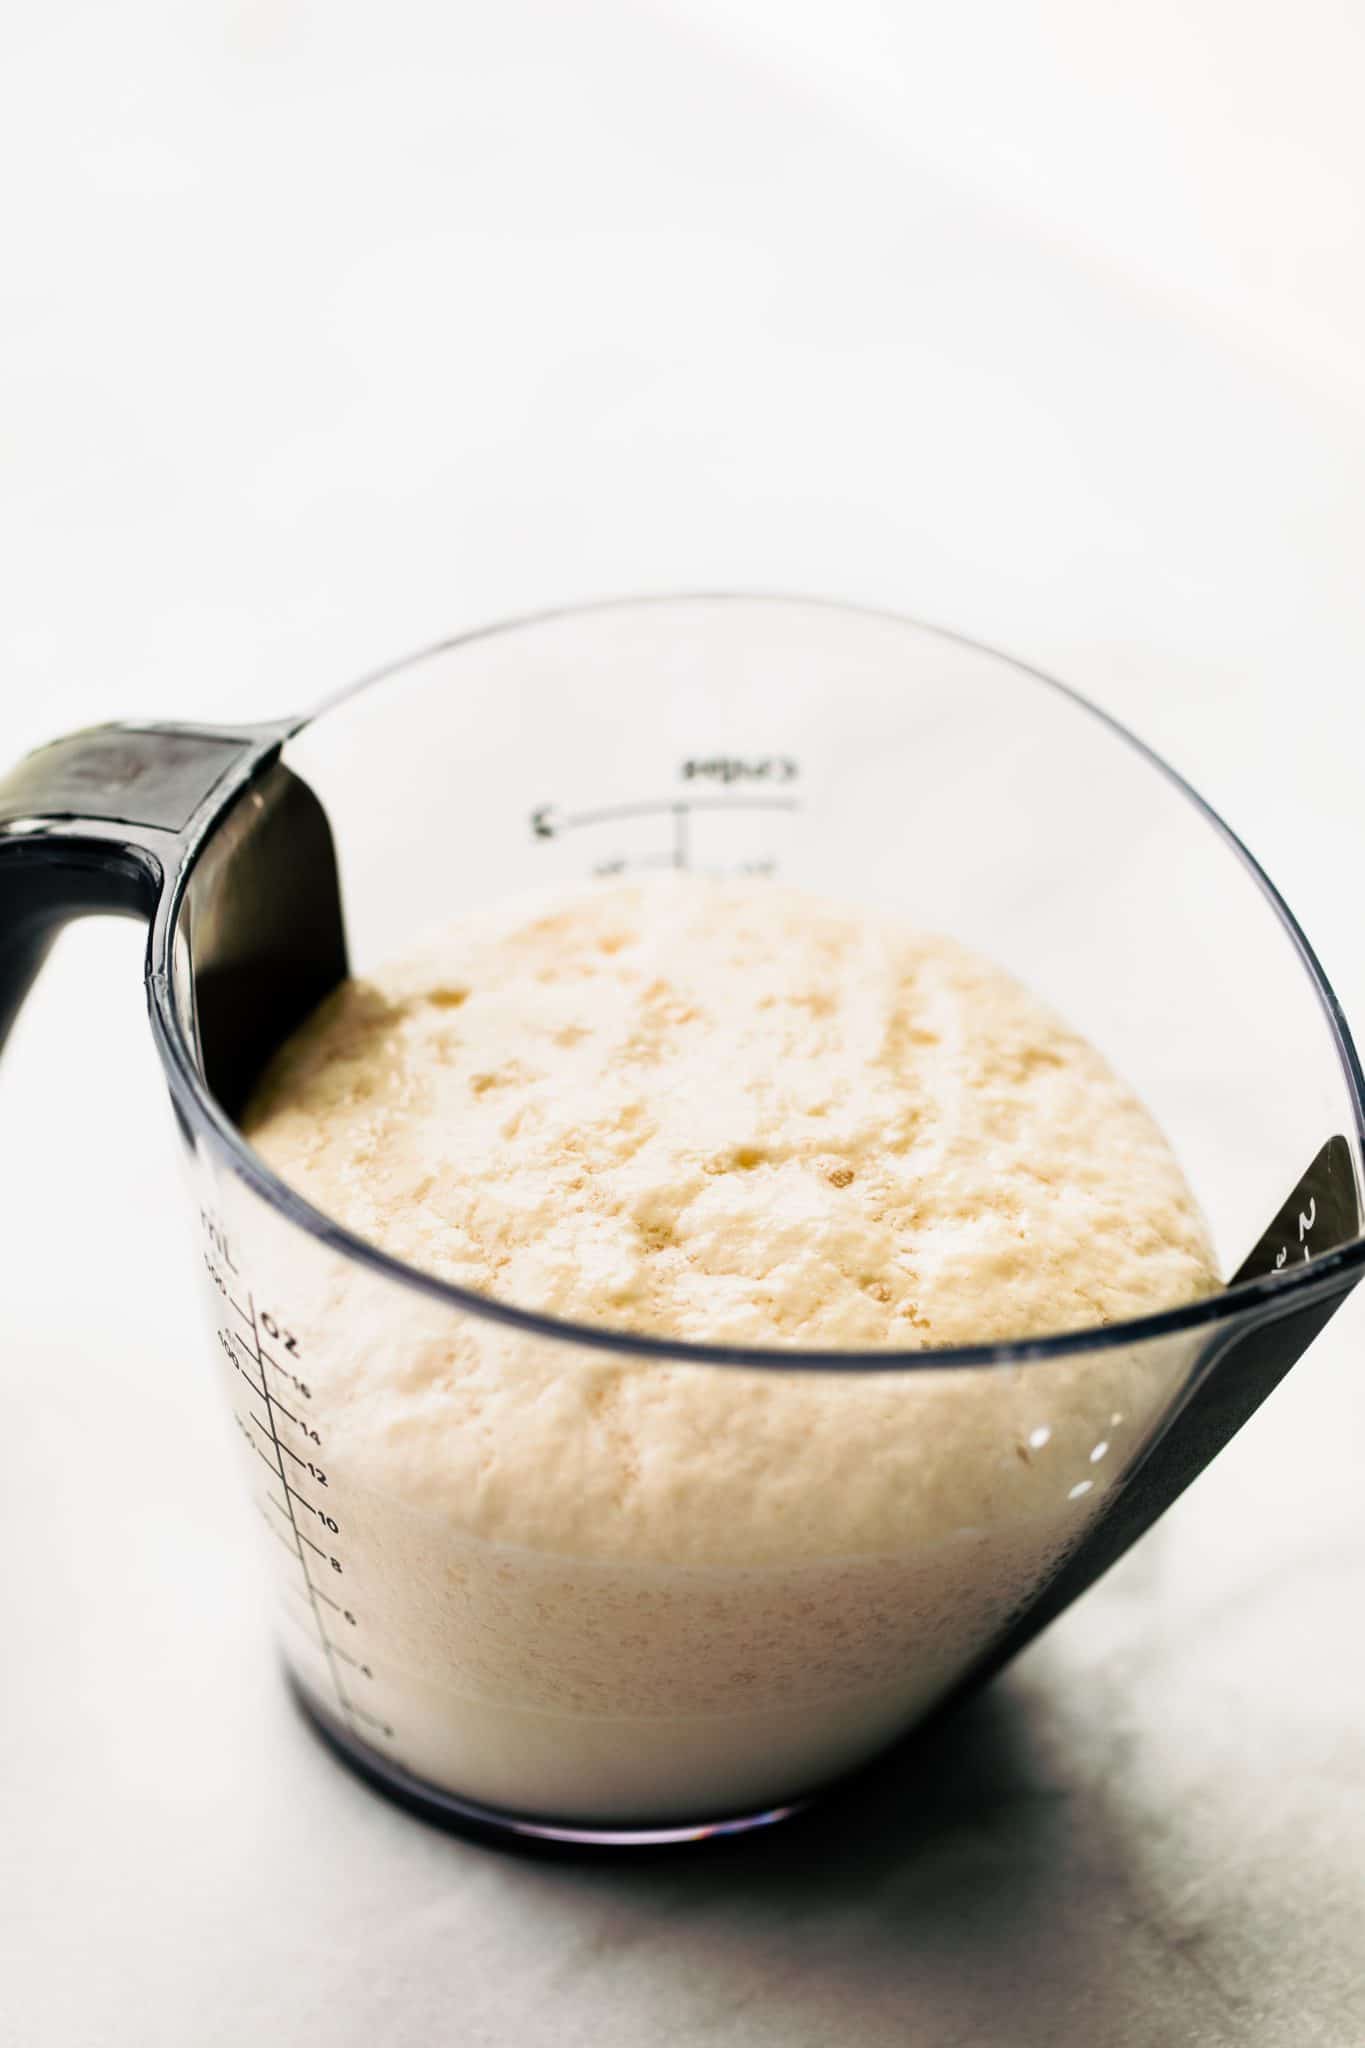
Pro-Tip: It may seem counterintuitive to proof the yeast that we’re using instant yeast, but trust us on this, okay? It helps create the soft, fluffy texture we’re looking to achieve!
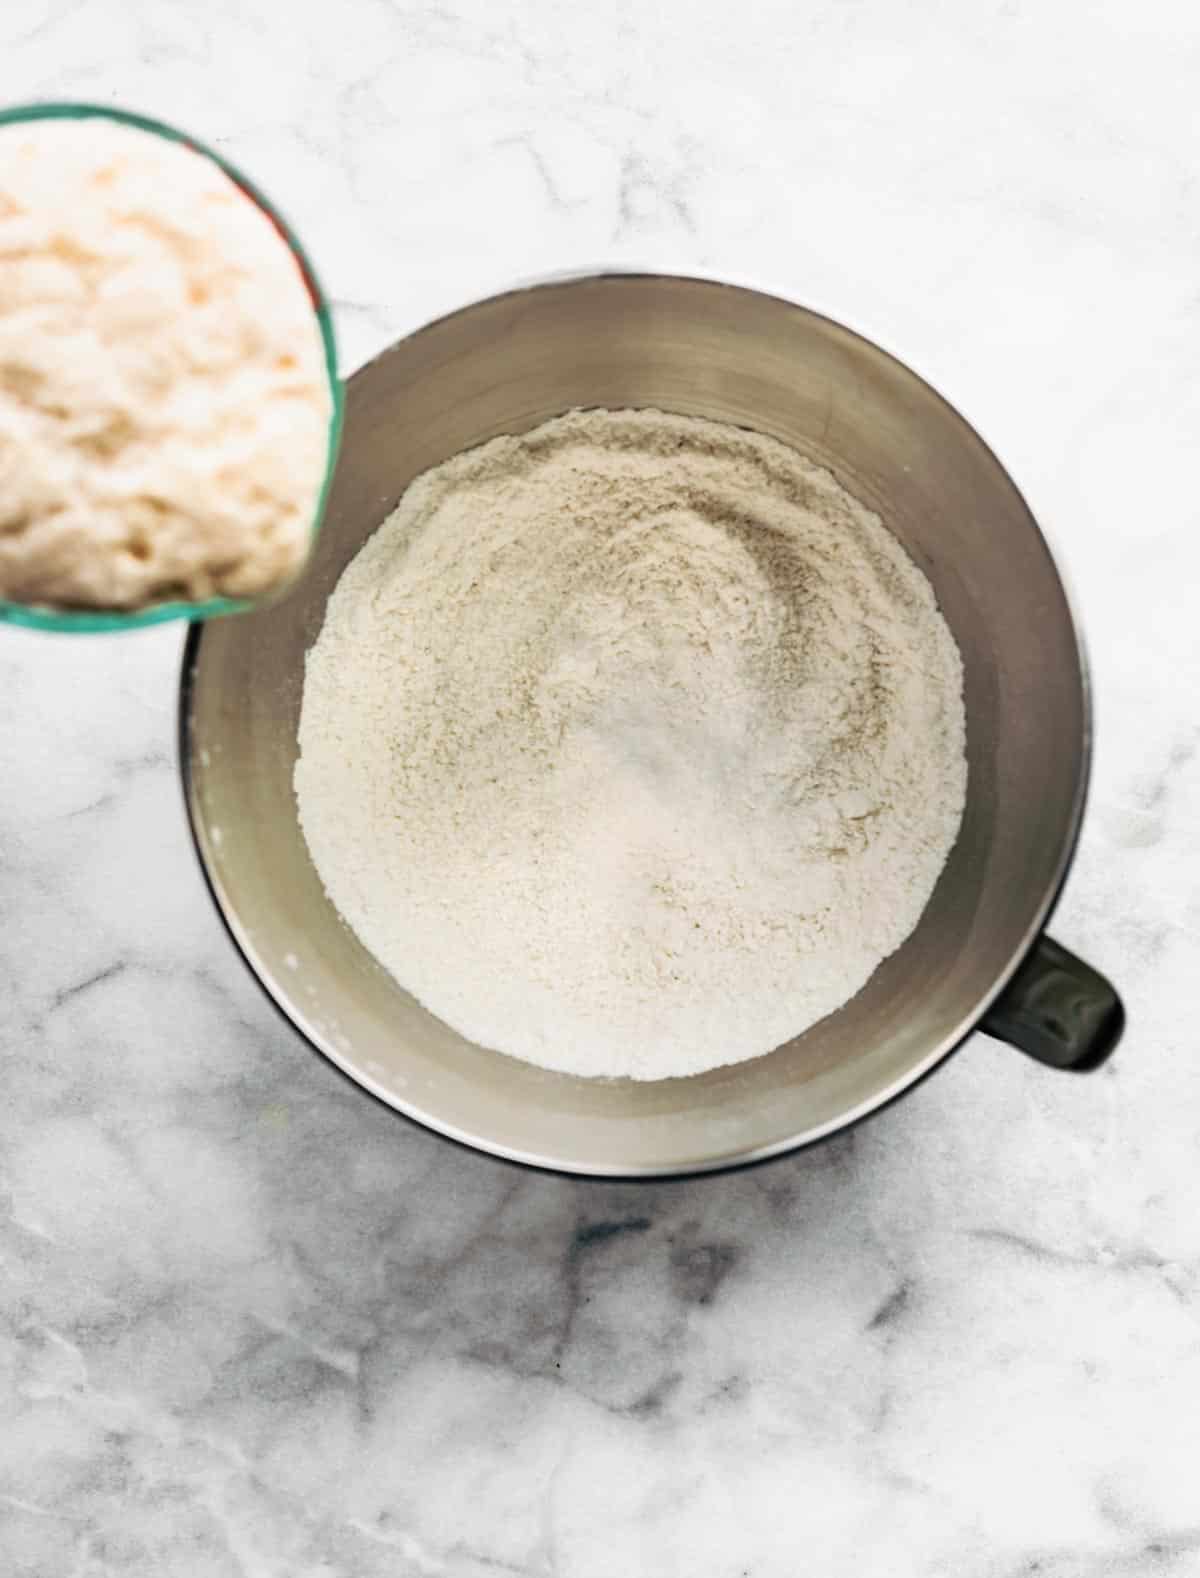
- Whisk. In the meantime, combine the gluten-free flour, xanthan gum, baking powder, sugar, and salt to the bowl of a stand mixer, and whisk to combine.
- Combine. Reduce the speed of the mixer to medium speed, and add the yeast, egg, and oil. Continue to mix with the whisk attachment for at least two to three minutes until the ingredients are combined.

-
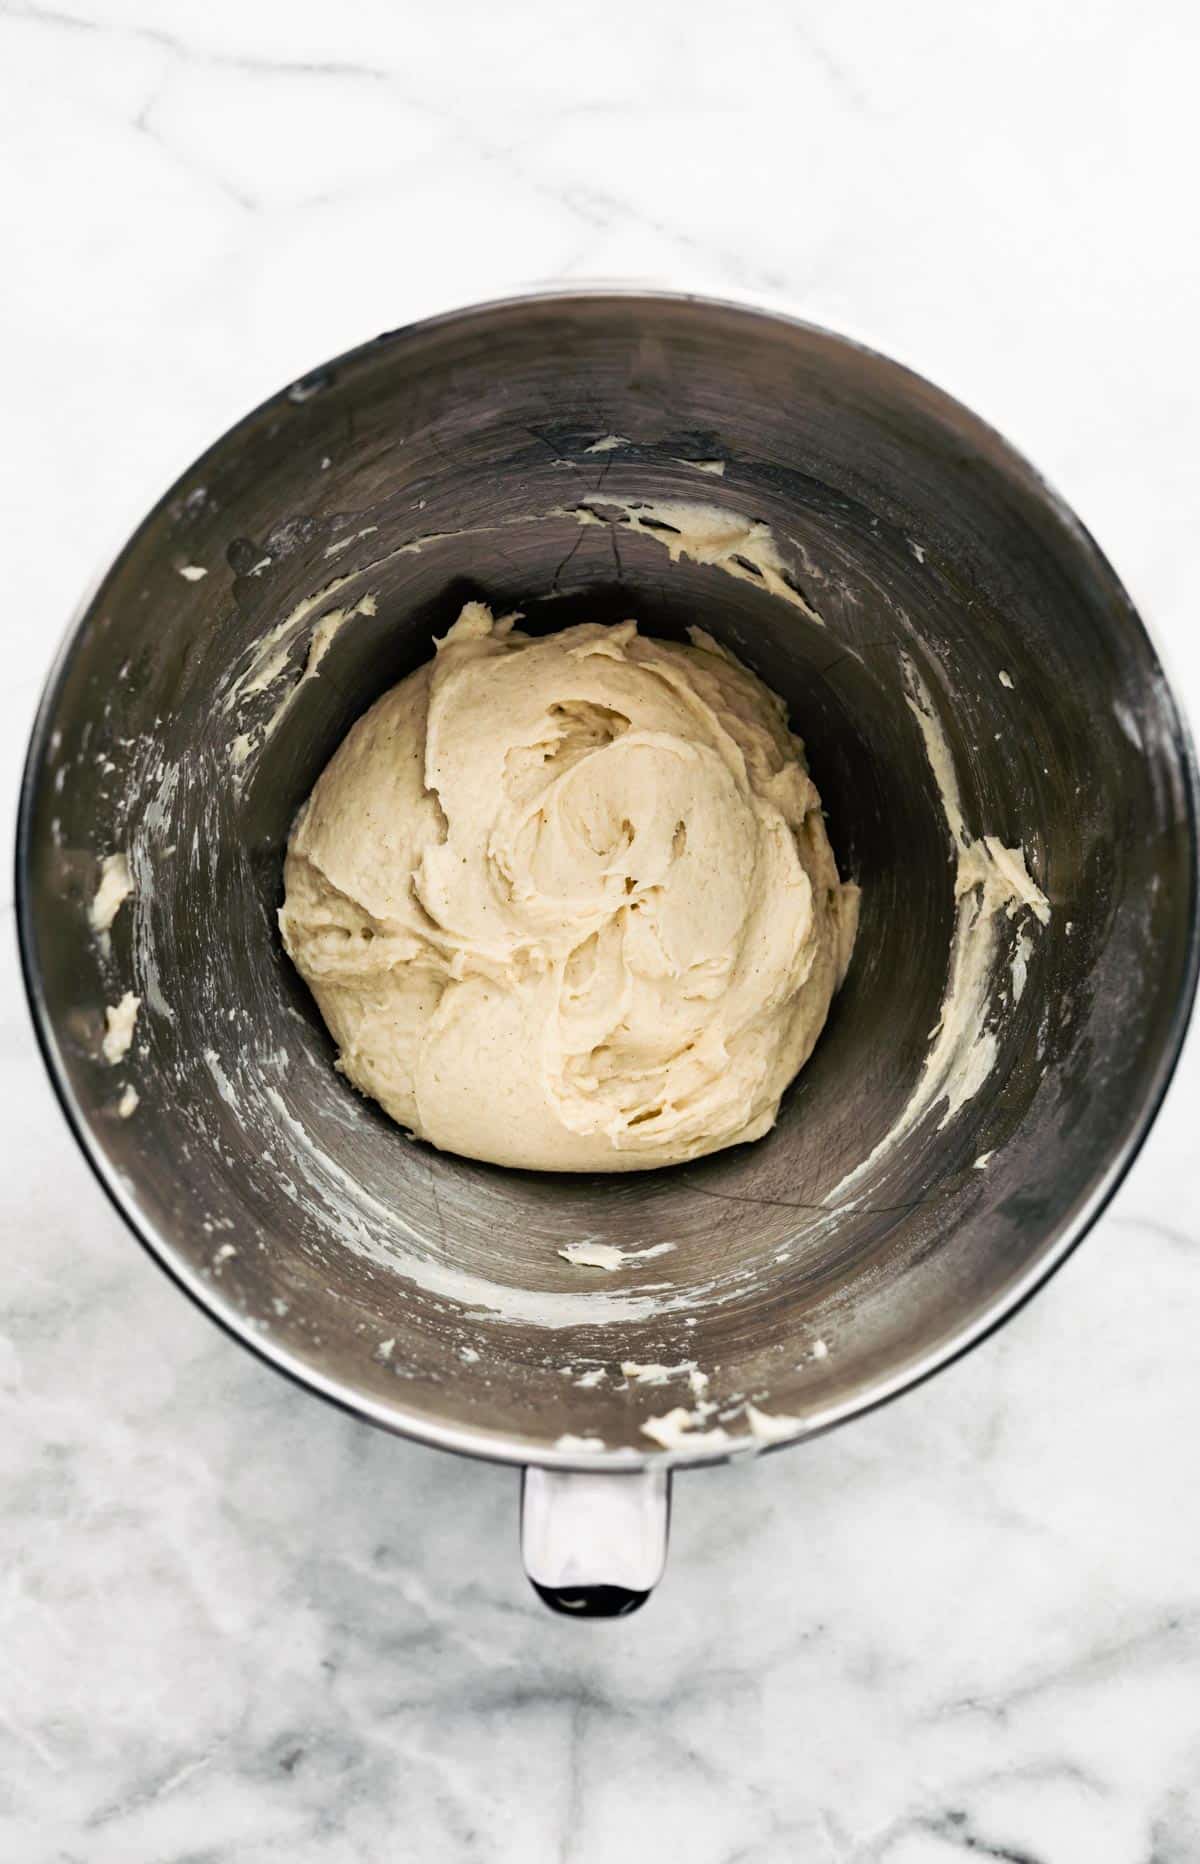
Mix. Remove the dough from the whisk attachment, and fit the mixer with a dough hook attachment. Continue to mix on medium speed.
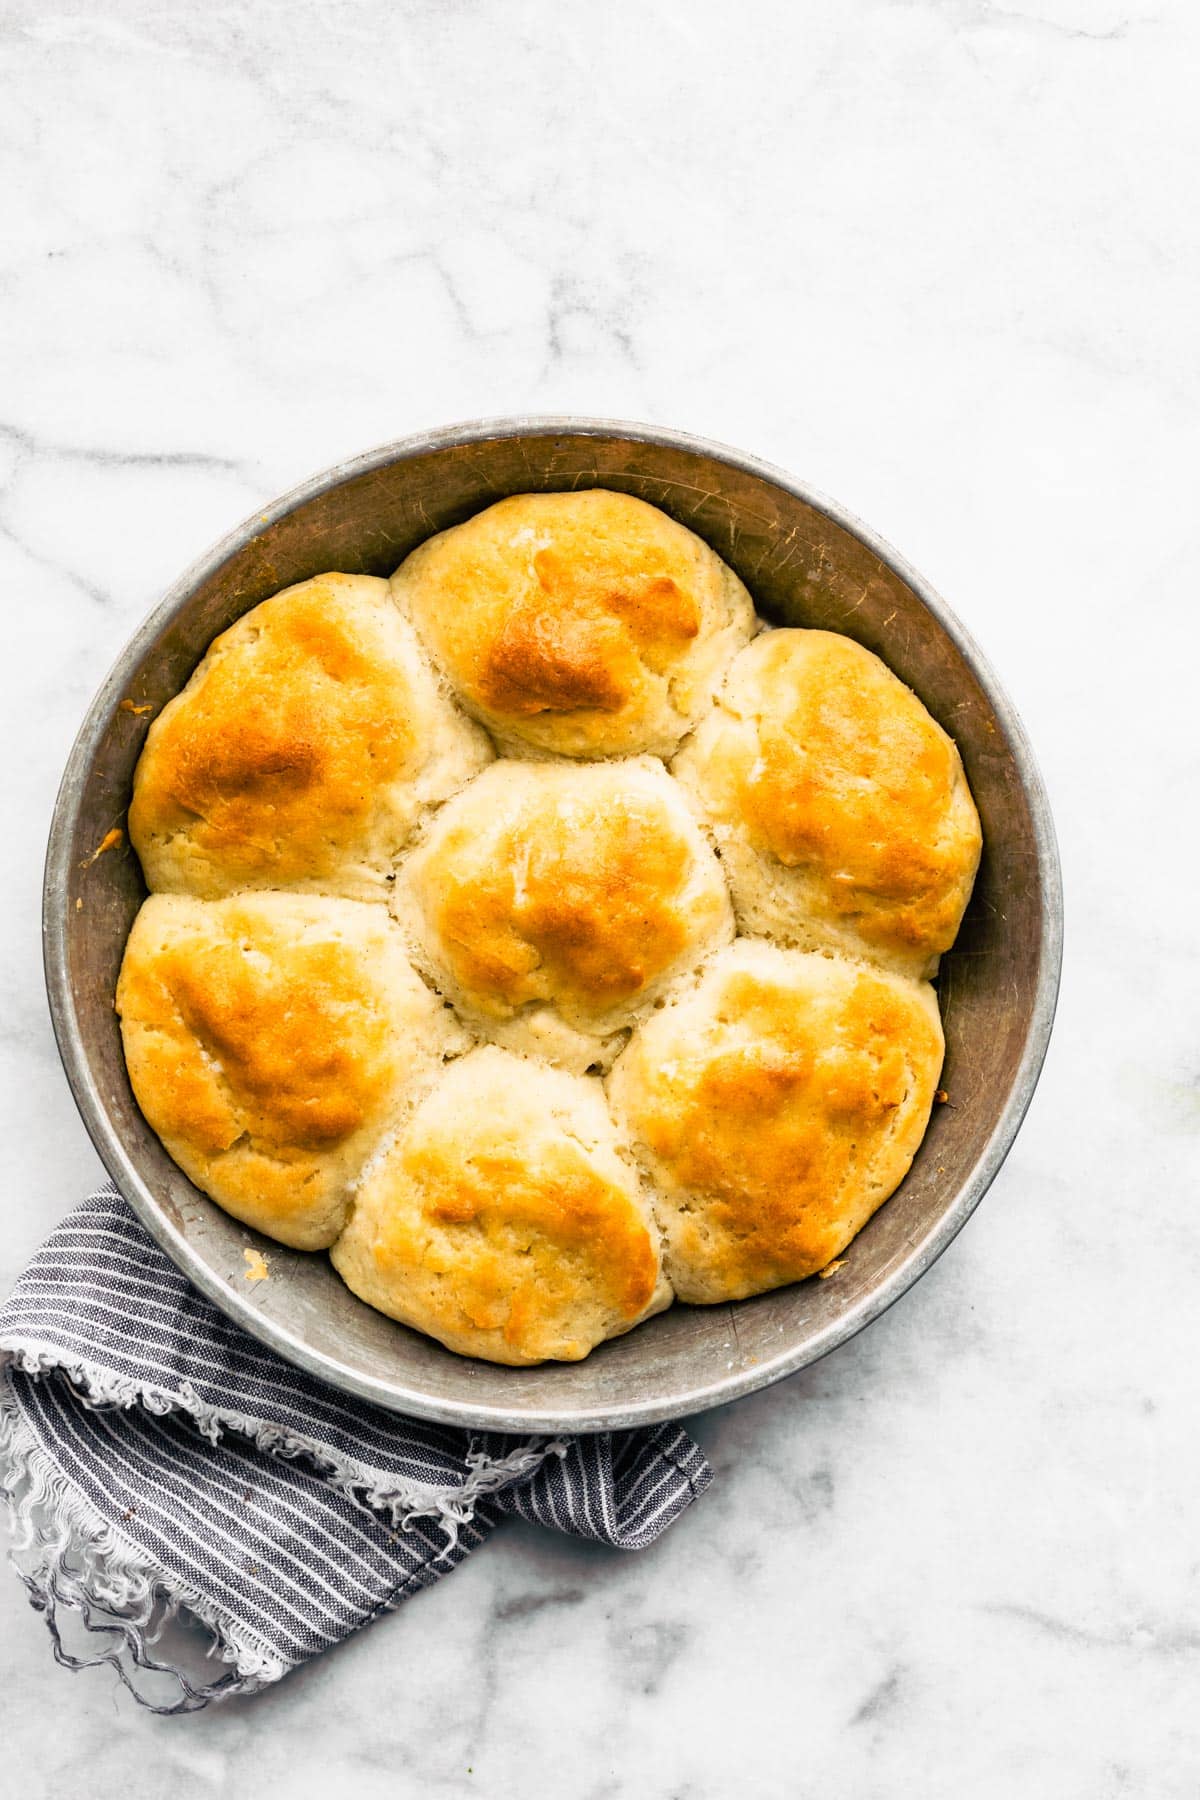
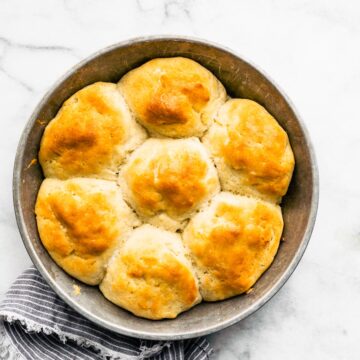
- Rise. Scoop 7-8 mounds of dough into a greased round baking pan. Smooth the tops with greased fingers or a spatula. Cover the dough with a towel, and let it rise in a warm place until it has nearly doubled in size. This should take anywhere from 45 minutes to an hour with the use of instant yeast.
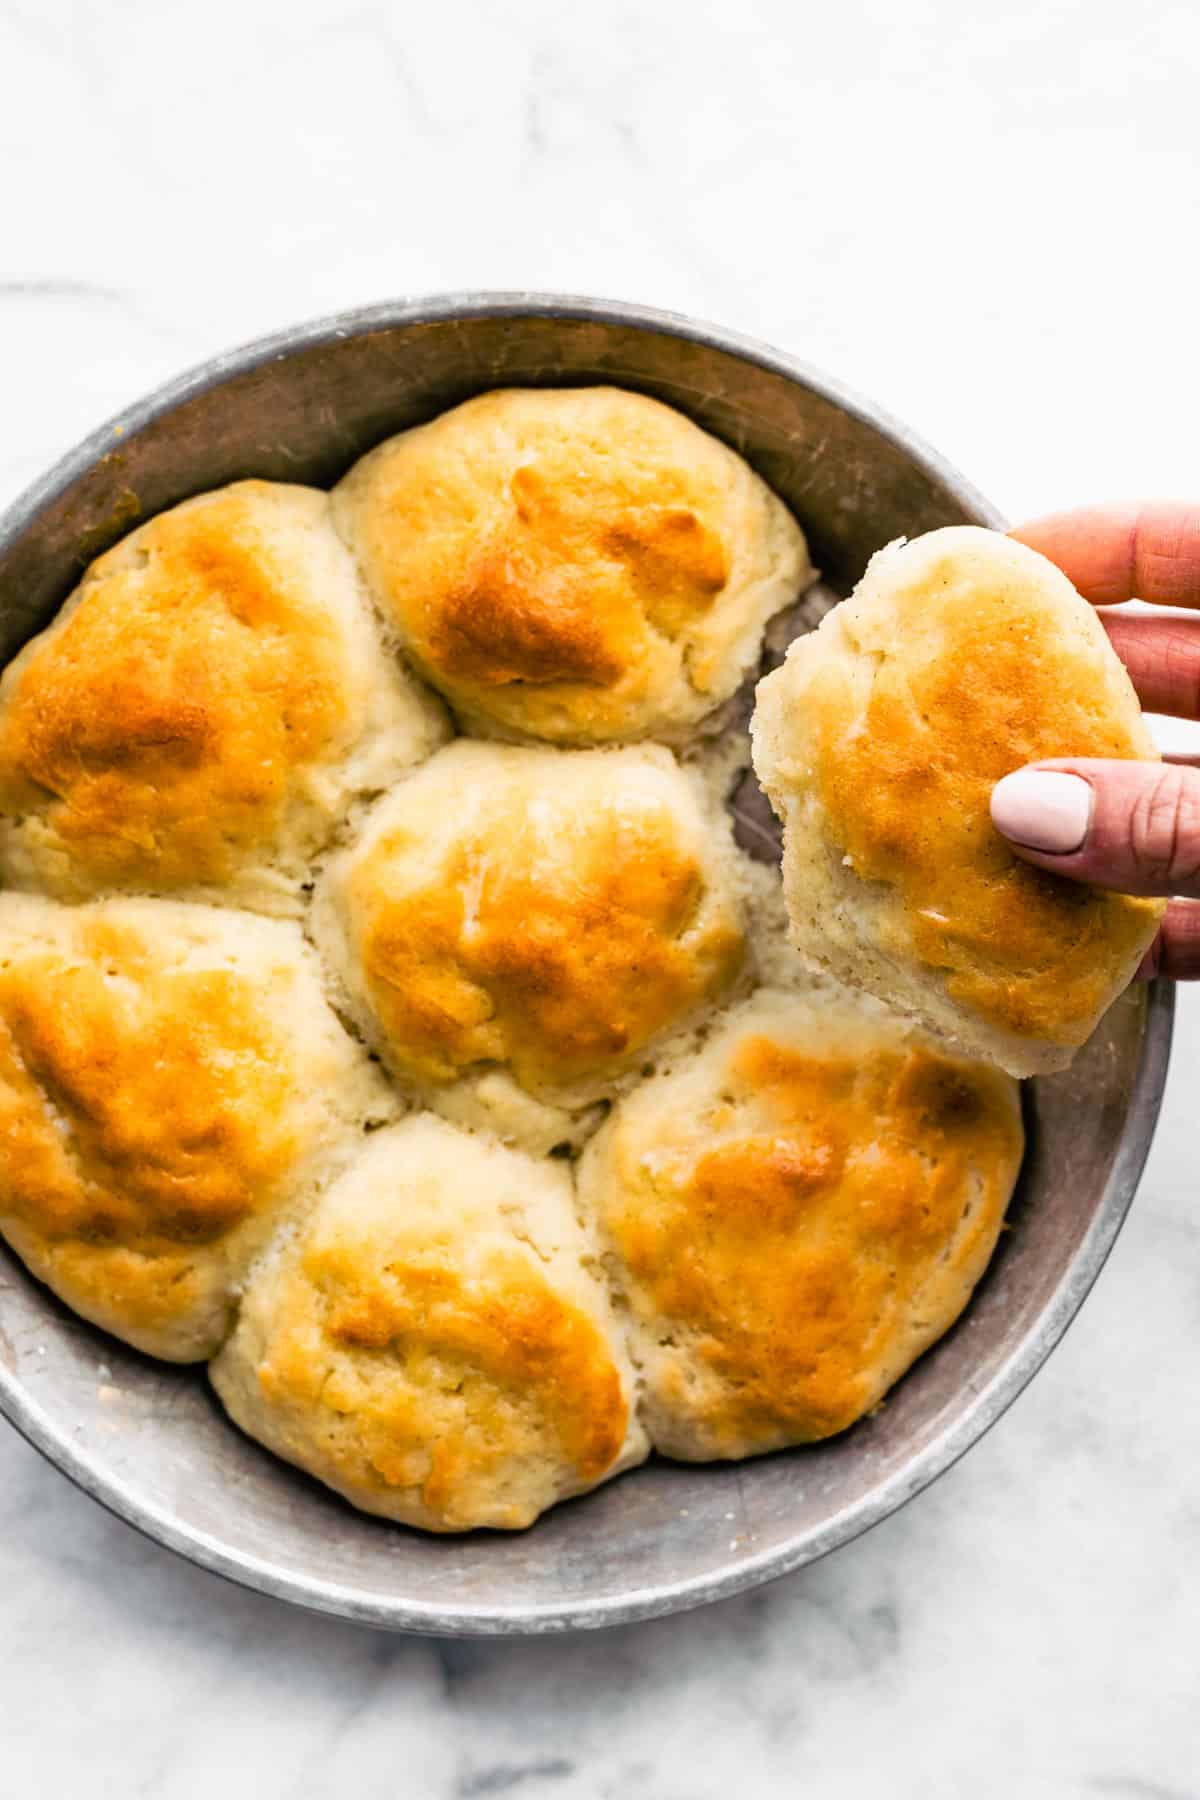
- Bake. Place the gluten-free rolls in the oven, keeping a close eye on them. Once they begin to brown, cover them with foil, and continue to bake, checking for doneness starting at the 12-minute mark.


NOTE – The total baking time will vary based on the type of flour you use. You’ll know your rolls are done when they have reached an internal temperature between 185 and 200° Fahrenheit.
- Serve. Pull them out of the oven, brush additional melted butter on top, and enjoy warm!
Note: Technically, you can, but we do not recommend mixing or kneading the dough by hand. The dough will rise and have a good taste, but your rolls will be tough and dense. Which isn’t what we want!
Baking Tips
Just in case this recipe wasn’t easy enough, we’ve got a few extra tips to make it failproof and for creating the best gluten free roll texture!

- Weigh the Ingredients. Baking is a science, and using the proper measurements is crucial for success. So, to ensure your gluten-free dinner rolls turn out perfect every time, we recommend using a food scale to measure your ingredients.
- Use Dairy-Free Milk. You might expect to proof the yeast with water, but we recommend swapping it out for milk. Trust us! It will result in a softer texture, a finer, more tender crumb, and a richer flavor.
- Don’t Add Extra Flour to the Dough. Unlike regular dough, gluten-free yeast dough is very sticky and wet similar to pizza dough. It’s supposed to be this way! There’s no need to add any extra flour because we won’t be kneading it. Instead, we let the mixer do all the work.
- Use the Right Pan Size. The type of pan you use will help you shape the dough. For the best results, we recommend using an 8 or 9-inch metal pie pan. You want the dough balls to be touching but not smashed together when they rise.
How to Store
These gluten-free dinner rolls are best served while they’re still warm. However, if you have leftovers or want to prepare in advance, they can be transferred to an airtight container and stored in the refrigerator for up to 4 days.
When you’re ready to eat, simply pop them in the microwave for a second to warm them back up, and enjoy!
Serving Suggestions
Of course, these gluten-free rolls are absolutely drool-worthy to enjoy warm on their own. However, they also make for the ultimate comfort food breakfast or addition to all your favorite meals! Some of our favorite ways to serve them include:

- Smeared with butter and jam.
- Dipped into One Pot Bacon Braised Lamb Stew, Turkey Sweet Potato Chili, or Creamy Vegan Mushroom Soup.
- Alongside comfort foods like Gluten Free Slow Cooker Spaghetti, Easy Broccoli and Cheese Casserole, and Potato & Cauliflower Shepherd’s Pie.
- At holidays with all your favorite sides such as Dairy Free Mashed Potatoes, Baked Cauliflower Mac and Cheese, and Baked Pears with Vegan Stuffing.
Common Questions About Gluten-Free Rolls
Yes, fresh yeast is naturally gluten-free! However, some brands include gluten-containing wheat starch in their yeast packets. So, be sure to double-check the ingredient list!
Yes, this is crucial to allow the yeast to rise and create air pockets which allow the gluten-free rolls to become soft and fluffy.
There are many reasons that could have contributed to your rolls not rising. However, the most common include using improper measurements, under or overheating the milk, and using expired yeast. For the best results, use a food scale to measure the ingredients accurately, use a milk thermometer, and buy a fresh packet of yeast!
The most common reason why your rolls might turn out dense is using too much flour or kneading by hand. Be careful to measure accurately using either a food scale or the spoon and level method, and use a stand mixer if possible!
More of Our Favorite
Gluten-Free Bread Recipes
Gluten-Free Rolls Recipe
- Author: Lindsay Cotter
-
 Total Time: 1 hour 20 minutes
 -
 Yield: 7-8 rolls
 - Diet: Gluten Free
Description
These Easy Gluten-Free Rolls are made with simple ingredients for the softest, most delicious gluten-free dinner rolls you’ll ever taste! Dairy-Free Option.
Ingredients
- 1 cup warm (110F) non-dairy milk
- 2 ¼ teaspoons quick-rise yeast (instant yeast)
- 4 Tablespoons sugar, divided
- 330 to 335 grams (2 to 3 cups) gluten-free all-purpose flour (See notes for flour options)
- 2 teaspoons (5 ½ grams) xanthan gum
- ¼ teaspoon (1 g) baking powder
- 1 teaspoon kosher salt
- 2 Tablespoons butter or coconut oil, melted
- 1 large egg, room temp
- 1 ¼ teaspoons apple cider vinegar
Instructions
- Proof the yeast to ensure the yeast is alive and active. In a glass measuring cup, heat the milk to 110 F then mix in the yeast and 1 Tablespoon sugar. Set aside for 10 minutes until the yeast is active (bubbly and happy).
- In a stand mixer, using the whisk attachment, whisk together the gluten free flour, xanthan gum, baking powder, salt, and 3 Tablespoons sugar.
- Still using the whisk attachment, place the stand mixer on low to medium speed. Gently add the proofed yeast, melted butter, egg and vinegar to the batter. Mix until combined.
- Remove the whisk attachment, wipe excess dough from the whisk and place back in the bowl. Change to the dough hook and continue to mix on medium speed for 2 to 3 minutes. The batter will be sticky, but that’s okay!
- Generously grease an 8″ or 9″ round pan. Using an ice cream scoop or ⅓ cup measuring cup, scoop dough into 7 to 8 mounds in the pan. Reshape with greased or wet hands, if needed, to smooth out the tops.
- Cover with a towel and let the dough rise in a warm place for 45 minutes or until almost doubled in size. During the last 10 minutes the rolls are rising, preheat the empty oven to 400°F.
- Bake for 15 to 25 minutes, covering with foil once the rolls are golden brown. Note – The baking times will vary based on type of gluten free flour blend, check for doneness starting at 12 to 15 minutes.
- Once the rolls are done or reach an internal temperature of 185 to 200 F, brush the rolls with additional melted butter, if desired.
- Store rolls in an airtight container in the fridge for up to 4 days. Gently warm before eating.
Notes
Gluten-Free Flour Blend Recommendations: We recommend using the homemade gluten-free blend for the softest rolls. However, the store-bought pre-made Gluten Free All Purpose Baking Flour (WITHOUT xanthan gum) works well too. For other flour recommendations, see blog post.
Homemade Gluten-Free Flour Blend Ingredients makes 2 ¾ to 3 cups (335g)
- 1 cup white rice flour (145 g)
- ½ cup tapioca starch (60g)
- ½ cup potato starch (70 g )
- ½ cup sorghum flour (60 g)
Baking/Flour Tips – It’s best to use a baking scale to accurately measure the amount of flour in grams versus cups.
Prep Tip – If not using a stand mixer, we recommend using a hand mixer with dough hook attachments. Knead the dough for 2 to 3 minutes at medium speed. We don’t recommend mixing or kneading by hand. It does work, but the rolls will be much more dense and doughy versus fluffy.
-
Prep Time: 10 minutes
-
Rest Time: 55 minutes
-
Cook Time: 15 minutes
-
 Category: Side Dish, Appetizer
-
 Method: Bake
-
 Cuisine: American
Nutrition
- Serving Size:
- Calories: 195
- Sugar: 6.3 g
- Sodium: 345.4 mg
- Fat: 4.9 g
- Saturated Fat: 3 g
- Carbohydrates: 32.7 g
- Fiber: 4.9 g
- Protein: 4.4 g
- Cholesterol: 23.3 mg
Keywords: gluten-free, gluten-free dinner rolls, rolls, appetizer, side dish

Do you have questions, feedback, or tips about this recipe? Leave a comment below with any questions or feedback you’d like to share!