

Starting seeds indoors should be a vital part of any prepper’s food security plan. You do not need a greenhouse nor a lot of expensive equipment to successfully provide all the plants you will need. Even preppers with space and light limitations can start seeds to grow their own garden plants.
Growing your own vegetable, herb, medicinal and edible flower seeds indoors will save you money that can be used to purchase other valuable preparedness gear because you do not have to purchase plants for the survival garden.
The money saved by growing your own plants can also be funneled back into the food security plan by enabling you to cultivate a larger garden.
It is also far easier and cheaper to purchase heirloom varieties for uncommon herbs, veggies, and medicinal flower varieties in seed form online or through a catalog than it is to find these same top quality crops in plant form at a local store.
Starting seeds indoors during the final weeks of winter or even during the fall months may elongate the growing season enough to allow for the cultivation of crops that are not recommended for your particular growing zone, like tobacco, protein-rich peanuts, cotton, as well as miniature coffee and fruit bearing trees.
12 Steps to Start Seeds Indoors
Step 1. Get Good Quality Seeds
Take the time to find and buy quality seeds. Even if you have to spend $2 to even $3 for a packet of seeds to garner the best quality of difficult to find seeds, you will still be spending less than you would on live plants – if you could find all of the varieties desired.
Higher quality seeds will most often produce a top yield.
Purchasing heirloom seeds will give you the opportunity to harvest them from some of the plants that grow so you can use them to start your survival garden the next growing season.
Step 2. Get the Right Kind of Dirt
Use either quality composting dirt or commercially manufactured potting soil to start the seeds. Either of these two types of dirt will most often give the seeds the nutrients they need to not only germinate and also offer both the best water retention and drainage.
Using good soil from your garden is always an option, but not typically the best one.
Destructive bugs lay their eggs in the soil before winter. The heat lamps used on the seeds when growing them indoors will often cause them to hatch – subjecting your seedlings to a severe threat while releasing these bugs inside of your home.
Step 3. Use the Right Containers
You don’t need large containers to start seeds even if you are growing dwarf trees. Using such containers takes up a lot of space unnecessarily. The plastic black seeds trays sold at garden centers or saved from previously purchased plants, are ideal for starting seeds indoors.
You can also upcycle a myriad of small containers you might already have such as cottage cheese containers, sour cream containers, egg cartons, toilet paper rolls, single water bottles cut in half, Play Doh containers, etc.
You can even make your own seed starting containers using newspaper. When upcycling plastic containers to use for cultivating seeds, always drill drainage holes in the bottom before use.
Step 4. Mind the Soil Temperature
Seeds should never be planted in cold or chilly soil. The average recommended temperature for germinating vegetable seeds ranges from 65 to 75 degrees F (18 C to 23 C). Nearly all varieties of seeds can benefit from heat beneath the growing container.
Placing the seed container on top of the refrigerator, near a wood stove, fireplace, or heater after sowing them in the soil will help warm the soil, and spark the humidity the seeds need to thrive.
You can also purchase seed warming mats or, in my personal experience, reptile heat mats or livestock warming blanket-style mats to raise the soil temperature.
Placing the seed trays near a window that gets good sun during the winter months will also expose them to the colder temperature or draft near windows – which can be a rapid seed killer.
Step 5. Give Them Enough Light
Grow lights do provide some added heat to the growing process, but they are not strong enough to warm the dirt all the way through in the same way that heat mats do.
There are a myriad of different types of grow lights, some are better suited to specific types of flowering and fruiting plants than others.
Some plant grow lights must be hung from the ceiling, others clip onto a table, while some models are designed to be hung from a stand that is placed on the table.
Read on for a detailed section on the ins and outs of grow lights below.
Plants that receive too much light can grow too quickly, and become spindly.
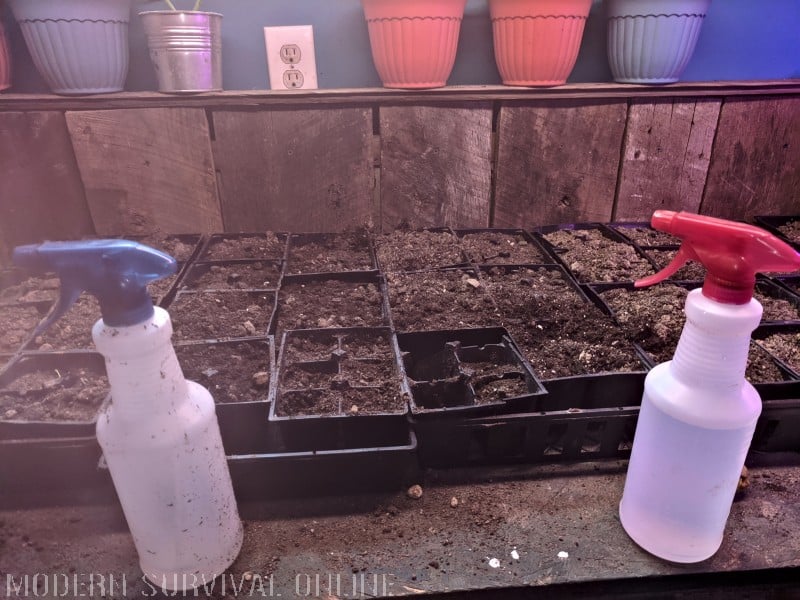
Step 6. Watering
Always dampen warmed soil before and after planting the seeds, even if the packet instructions dictate sowing the seeds on top of the soil.
Seeds require both water and air to germinate, and to develop properly. But, oversaturating the seeds will often cause them to rot, develop mildew, or dampen off. It is best to use a squirt bottle, not a watering can to provide moisture.
Do not squirt directly on top of the seedlings because their young stems may still be too fragile to handle even the direct pressure of a squirt bottle. Keep the soil and seeds to the same water consistency of a damp sponge, for best results.
Signs of Overwatering
- Drooping leaves
- Leaves that are falling off
- Wilting of foliage
- Wilting of the stem that is spreading to the leaves
- Stunted growth
- Discoloration of the entire seedling.
Signs of Underwatering
- Wilting of the entire plant
- Leaves that are turning brown
- Dry soil
- Wilting that is occurring solely or primarily on the tips of the leaves.
Step 7. Get the Air Temperature Right
The exact temperature for growing seeds is usually noted on the package.
Most annual vegetable plants tend to germinate best when subjected to consistent 70 to 80 degree F (21 to 26 C) temperatures. Lettuce and many fall garden crops are notable exceptions, they prefer temperatures in the 60 to 70 degree F (15 to 21 C) range.
Keeping the air or room temperature steady is as important as remaining in the proper degree range. Most seedling types are extremely sensitive to temperature fluctuations. Herb seedlings like basil are among the most susceptible to fluctuating temperatures.
Spending merely a few days near a drafty window or in the draft of a door can kill a tray of basil seeds. The most common temperature-hardy seed varieties include carrots, garlic, beets, kale, onions, and potatoes.
Seedlings that have been exposed to temperatures that are too hot and dry will often die off due to a weak stem and spindly leaf growth.
Seedlings that are placed in too cool of an environment and become chilled will typically develop leaves that are droopy and yellow before they ultimately fall off the stem, and cause the burgeoning plant to die.
Sprinkling some cinnamon around the base of seedlings can sometimes help curtail or prevent damping off that is caused by bacteria or fungus that has developed in the soil due to fluctuating humidity and temperature levels.
Step 8. Humidity
As with temperature, the humidity needs of seedlings also vary (at least somewhat). Growing seeds indoors for your survival garden during the cold weather months can be a challenge if you heat primarily by a wood stove, propane gas heaters, or a fireplace – as many preppers do.
As noted above, dry and hot conditions around the seeds will stunt growth or kill the sprouting plants. Creating some moisture in of the room where the seeds are placed is essential to their growth potential.
You can create moisture quickly and inexpensively by:
- Putting a pot or kettle of water directly on the wood stove, or by suspending in the fireplace to add moisture into the room.
- Grouping the sprouting seeds closely together to help them retain the available moisture.
- Putting some bricks in a metal or aluminum pie pan, and placing them on the seed tables. The bricks will help spark a larger source of evaporation adjacent to the growing seeds.
- Squirting the plants in small amounts throughout the day to help keep a continual source of moisture under the heat lamps in a dry room to infuse more humidity into the growing process. Remember, seedlings with thick or “fuzzy” leaves can retain moisture far longer than plants with other leaf types and cause rotting or mildew. Never water within the two hours before you turn the lights off at night. The water will not have time to evaporate and can chill the plants.
- Placing a humidifier on the seedling table to keep a steady flow of moisture next to them. If possible, place it slightly below the seed trays because, like heat, the humidify stream will flow upwards.
Inspect the seedlings twice a day for signs of low humidity problems. If you notice leaves that appear either withered or puckered, start developing brown tips, or are losing their leaves, a lack of moisture is the likely cause.
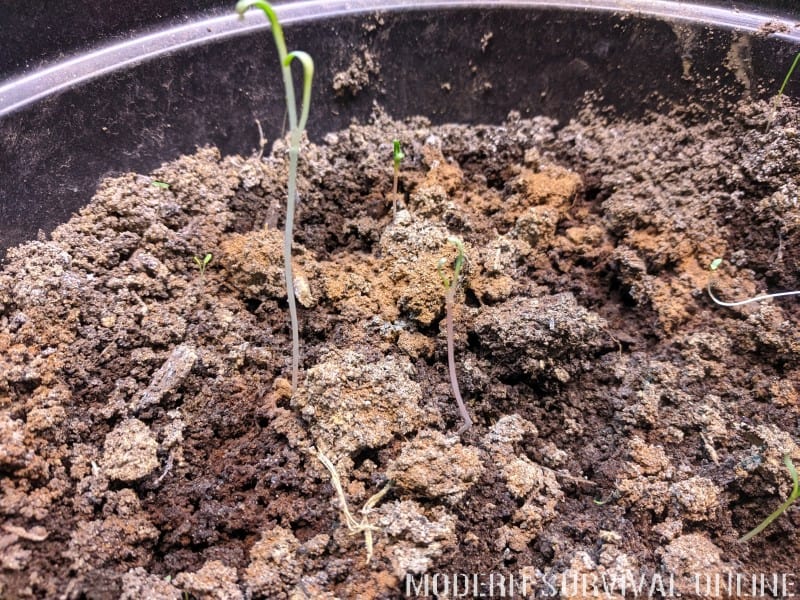
Step 9. Plant Depth
There is no need to whip out a measuring tape and gauge the exact depth a seed is planted, eyeballing the proper measurement will usually suffice.
However, you must read the back of the seed packet carefully to ensure you are placing the seed into the right type of soil and the recommended depth for it to have the best chance at a successful germination.
The smaller the seed, the less likely it will be planted either deeply or covered thickly with dirt. Seeds that are sown too deeply into the soil will not likely be able to generate and store enough energy to grow strong enough to break through even loose dirt to reach the surface.
It’s usually only large seeds, like bean varieties, that are recommended for deep (approximately one inch) sowing into the soil.
Step 10. Thinning and Transplanting
Once the seedlings have developed two distinct sets of leaves it is time to thin them if more than one is placed in a single seed tray cell or small container – like a cottage cheese tub.
Step 11. Ventilation
Just as with established plants in the garden, seedlings also need proper ventilation in order to thrive. Create a consistent air flow inbetween the trays and containers to ensure the air around them becomes neither too stagnant , nor too dry.
Spacing out the trays is often adequate, but if you are working in a small space and already struggling with humidity levels, consider placing a small fan near the seed table, and keeping it on low throughout the day when the grow lights are plugged in to increase ventilation.
Step 12. Fertilizer
Some folks fertilize their seeds and others do not. Each variety planted may have specific recommendations to follow as to type and amount of fertilizer used, as well as start and end dates for feeding the seedlings with either a homemade or commercial fertilizer.
Typically, seedlings are only fertilized once to twice a month (with the exceptions of tomato plants that may require feeding more often due to their sensitivity to humidity fluctuation).
You can quickly, easily, and incredibly cheaply make a compost tea to use as fertilizer for seedlings and plants.
How to Make Compost Tea Fertilizer
- Place a quality and mature compost into a 5-gallon bucket until it is three quarters of the way full with the natural matter.
- Using room temperature water, fill the bucket all the way.
- Over the next 3 to 4 days, allow the water to thoroughly penetrate the compost in a room temperature environment. Never allow the mixture to become chilled or to freeze. If making only a small amount of tea, use the 3 parts dirt to 1 part water ratio, and brew the mixture over low heat heat for several hours (if you do not want to wait the entire four days).
- Strain the water from the bucket through cheesecloth, painter’s canvas, or a mesh screen, keeping only the processed water and placing the dirt back into the compost pile.
- Stir in additional water that has been warmed to room temperature if a typical tea consistency and color are not reached after the days of brewing.
- Pour the tea (once it has been stirred and allowed to settle at room temperature) around the base of the seedling (or plants) at the surface of the soil, and never from the top down to the bottom of the growing seeds or maturing plants.
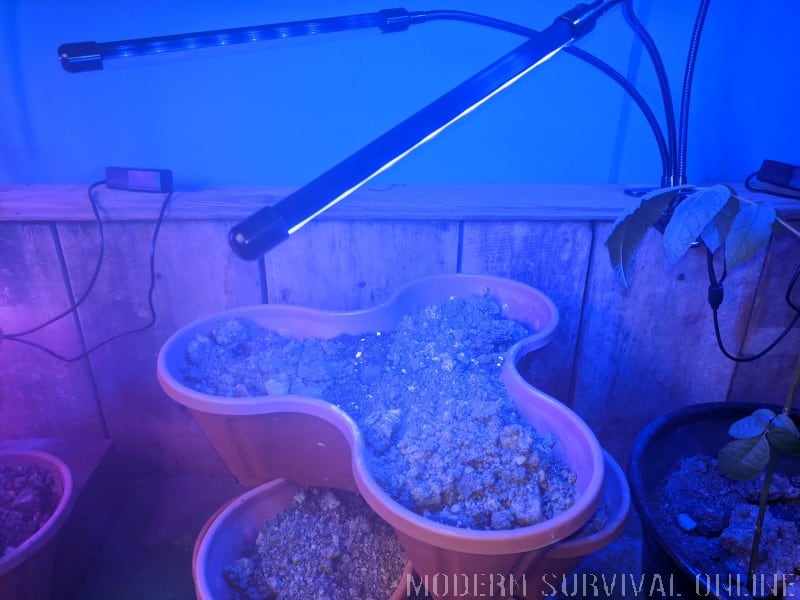
Seed Grow Lights
Placing seed trays on a table in front of a large window that gets great southern exposure is not usually enough to foster quality seed germination.
The seeds need heat and light that is consistent, targeted, and free from draft in order to develop properly.
Starting seeds in February, even in states that do not get cold enough to produce snow in the winter, requires the addition of grow lights (if not heat mats, as well).
The seemingly bright and warm rays of winter sunshine coming through the wonderfully large window might keep houseplants alive, but do not have enough strength to germinate seeds to their utmost potential (if at all).
Grow lights can easily range from about $20 to $200, depending upon size, intensity, and special features (like multiple color lights and a timer).
Plant lights capable of producing 6,400 kelvins are recommended for starting the majority of both most vegetable and herb seeds.
Grow lights of this type usually require only 54 watts bulbs, and should not cause a noticeable increase to your electric bill.
The best grow lights for seeds often come with blue, red, and white light options. Plants absorb different light wavelengths and then transfer the energy they garner into chlorophyll and use it for photosynthesis.
White lights offer wavelengths that somewhat aid to the photosynthesis process.
The blue and red LED lights are far more important to a well-rounded germination and to the seeds’ growing process. There are two vital types of chlorophyll that are primarily absorbed under blue and red lights.
Lettuce does best in cooler temperatures, so the bright white lights this grow light also produces (in addition to red) is not really necessary during the first two weeks.
Once the seeds have sprouted, I add in the red light option, and only after the seedlings start to turn into young plants will I raise the lights, and allow white light to also be used to keep the lettuce growing indoors either permanently or until the plants are hardened off and moved outdoors.
Grow Lights Tips
Buy growing lights that can be adjusted as the seeds develop into young plants. This means the lights can be raised two feet about the plants they are helping to cultivate.
Clip off table lamps are often ideal for seeds, but cannot be raised high enough to continue helping young plants grow until it is time to harden them off.
Using regular household light bulbs is never a good idea. Grow lights bulbs are created usually in led or fluorescent varieties that stimulate the photoreceptors in plants, and help them grow.
Place the seed trays under the lights according to the directions on the seed packet. Some plants require direct sunlight but others thrive in light or partial shade.
If a developing seed is subjected to too much Florigen (a plant hormone that controls both the budding and flowering process) the plant can dry up and die, have stunted growth, or never develop blooms.
Most vegetable, herb, medicinal and edible flowers require between 10 to 12 hours a day of simulated sunshine under grow lights or the real deal outdoors.
If you seedlings develop a stem that is lighter than its typical color or is thin or spawns leaves that are unusually small, it is probably not getting either enough light or enough of the right light.
Consider moving the existing grow light closer to the seed trays, or investing in a different type of light.
Grow Light Varieties
There are four types of grow lights that are designed for indoor use in the seed germination process.
While all of the light types on this list can be used to start any variety of seeds, some are only marketed for the growth of houseplants, and not especially geared to the germination of garden crops and fruit grove seeds.
HID – High Intensity Discharge Grow Lights
Just one 1,000 watt HID bulb can generate as much light as roughly fifty 40-watt fluorescent light bulbs.
There are multiple different types of HID light bulbs: high pressure sodium, low pressure sodium, metal halide, and mercury vapor, are among those commonly used to germinate seeds.
High intensity discharge bulbs shine incredibly bright, and are also very energy efficient, making them a top choice for germinating seeds during the long, cold winter months.
High pressure sodium HID bulbs broadcast a red or orange color of light onto plants that is geared to helping them thrive during the flowering stage. The metal halide bulbs put off a blue cast that helps spark leaf growth, and can also be used to dwarf standard size bushes and trees after they get past the seedling stage.
Metal halide bulbs are often recommended for starting pepper plants, tomato plants, and bean varieties – as well as when dwarfing fruit bearing trees.
HID grow lights typically do not need to be adjusted and re-adjusted over the growing seeds as often as other light varieties.
They can be suspended further above the seed trays without risking a reduction of heat or direct light than LED or fluorescent grow light types.
Fluorescent Grow Lights
These grow lights are often referred to as “shop lights”, and are placed in long rectangular hanging light fixtures. While they are quite satisfactory for started plants, they do not possess the same level of either light or heat as HID lights.
Vegetable seeds will grow under them, but often struggle with spindly stems due – especially tomato plants.
Compact Fluorescent Grow Lights
Bulbs of this type are smaller than the long and thin traditional fluorescent bulbs. They do not produce as much light or heat as HID bulbs, but do offer far more than a standard incandescent light bulb.
If you use compact fluorescent bulbs – or standard fluorescent bulbs, you will likely achieve better results by hanging them lower than recommended for germination under HID grow lights.
LED – Light Emitting Diode Grow Lights
LED grow lights are comprised of thousands of tiny little LED chips called diodes. These types of lights can create a narrow yet highly specific range of colors. Any one chip is capable of creating only ultra violet, red, infrared, blue, etc. ranges of color.
But, when these diodes are combined together, as they are with grow lights, they offer a broad spectrum of light that can be amazingly beneficial to the germination and growing process.
While LED rays are not as intense as those produced by HID grow lights and more bulbs are needed to generate the same level of heat and ray yields, LED lights are a viable and often less expensive for seed germination, and for plant cultivation.
This type of grow light uses less energy than HID grow lights.
LED grow lights must be kept closer to the seed trays than HID lights in order to work successfully.
Plant Grow Light Wattage, Coverage Area, and Height Chart
| Wattage | Coverage Area | Hanging Height |
|---|---|---|
| 400 | When over no or low light spaces – 5 ft. x 5 ft. When over spaces with some natural light – 8 ft. x 8 ft. |
1 to 4 feet above seed trays |
| 600 | When over no or low light spaces – 7 ft. by 7 ft. When over spaces with some natural light – 10 ft by 10 ft. |
2 to 5 feet above seed trays |
| 1,000 | When over no or low light spaces – 8 ft. by 8 ft. When over spaces with some natural light – 12 ft. by 12 ft. |
2 to 6 feet above seed trays |
For best results when starting seeds indoors, mimic the natural day to night setting outdoors as closely as possible. Turn on the grow lights around 6 or 7 a.m., and shut them down a few hours after dusk – unless using a lower quality light.
If using a lower quality light to germinate seeds, consider leaving the grow lights on until 9 p.m. each day.
Seedling Pests and Diseases
Just because you’re growing plants indoors, that doesn’t mean you’ll necessarily escape an infestation of destructive insects (even if you used potting soil) or common plant diseases.
Refer to the seed packet or a good variety specific guide to learn what specific bad bugs and plant diseases are common to each type of seeds you are attempting to germinate.
The list below are common to most traditional types of garden crops and provide some insight into obstacles you may need to be on the lookout for when starting seeds indoors.
Top 10 Destructive Bugs That Target Indoor Plants
- Thrips
- Aphids
- Earwigs
- White Flies
- Root Mealybugs
- Spider Mites
- Eelworms
- Cyclamen Mites
- Scale Insects
- Caterpillars
Top 7 Plant Diseases That Afflict Indoor Plants
- Sooty Mold
- Damping Off
- Rust
- Root Rot
- Black Leg
- Powdery Mildew
- Botrytis Leaf Spots
45 Seed Varieties to Start Indoors
While any plant seed, root, bulb, or “eye” can be started indoors, some thrive better than others, and some (like potatoes) can go in the ground early enough outdoors due to their hardy nature that they do not need to take up space when starting seeds inside.
As a prepper who wants to make sure his or her family does not starve when the SHTF, there is absolutely nothing wrong with starting cold hard crops inside instead of waiting to put food in the ground outside, or waiting too long to purchase “starters” of those crops.
If growing hardy crops like potatoes, onions, and turnips inside, start them a few weeks later than the rest of your seeds since they can harden off and transition outdoors far more easily.
Also, use large plastic tubs or biodegradable containers that can simply be placed in a hole dug in the garden to avoid disturbing the already thriving garden plants by transplanting them in a traditional manner.
| Kale | Brussels Sprouts |
| Cilantro | Tomatoes |
| Lemongrass | Dill |
| Parsley | Sweet Potatoes |
| Feverfew | Lavender |
| Oregano | Tarragon |
| Chamomile | Strawberries |
| Purslane | Broad Leaf Plantain |
| Microgreens | Cucumbers |
| Cinnamon | Coriander |
| Okra | Sage |
| Eggplant | Zucchini |
| Amaranth | Spinach |
| Mint | Jerusalem Artichokes |
| Carrots | Arugula |
| Yellow or Red Onions | Thyme |
| Rosemary | Sugar Beets |
| Lettuce | Scallions – Green Onions |
| Broccoli | Ginger |
| English Peas | Beets |
| Peppers – all varieties | Garlic |
| Cauliflower | Radishes |
| Borage |
Always start seeds about six weeks before the anticipated date of the last hard frost in your region for most seeds. Tomatoes may be started eight weeks ahead of the frost date if you live in a colder region.
Typically, zucchini and cucumber seeds can wait until four weeks before the frost date because they are hardy and grow quickly, depending on the length of your growing season.
How to Harden off Young Plants and Transition Them Outdoors
It is essential that you harden off your young plants properly before transitioning them outdoors.
All of the time and effort that went into getting the seeds to germinate and grow into a garden ready plant can be lost almost immediately if the little plants don’t have time to acclimate from the high heat and humidity environment to the late spring weather fluctuations that will surround them when relocating outdoors.
You just cannot decide it is warm enough for the young plants to be moved out to the garden one day, and tote them out and dig a hole – at least not if you want them to produce food to feed yourself and your loved ones.
Even plants that could survive such an abrupt change in environmental circumstances will most likely experience a reduced yield.
Step 1. Start preparing your young plants to relocate outdoors seven to 10 days before the relocation date. Reduce the amount of heat they are receiving by positioning the grow lights further above.
Step 2. Move the seed trays outside, and place them inside of a cold frame or low hoop for 2 to 3 hours a day. Don’t place them in direct sunlight if you are experiencing hot temperatures. Opt instead for light shade.
Step 3. For the following two or three days, allow the seed trays to spend one to two more hours in the cold frame or low hoop outside.
Step 4. For the remaining days, place the plants completely outside in a spot that will get nice morning sun, but not be exposed to the intensity of afternoon sun. Depending upon your growing space, this might require you moving the trays to a different location around 11 A.M. or noon.
Step 5. Once morning and overnight temperatures are at a steady minimum of 50 degrees F, the young plants should be hardy enough to remain outdoors full time.
Step 6. Before placing the plants into a garden, raised bed, or even large outdoor growing containers, layer the hole they will be placed into with some good quality compost to help give them a strong nutrient boost.
The transplant process can cause some trauma to the plants and the compost will help them settle into their new environment quicker, and hopefully make the plants strong enough to withstand the weather fluctuations.
Step 7. For best results, transplant on a mild day, when the sun is not too intense. Water each plant lightly after it is settled into a hole, even if the soil is already damp.
When transplanting tomatoes, water the hole itself a little bit before putting the plant inside and then lightly water the above ground soil.
Related: How to start a seeds stockpile
Final Words
Do not expect every single seed to germinate or produce a robust plant. Sometimes, even when you do everything absolutely right, some simply refuse to thrive.
Remove any struggling seedlings or plants from the growing plot quickly so the debris they produce will not cause any bacteria to grow in the soil, and thwart other healthy crops.
